What's new
Yeah powder coating adds volume to stuff as well. I've had items coated that wouldn't fit anymore due to size increase. It's important that the coaters take the time to cover screw posts and stuff else you can strip or even break them.
 
Last edited:
Yeah powder coating adds volume to stuff as well. I've had items coated that wouldn't fit anymore due to size increase. It's important that the coaters take the time to desk off screw posts and stuff else you can strip or even break posts.
Lol. This is my fifth cab and fifth time asking them to make sure to cover the screw posts.

I swear he almost cracked an evil smile when he nodded at me and said "I'll make sure this time"

They are a bunch of manly mountain men who huff fumes all day and work in furnaces who don't put up with shit so I never complain, just bring it up as a matter of fact not to condescend.

And the owner and his brother don't intend to, but have to trust their other employees to follow through with their work.

The good thing is I'm still paying 2018 prices.. $400 for every single piece of the cab and a few other cab parts like Blast City, Astro, Domy Theatre doors and panels just thrown in for free.

It is what it is and I'm fine with it.

They clean up fine with a wire wheel Dremel and a little lithium grease on the thread.
 
My new plan is to grab every 13" set available. I have access to around 8 of them, hope and pray for a high impendence consumer and get the one with the best image and convergence for a yoke swap.
Cool project.

FWIW, you have a high impedance yoke mated to the Sharp Image 13" monitor for sure. In my experience, you wont find a high impedance consumer tv (13" or otherwise) manufactured in the 1990s or after. If you want to avoid a yoke swap, start looking 1970s-1980s spec shadowmask TVs units made by Japanese manufacturers (toshiba, hitachi, jvc, etc.) or built under license by them (sears, montgomery ward, jcpenney). I have had better lucker with the early 1980s in particular. US manufacturers of that vintage seem to use B&K "CR-23" or 9 pin tubes even on small 13" A34xx tubes.

IMO, likely the computer monitor tube wont be a B&K "CR-31" or 7 pin tube and if anything id wager it has a far lower impedance than the consumer tube you previously measured. Of note, most computer monitor tubes of that era were dual focus, which may not pose an issue if the neckboard mates up, but I honestly am not certain if the adjustments of the flyback focus would be comprised in some way.

If 15kz is all your after, you could scrap the sharp image chassis and instead match that funai tube and consumer yoke up to any p447 k7000 chassis (or k7203 if you dont have an isolation transformer and want to avoid installing one). That may be considerably easier (and cheaper) than seeking out a compatible high impedance tv.
 
Lol. This is my fifth cab and fifth time asking them to make sure to cover the screw posts.

I swear he almost cracked an evil smile when he nodded at me and said "I'll make sure this time"

They are a bunch of manly mountain men who huff fumes all day and work in furnaces who don't put up with shit so I never complain, just bring it up as a matter of fact not to condescend.

And the owner and his brother don't intend to, but have to trust their other employees to follow through with their work.

The good thing is I'm still paying 2018 prices.. $400 for every single piece of the cab and a few other cab parts like Blast City, Astro, Domy Theatre doors and panels just thrown in for free.

It is what it is and I'm fine with it.

They clean up fine with a wire wheel Dremel and a little lithium grease on the thread.
Wow great prices! When I asked a few years back at an auto shop, they quoted me over 1K for my Impress. I just reassembled it and it's been like that since.
 
The good thing is I'm still paying 2018 prices.. $400 for every single piece of the cab and a few other cab parts like Blast City, Astro, Domy Theatre doors and panels just thrown in for free.
Woo! That’s a screaming deal. My brother owns an auto body shop and he says painting an arcade cabinet would be almost no different from painting a car; lots of labor.
 
I got the rest of the pieces from the Powder Coater for the Aero City and am ready to tackle some reassembly along with some CP parts from Arcade shock.

Time to "finish the job" on the bondo CP I stripped and coated earlier.

A41150-F7-8-EB2-42-D5-9-F23-58-F89-FFD6403.jpg


The GateNinety wrap had to be guided over the yen and screw holes while still linging up perfectly with the Control Panel opening.

31063765-50-F2-4-F47-BFB4-BE4-ED659364-D.jpg


I used a heat gun this time in hopes it would help loosen the stiff overlay of the surround. I was pleased with the result.

I decided to use white 24mm buttons even though I bought Silver to match my metallic theme.

DD04-D9-E5-A532-494-C-8174-BF9-F8903-CA81.jpg


88137518-BCD9-4087-98-B5-0-EFB545-E116-F.jpg


Then I looked at my @alberto1225 CP and decided to stick to my plan and changed them back

5-B5-D3914-7-F96-4-F69-ACF5-85-D42-B5839-D8.jpg


With so much metallic going on. I decided to neuter the balltops and go with default gloss black.

2-D37-B3-AA-5-D56-42-C3-9-E17-0-A143-D99-B7-E2.jpg


My brain and eyes agreed and decided to move on to securing the CP to the surround.

All the screw posts are powder coated... F@$!

And my wire wheel is on its last stubs.. Must preserve this precious resource to save myself a trip. Lithium grease in every nut and on every screw post as well.. I wil NOT be wasting a trip today!

59183-FBA-524-C-4-BE4-B384-77302-E745-A2-D.jpg


The stubby wire wheel worked and the CP is set..

9-F17-B126-613-B-4-D18-A4-B6-DDE6335-AD328.jpg


BEFORE (Bondo city and welds galore.. ) :

5736796-B-99-E2-410-D-9614-B8-A3-F947-E962.jpg

DFA73-A41-C542-4-D09-AF98-BA0517-D22908.jpg

B2-CE157-E-5-B73-4769-8543-EEF44579837-A.jpg


AFTER :

381-C56-D8-DE36-4-F05-B1-D6-338-F2-B731795.jpg


This time I went a little custom with the "mettalic" theme and powder plated the Yen chute, PSU, power block, Service panel, Jamma holster, and monitor hinge. The cold rolled steel just wasn't doing it for me..

I finished installing the PSU wood and cleaned up an Aero JAMMA ply I retrieved from one of my other project Aero's.

1-EE191-A8-B465-4213-8607-5-F133-D00-D62-E.jpg

3736-E72-E-5-ADF-47-AD-BB09-C50-B8-DC3181-F.jpg

5-A73-BC02-2-A14-4-CAD-B8-C7-660343477-B79.jpg

B48-E5-FD0-A4-A2-499-B-BEDC-F15282-D56-EAA.jpg


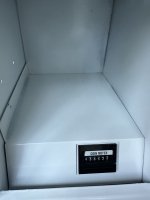
Finally I hooked up the Coin meter and installed the coin bucket.

383093-FF-593-B-483-E-9356-2-C20-AC156-C0-A.jpg


I need to grab the a repro footrest and Ill be close to closing the deal on this cab..

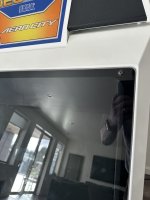
Next up is decals, Footrest, glass border, Monitor, chassis, bezel and wiring cleanup.

Have a nice Mar 12 week!

C17-C3205-93-D6-4261-BCE8-F8-A5-FA216712.jpg
 

Attachments

  • 383093-FF-593-B-483-E-9356-2-C20-AC156-C0-A.jpg
    383093-FF-593-B-483-E-9356-2-C20-AC156-C0-A.jpg
    57.5 KB · Views: 51
Last edited:
I take a break and another year goes by.

Not that anyone asked but it got a little hectic at my job.

Unfortunately. I got a surprise by the wife saying she picked up my "arcade pile" and tidied my cabs.

This gave me much anxiety as I had transformers and PSU's next to incomplete CP's and bags of screws.

I walked into the garage to see this..

B30-D6-D40-31-F8-4-CE3-8-BB8-A4-ED5-CC3-F47-C.jpg


I suspected the bezel was damaged and apon closer inspection. I found it was pretty beat up by the slight move.

AD785578-526-B-4-E4-F-A440-53445-FF1-E1-FD.jpg

0-E9114-DA-2241-4026-9-FCA-A404-A997-E209.jpg


I learned awhile back the bezel edges can be cleaned with Isopropyl and then lithium grease so I went to town on the initial cleaning. Like my other uncleaned bezels the metled grommets took a lot of wiping and ISO to clean off

4-AED9-B45-9476-4856-9-DDE-6-EC867-E0-AD7-E.jpg


I got my electrical tape out and used my finger to apply a little pressure while I taped each torn angle.

6069-EDE9-3-E27-4-EBD-AA10-50-D4-DC2-A4-E67.jpg


Now it was time for a a good amount rubbing with my white lithium grease to remove the oxidation from the plastic as to blend the tears and general age of the thin plastic.

I'm happy with how it turned out. I was crushed to see at first it but fixing it lit a fire under my ass to get back into the hobby. Ill see you all around!

13-A89-D54-395-E-40-A2-8-BD7-C463-C6-E40-EC8.jpg
 
Now that the bezel is repaired, I wanted to protect it under glass in case I procrastinated again for a long period of time.

I noticed I didn't have glass or screws so I took a screw from my Aero at the lake house and headed to the hardware store

FDC526-FB-4146-468-C-81-F5-7-C6239145-F0-D.jpg

7674-B30-A-7577-4224-BC26-EDE3198-CC12-F.jpg


No oversized panhead security screws to be found so I bought some black 5mm hex screws and a rubber gasket and headed back


The pan heads were a bit smaller than the hole size but this will have to make due until I can scour McMaster-Carr for better screws in the future. A test fit held snugly against the glass at the lake cab

0-DDC3-E00-307-F-4-FB5-9-FCB-D78-D8-AE6187-F.jpg


Now onto the glass replacement. This is something I did months ago to replace a bunch of glass that some bad kids carved their giant intials on, rendering the panels useless. I contracted a local glass company to make a replica of my original with matching tint. They were very expensive. I cant remember exactly how much but I want to say $180 for the glass + $40 for the glass black border decal+ $20 for the decal guy to apply the air release film to the glass.

I took a pane home and was ready to apply it!

57-FFFC3-F-28-C4-4-E43-A096-51-A8-FA285-F9-B.jpg

CD0-A2-F91-AB75-4-C9-F-9310-F4-BBE58-B7969.jpg


The bezel fit nicely so i decided to bolt it down..

32646-AEE-DC2-A-4-E9-D-B3-A3-EC467-C37-BDB0.jpg


The screws would not thread due to the powder coating. I should have remembered to bring my tap and dye set but there is always the promise of tomorrow. At least now my bezel is protected from future harm by partially threaded powder blocked thresholds..

33-F6876-D-B88-C-4-C66-9924-B38603-BF85-EC.jpg
 

Attachments

  • FDC526-FB-4146-468-C-81-F5-7-C6239145-F0-D.jpg
    FDC526-FB-4146-468-C-81-F5-7-C6239145-F0-D.jpg
    107.4 KB · Views: 15
Last edited:
Excellent work. I used NOVUS 7020 on my Aero bezel when I was scrubbing mine down; it worked really well:

8D10843D-5A2F-4494-9CE5-6587C38F26DE.jpeg


But I feel your bezel pain. You look at them wrong and they shatter lol.

Just to add some motivation (not that you need it), here’s my cleaned up AC…it may be my favorite cab:

IMG_7631.jpeg
Tell me more about that mail slot on the main pcb door! 😅 ✉️ 📫🏤
 
Back
Top