What's new

Ziggy Cheetos Dust

Grand Master
Joined
Oct 8, 2019
Messages
643
Reaction score
973
Location
Australia
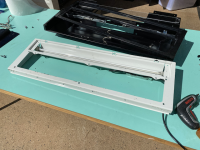
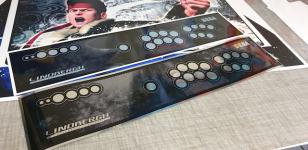
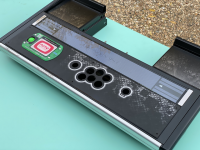
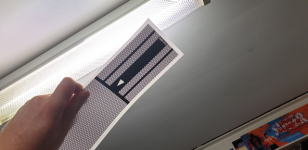
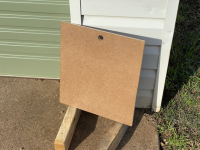
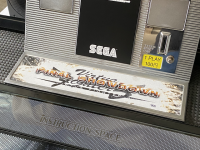
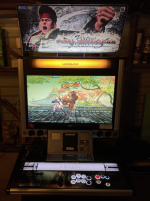
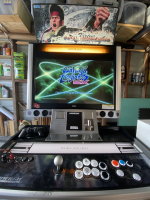
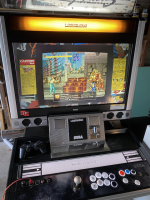
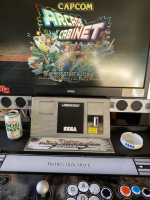
Hi all, nothing too spectacular here, but I’m documenting as best I can my take on a SLUC resto/console adaptation. It’s my first arcade project so I’m learning as I go and will need help from those with more know how than I. I’m not using original hardware but making a custom setup for myself to enjoy mostly PS3 fighting games. I was never into the genre but now I have a Jap sit-down cabinet I’m keen. Sorry for not initially posting pics and descriptions in this thread - just a YouTube link for now and I’ll go from there.

https://www.youtube.com/playlist?lis...1Oyb6fy6Ua8ugP
 
Okay, the above videos are up, but here's some details for anyone interested. I took heaps of photos, so quite a bit of detail will be missed as I can't post them all here, but feel free to ask for any more detail if you like.

First up, here's the cab minus any hardware, but with all the IO, boards and wiring intact. It has a Noir replica billboard and control panel.

I'm new to arcades and am more interested in converting this for console use for maximum gameplay. The first step was to visualise how I wanted to modify the CP. I have original 1P panels and a Jasen's Customs 2P panel so was happy to cut this one up. Coins came in handy and an old school compass.

Version 2.png
IMG_8411.png
 

Attachments

  • Version 2 (1).png
    Version 2 (1).png
    346 KB · Views: 509
  • IMG_8407.png
    IMG_8407.png
    481 KB · Views: 505
Last edited:
For once I know someone who has the machinery and cad skills to help me cut out the button and aux button holes I wanted. Once the holes were cut I removed all the old paint and rust and prepared the panel for powder coating. The panel is based on what buttons a Brook UFB will support. On top of that I've added 2 x USB, a volume knob and a headphone jack.
IMG_8465.png
IMG_8478.png
 

Attachments

  • IMG_8483.png
    IMG_8483.png
    300.8 KB · Views: 458
  • IMG_8471.png
    IMG_8471.png
    554.9 KB · Views: 463
I spent a good amount of time dismantling and cleaning the CP. Laying the powder coated panel in was very rewarding. There was some residual coke syrup in there eating away at the metal.
IMG_9279.png
IMG_9306.png
 

Attachments

  • IMG_9294.png
    IMG_9294.png
    480.5 KB · Views: 484
Last edited:
After searching like many others before me, I found a komorebi image I was happy to send to the graphic designer to make my custom panel artwork in the spirit of the original. The final image used on the CP was the central portion of the attached picture turned upside down and in greyscale. It took a bit of back and forth to get the art just how I wanted it. The size of the white rings and two shades of transparent surrounds are very specific on the original panels. The final printout is beautiful and printed on chrome. I had another standard one done. Granted the original is more like a brushed foil, but this is awesome all the same. I also had a Virtua Fighter marquee done from a scan I found online. This was all done by Carson at Noodleshirt in Aust.
IMG_9309.png
IMG_9217.png
IMG_9223.png
 

Attachments

  • IMG_8609.png
    IMG_8609.png
    651.1 KB · Views: 474
  • 91279921_2631380583852187_2194265243536850944_n.png
    91279921_2631380583852187_2194265243536850944_n.png
    380.6 KB · Views: 520
Last edited:
Here's what the other panels I have look like in place:

IMG_9348.png
IMG_9351.png
 

Attachments

  • IMG_9349.png
    IMG_9349.png
    494.8 KB · Views: 514
I purchased what I'm told (by River Service JP) was the last instruction space from Sega. I had it scanned in two halves and then reproduced on translite paper/plastic by Noodleshirt. It doesn't have the same rear blockout as the original but I'm very happy with the outcome.
IMG_0582.png
 

Attachments

  • 91678259_2846221908808733_3598730071998726144_n.png
    91678259_2846221908808733_3598730071998726144_n.png
    274.5 KB · Views: 193
After sticking down the overlay, I carefully cut out the holes and put in some buttons for a test. The dual headphones was a brain fart, and later I put a volume knob in there.
Everything lined up beautifully. In order to get the artwork done, I turned the CP over and traced to out on paper. I then scanned that paper and sent image to Noodleshirt.
LCA Panel.jpg
IMG_9339.png
IMG_9369.png
 

Attachments

  • IMG_9332.png
    IMG_9332.png
    560 KB · Views: 418
  • IMG_9365.png
    IMG_9365.png
    610 KB · Views: 446
Next up was to clean all the internals. It came up well and there wasn't any surprises.
IMG_9407.png
IMG_9420.png
IMG_9427.png
IMG_9437.png
 

Attachments

  • IMG_9410.png
    IMG_9410.png
    547 KB · Views: 410
  • IMG_9435.png
    IMG_9435.png
    493.3 KB · Views: 414
  • IMG_9443.png
    IMG_9443.png
    492.9 KB · Views: 420
  • IMG_9426.png
    IMG_9426.png
    521 KB · Views: 410
The billboard was a bit tricky to simulate the real ones that have a black border on the perspex. The fixing points cut through some of the logo, but it will do until I can get an original. These Noir billboards are too tall for the Lindbergh and the previous arcade owner drilled new holes to fix this to the cabinet. I was able to lower it and it now sits nearly in the right spot.
IMG_9374.png
 
After cleaning up the access panel, I had a traffolyte patch made to cover the holes. I could have got silver but thought I'd try black in case the silver wasn't quite a match. It's really coming along now!
IMG_9453.png
IMG_9457.png
 

Attachments

  • IMG_9452.png
    IMG_9452.png
    387.5 KB · Views: 429
  • IMG_9466.png
    IMG_9466.png
    581 KB · Views: 442
I removed the monitor next and cleaned out all the guts from fluff and schmeg. I layed in an LG monitor I have for the future, but it wouldn't fit as is. I'll give this a proper go when I have more time, but think it might have to de case the monitor or use one of the other known monitors that fit the machine. After cleaning the top half of the machine (including speakers) thoroughly I put it all back together and it's come up well.
IMG_9485.png
IMG_9520.png
IMG_9526.png
IMG_9542.png
IMG_9551.png
 

Attachments

  • IMG_9521.png
    IMG_9521.png
    447 KB · Views: 368
  • IMG_9490.png
    IMG_9490.png
    437.5 KB · Views: 148
  • IMG_9547.png
    IMG_9547.png
    392.1 KB · Views: 359
  • IMG_9537.png
    IMG_9537.png
    414.7 KB · Views: 351
  • IMG_9562.png
    IMG_9562.png
    516.7 KB · Views: 347
Last edited:
The machine is now back together and I'm able to connect a PS3 to the monitor with a USB KVM switch you will see later.
IMG_9591.png
 

Attachments

  • IMG_9597.png
    IMG_9597.png
    547.1 KB · Views: 441
Connecting all the buttons and audio stuff was a process that involved a lot of experimentation until I was happy. I can't remember the exact order but the post below shows the finished product.
IMG_9658.png
IMG_9836.png
IMG_9859.png
IMG_9861.png
 

Attachments

  • IMG_9663.png
    IMG_9663.png
    376.7 KB · Views: 151
  • IMG_9844.png
    IMG_9844.png
    544.1 KB · Views: 428
  • IMG_9860.png
    IMG_9860.png
    530.7 KB · Views: 127
  • IMG_9605.png
    IMG_9605.png
    500.8 KB · Views: 378
This is how it mostly ended up. I had to source some cables with Dupont connectors as well as some pre-made Brook harnesses to get this just how I wanted. I powered the 5V LED strip from the Brook board.
IMG_9861.png
IMG_9984.png
IMG_9986.png
 

Attachments

  • IMG_9985.png
    IMG_9985.png
    496 KB · Views: 334
  • IMG_9973.png
    IMG_9973.png
    573.8 KB · Views: 147
Last edited:
The next big phase was to build a board of components that controlled the switching of two consoles/PC and the audio setup. In the Youtube series I linked to in the first post you can see that whole process I went through. Basically I have a USB/HDMI KVM switch that allows me to have two consoles connected to the cabinet. I can't exactly switch between them live, but you can easily play games on one console and then switch it off and switch on the second console and play that. The audio worked out that I have a volume knob on the CP that controls the volume of the Lindbergh speakers, and I have a headphone amp inside the cab that controls the volume of the headphone out. The USB plugs are connected to one of the consoles of your choice and the other to a USB power supply for your phone. As mentioned, there's heaps more explanation in the Youtube videos.
IMG_9806.png
IMG_9916.png
IMG_9924.png
 

Attachments

  • IMG_9920.png
    IMG_9920.png
    549.9 KB · Views: 350
  • IMG_9988.png
    IMG_9988.png
    552 KB · Views: 360
  • IMG_9809.png
    IMG_9809.png
    555.9 KB · Views: 332
Last edited:
I spent hours getting the cables right so I can unplug stuff in the CP and at the back for CP removal and easy transport. Those RCA cables allow me to connect a sub or external powered speakers.
IMG_9990.png
 
Last edited:
This has been a real joy for me. Over 12 months from purchase to completion with weeks and weeks in between of no activity or waiting for parts. Some finishing touches included getting a couple of mini instruction space artwork panels. I'm no artist but made a similar one to the original Lindbergh one, and also a Final Showdown one. These were printed on Ezytack and can be peeled off. The Dariusburst decal is for my Game Wizard (Vewlix Replica) cabinet.

IMG_9932.png
IMG_9938.png
 

Attachments

  • IMG_9936.png
    IMG_9936.png
    613 KB · Views: 329
Last edited:
So there it is folks. These cabs are perfect for those who want to convert to console use and don't know much about the world of CRT candy cabs. Hopefully you get inspired from what I've done, and get in touch if I can help you out in any way with your Lindbergh project.
IMG_0013.png
IMG_9851.png
IMG_9870.png
IMG_9967.png
 

Attachments

  • IMG_9848.png
    IMG_9848.png
    379.8 KB · Views: 349
  • IMG_9869.png
    IMG_9869.png
    547.2 KB · Views: 448
  • IMG_9871.png
    IMG_9871.png
    550.9 KB · Views: 592
  • IMG_9999.png
    IMG_9999.png
    568.4 KB · Views: 323
Nice work and good write up! Time to play some games...
 
Back
Top