This is the PC in my Kraylix cab:
It wouldn't fit with the case so I cut a piece of MDF, laid it out. drilled pilot holes in the motherboard mounting positions then used nylon spacers and screws to secure the motherboard to the MDF. you can get the MDF, spacers and screws at your local hardware store.
You can't see it in the picture but I actually cut a portion out of an old PC case to make a bracket for the Power supply. so basically the section of a case that the PSU normally bolts to is there, plus some bent tabs with holes drill in them to mount to the MDF. I did the same thing with the hard drives (not in the photo) basically removed the 4-slot hard drive caddy and bolted that to the MDF and gave myself a nice mounting location for all my drives. The power switch and audio amp are front center here because that was located directly behind the "coin door" so I can open that up to adjust the volume and turn the machine on and off easily. The big empty space on the left is for a Subwoofer which I never got around to installing. Also not visibile in the picture is a bracket I made to support the top of the Graphics card to keep it flopping back and forth (Sorry this is pretty much the only photo I have of this setup... I really need to take better photos of this thing).
Another example is my Fix it Felix Machine:
on this one I got some L-channel aluminum from home depot cut it down to the length i wanted then drilled holes in it for the screws, then screwed it into the PC case as a mounting bracket. (you'll want to do this with the mobo removed so you don't damage it with metal filings, also make sure there is enough clearance for the screws) There's one on the bottom too that allows it to slide right into the PCB slot in the cabinet. You can also notice here I added my own power outlet for the PC to plug into. That's tied into the AC input so the PC turns on and off with the external power switch on the cab (bios is set to turn on as soon as power is applied). the Kraylix cab is wired similarly except I used a power strip with the end wired into the external power port instead of a hard mounted outlet.
At some point I'm going to be building another similar setup for my DDR cab since the PC is is just sitting outside of the cab on that one. Space is surprisingly very tight in those massive cabs though so it's going to take some creativity.
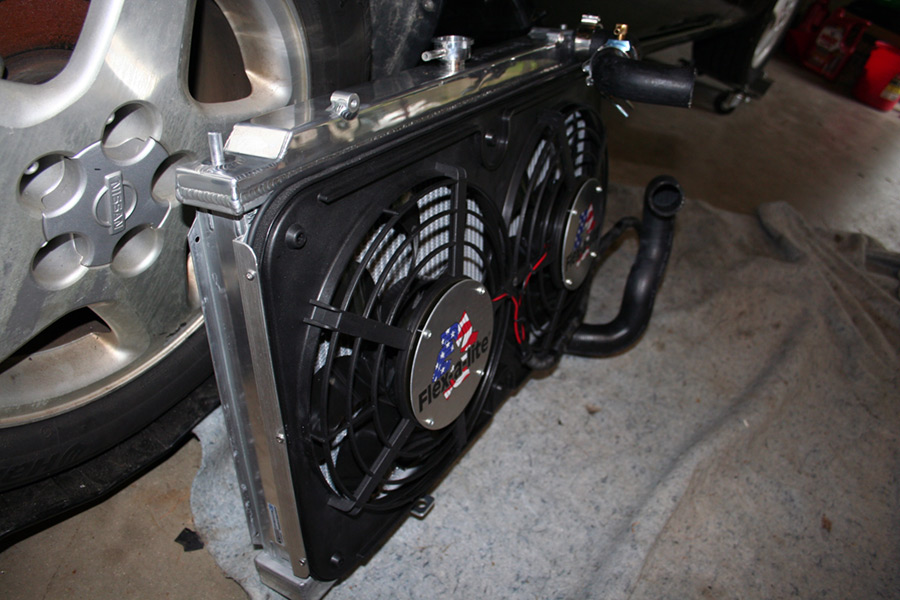
L-Channel aluminum is extremely useful for building brackets you can get it at just about any hardware store and all you need to make a bracket is a drill and a cutting tool (dremmel works, or even a handsaw with a metal cutting blade) I've used this to build custom hard drive mounts, license plate mounts for cars and motorcycles, I even used it to build a custom radiator fan mount on my car:
those sweet rounded corners were made with a dremmel grinding tool. sanding or filing down sharp edges makes things look a lot more pro, and a lot less prone to cut yourself. the FiF brackets have rounded corners too, they're just not as apparent from the angle of the picture.


") I just took out the front cover and all the drives, CD-ROM, USB reader and the front plate.. It is tight but it is in now
I just took out the front cover and all the drives, CD-ROM, USB reader and the front plate.. It is tight but it is in now