What's new
Got the chassis out of the frame over the weekend. I just need to wait for my cap kit and other parts to arrive. IMG_20171218_123629.jpg

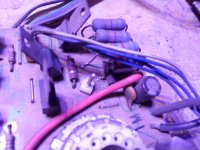
This thing is pretty filthy... What is the best way to clean it up?
 
I normally use an air compressor. If the chassis was kept dry, most dust can simply be blown off. The cable to the anode connection of the tube can be wiped clean with a soft tissue. (Usually, you can't blow that one proper.)

A soft paintbrush can also help to wipe it clean. (Again using the compressor to blow away the removed dust.)
 
For cleaning the board/chassis, I also use compressed air carefully. Sometimes I use a very soft toothbrush at the same time. Soft paintbrush is also a great idea!

If you haven't done a lot of soldering you should watch and understand this video before taking your iron to anything. A clean tip that is the appropriate size for the work is definitely key. It should be cleaned with a wire brush and dragged across a wet sponge to remove oxides periodically while working. While that's not as important for brand new assembly it's really important for oxidized boards and rework in general.


Take your time, no need to rush :) The finished product will be worth the wait.
 
Excellent! Thanks for the advice and the informative video. ∆∆∆∆∆∆

I'm going to practice on some other projects and scraps I have laying around until my order arrives 8)
 
While searching for videos of people doing "cap kits" I have seen some where the individual sprays the chassis board with common rubbing alcohol to clean it. Is this not advisable?

After using compressed air I am not satisfied with how dirty mine still is.

Thanks again for the comments and advice.
 
Alcohol is fine, air is fine, garden hose and simple green is fine. Whatever you do, be sure to dry completely before use. People hear water and electronics and get scared but there is nothing to worry about (just don't use a pressure washer :P). You can wash the tubes as well.

W2qGVZR.jpg
 
Thank you for clarifying ∆∆∆∆

Your chassis turned out very nice, I'm hoping to get mine that clean too.

What method did you use for yours if you don't mind me asking?
 
Simple Green and a garden hose work perfecty fine. In the summer a chassis around here can dry all the way in about 2-3 days. Our weather right now doesn't really permit that right now though.
 
I received my order from arcadepartsandrepair.com a few days ago and started work last night. They had all of the transistors in stock for my chassis and processed and shipped my order quickly so hats off to them.

First thing I did was desolder the flyback transformer. With my new solder sucker it was easy pea'sy. I did run into one problem though:

The neck board was attached to the flyback by a couple of wires, one of which had a single pin connector. I tried to disassemble the connector and pin carefully so I could reuse them. I was able to get the pin out of the housing no problem, but the pin was crimped on so tight that I just bent it to hell while trying to open it.

I am trying to determine where I could find a suitable replacement but am having a hard time finding anything. The connector is stamped "STM" and looks like the picture attached.

Does anyone have advice on where to buy a replacement or advise another possible solution?

Thanks for looking and for the continued support! ^^
 

Attachments

  • IMG_20171230_124425.jpg
    IMG_20171230_124425.jpg
    524 KB · Views: 257
  • IMG_20171230_124508.jpg
    IMG_20171230_124508.jpg
    502 KB · Views: 244
Thanks ∆∆∆∆∆

I was thinking that would work as well, but I wasn't sure if it would be advisable.

I guess I'll just go for it so I can continue.
 
On my chassis the capacitors are labeled only on the top of the board and not the bottom where I need to solder.

Is there a trick to easily find where they pass through?
 
I usually clamp my pcb vertically and look for distinct ICs near the piece I'm replacing for reference. If the bottom isn't labelled I use little sticky arrows to aim at the area I'm working in. That really sucks that the solder side isn't labelled... Makes life much easier.
 
I'm proud to report that it was a successful installation, and the monitor is now working perfectly!

I am so glad that I decided to repair this myself. With the wealth of knowledge online and on this forum it was a piece of cake!

Thank you to everyone for all of your help! :)
 
As requested :D ∆∆∆∆∆

Shiny new caps and flyback!!!
IMG_20180105_152919.jpg


Monitor working as intended! :thumbup:
IMG_20180105_152945.jpg
 
Back
Top