Finisterre
Professional
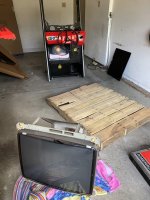
I recently picked up an 18 wheeler cab, and unfortunately they only sent ONE mover, so I didn't have anyone to bribe to help me get it downstairs. They wound up leaving it in the parking spot that my wife uses. I of course had some urgency to get it inside. I figured it would be a rite of passage to take the thing apart and get more familiar with the innards.
I first started with a pile of web searches to get my bearings and make myself comfortable. The following forum posts and YouTube videos set the stage for me to dive on in with an understanding of what to expect:
How to rebuild a Sega Naomi Universal cabinet - https://forum.arcadeotaku.com/viewtopic.php?f=3&t=46&sid=fe8f80620eaa4a52aa12d84b958929a8
Naomi Uni Rebuild - Warning Photo Heavy - https://www.sega-naomi.eu/forum/viewtopic.php?t=1117
How to for rotating monitor? - https://sega-naomi.eu/forum/viewtopic.php?f=3&t=932
Removing monitor from and transporting Crazy Taxi Upright - https://forums.arcade-museum.com/showthread.php?t=373248
What's the best way to move a NAOMI Universal? - https://forums.arcade-museum.com/showthread.php?t=341009
Moving the candy cabs through doors and stairs (at the bottom) http://www.candycab.es/akihabarainhome/candycabs.htm
My UKVAC post on making it happen is here: http://www.ukvac.com/forum/greetings-from-an-ohio-based-naomi-upright-chaser_topic364911.html
I'll simply reiterate it here.
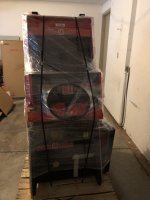
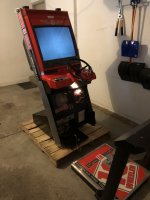
My cab showed up on a palate, wrapped in plastic and cardboard. Getting it unwrapped is pretty standard, and of course required the help of my son. I snaked an ethernet cable up from my office so I could try to Netboot Initial D, King of Route 66, etc. I wanted to make sure I didn't get a dud.


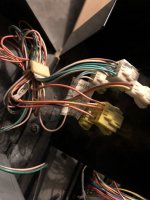
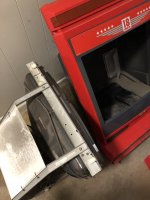
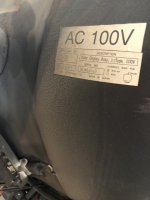
I started by taking the back bezel off to expose the monitor, and I took note of the model number, as I know some of them will shock the bejesus out of you if you touch them in the wrong spot, and they should apparently be discharged (to much contention in the community). I decided to YOLO it and not do so after the advice of a UKVAC member: "I'm gonna go out on a limb here, and disagree! For starters, the 29e31s doesn't need discharging, as long as it's been switched off a short while. Also, Given that you're only going to be lifting it by the frame, you'll be fine. Wear gloves though, 'cos the metil is really going to hurt your fingers otherwise." - http://www.ukvac.com/forum/forum_po...om-an-ohio-based-naomi-upright-chaser#1049271
I 100% agree with him on the wear gloves statement... if you think twice, google "Ring Degloving Injury" (oh yeah also take your rings off!)
http://lmgtfy.com/?q=Ring+Degloving+Injury
If you want to use an extra bit of caution you can of course follow the community instructions on discharging your monitor: https://wiki.arcadeotaku.com/w/How_to_discharge_a_monitor


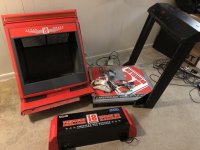
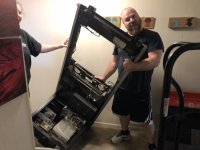
I set both the front and back bezel aside and moved on to removing the monitor. I did unfortunately break one of the tabs in the process

I first started with a pile of web searches to get my bearings and make myself comfortable. The following forum posts and YouTube videos set the stage for me to dive on in with an understanding of what to expect:
Naomi Uni Rebuild - Warning Photo Heavy - https://www.sega-naomi.eu/forum/viewtopic.php?t=1117
How to for rotating monitor? - https://sega-naomi.eu/forum/viewtopic.php?f=3&t=932
Removing monitor from and transporting Crazy Taxi Upright - https://forums.arcade-museum.com/showthread.php?t=373248
What's the best way to move a NAOMI Universal? - https://forums.arcade-museum.com/showthread.php?t=341009
Moving the candy cabs through doors and stairs (at the bottom) http://www.candycab.es/akihabarainhome/candycabs.htm
My UKVAC post on making it happen is here: http://www.ukvac.com/forum/greetings-from-an-ohio-based-naomi-upright-chaser_topic364911.html
I'll simply reiterate it here.
My cab showed up on a palate, wrapped in plastic and cardboard. Getting it unwrapped is pretty standard, and of course required the help of my son. I snaked an ethernet cable up from my office so I could try to Netboot Initial D, King of Route 66, etc. I wanted to make sure I didn't get a dud.
I started by taking the back bezel off to expose the monitor, and I took note of the model number, as I know some of them will shock the bejesus out of you if you touch them in the wrong spot, and they should apparently be discharged (to much contention in the community). I decided to YOLO it and not do so after the advice of a UKVAC member: "I'm gonna go out on a limb here, and disagree! For starters, the 29e31s doesn't need discharging, as long as it's been switched off a short while. Also, Given that you're only going to be lifting it by the frame, you'll be fine. Wear gloves though, 'cos the metil is really going to hurt your fingers otherwise." - http://www.ukvac.com/forum/forum_po...om-an-ohio-based-naomi-upright-chaser#1049271
I 100% agree with him on the wear gloves statement... if you think twice, google "Ring Degloving Injury" (oh yeah also take your rings off!)
http://lmgtfy.com/?q=Ring+Degloving+Injury
If you want to use an extra bit of caution you can of course follow the community instructions on discharging your monitor: https://wiki.arcadeotaku.com/w/How_to_discharge_a_monitor
I set both the front and back bezel aside and moved on to removing the monitor. I did unfortunately break one of the tabs in the process
Attachments

Last edited:
")