gamenwatch
Enthusiast
.
Last edited:
That is odd, my NNC doesn't have it either, nor does it have that odd cage around the psu.nice project, also make sure to get a proper CP for it")
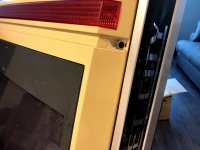
btw. what is all this? My NNC doesn't have these parts;

The PSU looks different because it's a Lindbergh PSU not a NAOMI PSU, the lower box on the left is an AC filter, the black and white box above it I'm not sure, but it looks like a circuit breaker.That is odd, my NNC doesn't have it either, nor does it have that odd cage around the psu.
You are correct sir. Also many US cabs had the noise filter as well on original uprights.The PSU looks different because it's a Lindbergh PSU not a NAOMI PSU, the lower box on the left is an AC filter, the black and white box above it I'm not sure, but it looks like a circuit breaker.That is odd, my NNC doesn't have it either, nor does it have that odd cage around the psu.
I'm guessing this cab was originally setup for Lindbergh use.
2P12B panelwhich panel did you get from Alberto?
The man does some top quality work!
I've got enough requests for them I'm going to be offering these for sale soon for those without access to a printer.You can get the files for 3d printed versions of these from thingiverse. @twistedsymphonymade them and they fit perfectly.
Yeah, I will also need 4, mine were brittle and damaged before I got the cabinet.Count me in for 4.I've got enough requests for them I'm going to be offering these for sale soon for those without access to a printer.You can get the files for 3d printed versions of these from thingiverse. @twistedsymphonymade them and they fit perfectly.
DO NOT USE BRAKE FLUID!!! that will erode the plastic itself which is 100x worse than drip marks.I've tried rubbing off the run with nail polish remover, but that's not working. I guess it seeps into the plastic quicker than I expected.
Given it's dye, am I screwed? I've heard of brake fluid being able to remove it, but it depends on the plastic. Worst case scenario, I can reach out to Yaton or Videotronics for a spare.