This summer I was lucky enough to purchase a Net City cabinet from a user on this forum! Yay!

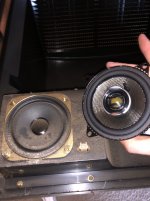
This is how the cabinet arrived. Overall in pretty decent shape. One of the speakers was blown and the control panel had seen better days. I started off first by opening it to replace the speakers as the blown speaker was pretty annoying. I used the Pioneer car speakers that have made rounds on the internet and started stripping things away.


As you can see when I was inside the cabinet I came to the realization it had never been cleaned internally ever so I set about to clean it from top to bottom while it was open. That nicotine tar is a nightmare to get out but it was necessary and great now that it's done. The speakers sounded amazing once everything was put back together.

I got the fantastic JAMMAFIER which allowed me to use all my Jamma pcbs as well as my fastio x3 setup. Unfortunately the X3 is so large that it cannot fit inside the Net City but it works and that's all that matters. I also obtained a Nesica x Live panel because of the great button layout which allows for easy Neo Geo setup or really any game.

Also grabbed the Zombie Revenge analog panel because it looks nice and why not?

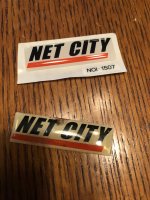
I was able to contact some people in Europe to locate NOS parts for the control panel (mine had a gigantic chunk out of the top of it and was pretty dirty), NOS Badge, some 3d printed screw covers and some custom art work for my 2p12b panel to give the final product a little twist. There's no panel art I'm aware that has the Net City logo and a 2p layout, all I know of are the 1p all net panels.

Got to work on the 2p12b panel by mounting the art to the control panel, cutting out all the holes, mounting the buttons/sticks and wiring it all up.

Here's the end result after a few months of work, I'm really happy with the outcome of this project and can finally play games on it without having nagging about wanting to finish fixing it up")
This is how the cabinet arrived. Overall in pretty decent shape. One of the speakers was blown and the control panel had seen better days. I started off first by opening it to replace the speakers as the blown speaker was pretty annoying. I used the Pioneer car speakers that have made rounds on the internet and started stripping things away.
As you can see when I was inside the cabinet I came to the realization it had never been cleaned internally ever so I set about to clean it from top to bottom while it was open. That nicotine tar is a nightmare to get out but it was necessary and great now that it's done. The speakers sounded amazing once everything was put back together.
I got the fantastic JAMMAFIER which allowed me to use all my Jamma pcbs as well as my fastio x3 setup. Unfortunately the X3 is so large that it cannot fit inside the Net City but it works and that's all that matters. I also obtained a Nesica x Live panel because of the great button layout which allows for easy Neo Geo setup or really any game.
Also grabbed the Zombie Revenge analog panel because it looks nice and why not?
I was able to contact some people in Europe to locate NOS parts for the control panel (mine had a gigantic chunk out of the top of it and was pretty dirty), NOS Badge, some 3d printed screw covers and some custom art work for my 2p12b panel to give the final product a little twist. There's no panel art I'm aware that has the Net City logo and a 2p layout, all I know of are the 1p all net panels.
Got to work on the 2p12b panel by mounting the art to the control panel, cutting out all the holes, mounting the buttons/sticks and wiring it all up.
Here's the end result after a few months of work, I'm really happy with the outcome of this project and can finally play games on it without having nagging about wanting to finish fixing it up