What's new
It highlights an obstacle within arcade use as a hobby.

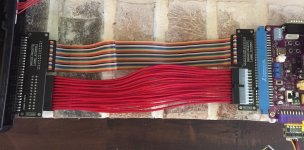
I wish there was a unified standard for all superguns.

It's part of the nature of arcade gaming, even outside of superguns, how many different standards are there for kick harness connection within cabs? There seldom is a one size fits all solution. Often we're required to tinker and fabricate, just part of the hobby.

One factors in many variables in PCB design. The size of the PCB, parts used/availability and their placement, trace width/length/position etc. Sometimes adding all these extra and perhaps unnecessary features breaks some solid design rules.

Personally, I prefer the KISS (keep it simple, stupid) approach.

Otherwise, where does it end?
 
The custom cables I had that Aliexpress supplier build and make available are great. Confirmed to be quality 18AWG wiring and made to spec. Link to purchase is in opening post.

This is great as the main goal of producing jamma extenders without needing to custom make/crimp/solder cables is now fully realised. Said supplier can also fabricate them in 60cm lengths.

51003319_10216523730818806_1871170062337966080_n.jpg
 
It will be a while before I sell any more. Chinese new year has halted all PCB production and parts supply.
 
There's a few reasons I didn't opt for a CPS2 Hirose connector.

  • They're more difficult and expensive to obtain. Australia doesn't have a great selection of electrical retailers.
  • Size. They're quite large and inefficient for the purpose. Why use a 34 pin connector when only 6 pins are needed.
If I had used a CPS2 connector, you would need to make your own wiring harness.

If I had used a CPS2 connector, it wouldn't have changed compatibility at all.

The JST-XH isn't HAS specific, it's merely a connector.

Regarding the button inputs, that's the job of the supergun. This is an extender, not a button remapper, not a voltmeter, not a video buffer, etc.
You can get the Hirose connector from RS components I think the smallest quantity is 10 but you are totally right, the connector is complete overkill to only use 6 pins you may as well use something smaller more fit for purpose such as the JST range.
 
I got my last batch from Mouser, RS didn't have them.
 
Built my own... thanks for the open source design!
 

Attachments

  • IMG_9885.jpg
    IMG_9885.jpg
    480.5 KB · Views: 246
Last edited:
Look great. Did you make both cables by hand?
The IDC cable, yes. I had the cable and connectors on hand from building other retro projects (for floppy drive cables to use GoTek drives with Amiga computers). The ATX extender was purchased on Aliexpress from the link that @Frank_fjs provided.
 
I’ll have to get around to making a batch. Are the IDC cables complicated to make? What’s the tool used?
 
I don't have a special tool for it (an IDC crimper is what it's called, if you want to buy a cheap one from Aliexpress). Instead, I get all the parts aligned and then push as hard as I can with my hands while placing the the connector on a flat surface to get the punching of the wires started. Then, I take a pair of water pump pliers and take two large metal washers and squeeze it the rest of the way until the IDC connector has totally penetrated the wires. The large washers are to spread out the force generated by the pliers (you can use any kind or shape of rigid metal block that's as thick as a USA quarter dollar coin), so that you don't crush the plastic and break it. I place the washers on both sides of the connector (the penetrator part and the backstop) and work my way from left to right until the entire length of the metal penetrator strip is completely punctured through the wire housing and into the metal wires inside. You'll hear the locks on the connectors click, and then after that, I double over the wire and install the strain relief part of the connector, which you can do by hand as no real force is needed to get it to lock into place. The critical part is lining up the wires with the metal teeth so that each set of teeth only penetrates one wire. I use magnification when doing all this to make sure alignment is what it should be.
 
I'll make some batches of these extension cables soon.
 
Back
Top