J
jassin000
OMG that link is a HORROR show!
At least no real Vewlix's were hurt in the making of this post (that is a Chewlix cab not a Vewlix).

"Then I used the old glass fixation system to fix the screen perfectly. Unframe the new screens are not a good idea, as they fit so well naturaly inside the vewlix frame."
No way in hell I'd ever do something this amature/unprofessional!
The LCD MUST be de-cased (unframe haha) and mounted (with god damn screws you chucklehead) inside the original Vewlix frame or I have ZERO interest.
"dudez check out my awesome Chinese made Vewlix cab!" *breathes heavily near it* "oh fuck all my glue and rubber bands just came free!"
I feel like the time is finally right for Draken to enter cab ownership, layer the monitor thick with hotglue baby we don't need no MF'n screws!
At least no real Vewlix's were hurt in the making of this post (that is a Chewlix cab not a Vewlix).
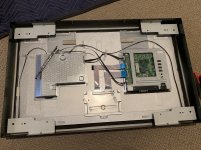
Yea its fucking tapped inside/resting on wooden blocks...I dont understand how the monitor is held into the unit if your not using the VESA mount?
"Then I used the old glass fixation system to fix the screen perfectly. Unframe the new screens are not a good idea, as they fit so well naturaly inside the vewlix frame."
No way in hell I'd ever do something this amature/unprofessional!
The LCD MUST be de-cased (unframe haha) and mounted (with god damn screws you chucklehead) inside the original Vewlix frame or I have ZERO interest.
"dudez check out my awesome Chinese made Vewlix cab!" *breathes heavily near it* "oh fuck all my glue and rubber bands just came free!"
I feel like the time is finally right for Draken to enter cab ownership, layer the monitor thick with hotglue baby we don't need no MF'n screws!
Last edited by a moderator:
")
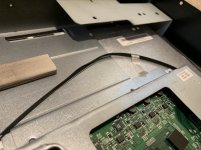
") and I could improve a bit the fixations, but I wanted to show that with no skill, everyone can do it, and I'm pretty sure many people already changed their screen because of this topic.
and I could improve a bit the fixations, but I wanted to show that with no skill, everyone can do it, and I'm pretty sure many people already changed their screen because of this topic.