JoeAwesome
Professional
Hi, everyone.
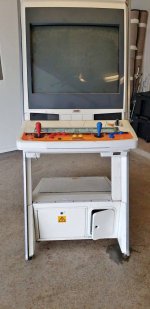
The intent of this thread is to hopefully show how to "deconvert" a European NAOMI Universal Cabinet (hereafter referred to as "Euro NUC") to a Japanese/US version ("JPN NUC"). There may be other cabinets in a similar situation, such as 18 Wheeler stand-up NUCs. Mine came from someone who imported a converted cabinet at one point, and likely used a step-up transformer or he was living somewhere to use as is with the higher voltage. I assume this could apply to a converted New Net City ("NNC") as well.
The Euro NUC is typically converted from a JPN NUC with an additional step-down transformer from 100-120v to 230v, and has a CEE 7 power cable to plug into the inlet instead of a NECA or JIS power cable (standard in US or JPN, respectively).

(CEE 7 power cable on left; NECA power cable on right)
The transformer plugs into Conn. BD relay board, which powers the monitor and PSU through AMP UP connections. The transformer also plugs directly to the sound amp for the 17v needed to power that.

The simple answer to this process is "remove the transformer," however, it's not as straightforward as that. Additional rewiring is needed, as well as a separate audio amp transformer. I want this to look clean, too, so I'll avoid hacking any of the existing wires, and instead use what's there.
Step 1: Removing the step-down transformer
-Unscrew the transformer from board
-Move grounds connected to hatch door and on transformer
-Remove the Conn. BD board from wooden board

You'll be left with the transformer and its wires removed from the cabinet as shown. You may choose to leave the wooden board in the cabinet, and I may likely put it back. You'll see why in the next post.
The intent of this thread is to hopefully show how to "deconvert" a European NAOMI Universal Cabinet (hereafter referred to as "Euro NUC") to a Japanese/US version ("JPN NUC"). There may be other cabinets in a similar situation, such as 18 Wheeler stand-up NUCs. Mine came from someone who imported a converted cabinet at one point, and likely used a step-up transformer or he was living somewhere to use as is with the higher voltage. I assume this could apply to a converted New Net City ("NNC") as well.
The Euro NUC is typically converted from a JPN NUC with an additional step-down transformer from 100-120v to 230v, and has a CEE 7 power cable to plug into the inlet instead of a NECA or JIS power cable (standard in US or JPN, respectively).
(CEE 7 power cable on left; NECA power cable on right)
The transformer plugs into Conn. BD relay board, which powers the monitor and PSU through AMP UP connections. The transformer also plugs directly to the sound amp for the 17v needed to power that.
The simple answer to this process is "remove the transformer," however, it's not as straightforward as that. Additional rewiring is needed, as well as a separate audio amp transformer. I want this to look clean, too, so I'll avoid hacking any of the existing wires, and instead use what's there.
Step 1: Removing the step-down transformer
-Unscrew the transformer from board
-Move grounds connected to hatch door and on transformer
-Remove the Conn. BD board from wooden board
You'll be left with the transformer and its wires removed from the cabinet as shown. You may choose to leave the wooden board in the cabinet, and I may likely put it back. You'll see why in the next post.


")


") .
.