nismopunch
Professional
Ughhh much excite for this!! @jassin000 please do the honors and continue to share 
Lets talk about screw size differences.please do the honors and continue to share


What do you think about my situation?This is why you ALWAYS use a key in your JAMMA connector.
But here is what happens when you hook it up backwards
+5V gets run to the buttons 4 and 5 inputs for players 1 and 2
-5V gets run to button 3 for players 1 and 2
+12V gets run to button 2 for players 1 and 2
and if your cab is equipped with coin counters another voltage input gets routed to right joystick for players 1 and 2
This will basically cook everything on the PCB starting with control inputs and the extent of the damage really has to do with how long you left it powered up like that.
 dang mistakes happen but that hurts, hopefully you caught it quick enough but interested to see feedback

")
Same. I think you pulled it in time @jassin000.I think you do not need to worry, it’s working so will be fine.
Yes, ONE TIME and leave it!One time set up and leave it at that? How you turn it on?


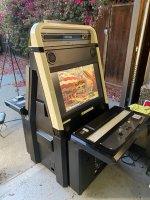
I peeled the anti-glare coating off my original glass, it was hazed anyway due to the original op using some harsh chemical cleaner or something.Were there any reflections issues, etc between the new monitor and that front glass??
Thanks J, will probably have to do that then, specially since I m using the old monitors.I peeled the anti-glare coating off my original glass, it was hazed anyway due to the original op using some harsh chemical cleaner or something.Its just regular old clear glass with a film applied to the surface.Were there any reflections issues, etc between the new monitor and that front glass??
With out it/clear glass, yes naturally you get some reflect back but its really not all that bad.
Def better without the hazed antiglar then with it.
Well, if I were to do that I would go for that museum art quality glass. Anti reflective, low iron, 99% light transmission, etc.. not just regular glassCant you just go down to your hardware store and get a new piece of glass cut? You wont have the anti-glare coating but if your going to strip it off anyways....
")