What's new
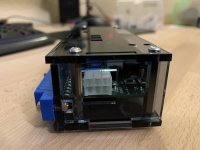
Hello, I am new to this, use the standard 1.7v version data, but I have a problem, connecting the minigun to the arcade monitor, it gives me a black and white signal and I am following the following pinout in mini din
3 sync
4 Gnd
6 Blue
7 Green
8 Red
The rest, everything works fine, very good audio and I take the buttons very well If you can help me, I would greatly appreciate it.
 
It's not designed for use with an arcade monitor, which expects TTL level video signals, instead it's designed for consumer monitors with 75 Ohm termination. Mind you, it should still be usable if you adjust the RGB pots accordingly however I don't know if the sync signal will be strong enough.

Other than that have you verified your soldering / connections? Seems odd for an image to display in black and white, I would have thought it would either work or not work at all.
I understand, in that case I would have to use an RGB cable directly to my monitor.
Where can I get the file to modify ?, so I can try to do something to my needs
 
The design file is within the download, it's an EasyEDA file.
 
Just tested my second board with a scart doldered on to the bottom of the board.
OSSC syncs perfectly but picture only displays blue. I guess that means that the blue and sync signal works.
Any idea how to troubleshoot the problem?
 
Just tested my second board with a scart doldered on to the bottom of the board.
OSSC syncs perfectly but picture only displays blue. I guess that means that the blue and sync signal works.
Any idea how to troubleshoot the problem?
Look for shorted pins on the THS7374 perhaps.
Otherwise I dunno. Post a pic of the board, and connection points of the SCART connector.
 
Just tested my second board with a scart doldered on to the bottom of the board.
OSSC syncs perfectly but picture only displays blue. I guess that means that the blue and sync signal works.
Any idea how to troubleshoot the problem?
Look for shorted pins on the THS7374 perhaps.Otherwise I dunno. Post a pic of the board, and connection points of the SCART connector.
Fiddled around with the THS7374 and everything points to this now.
Guess I'll have to refit it -- @#$#@$
 
@'Frank_fjs Do you have a schematic of the Audio circuitry, just trying to learn and understand how the circuitry is able to isolate the AC sound signal with capacitors.
This super basic version of ebay, https://www.ebay.co.uk/itm/Arcade-S...electronik-polyvalent-gaming-PCB/293233443315, uses the same design concept as the audio.
That approach makes sense to me as it isolates the audio signal using transformers, but obviously not optimal or overkill?

Any reason the LPF is served by a 3$ switch vs. a pin header with jumper?

Also some feedback after a few days of usage - I find the Sullins edge connector from the DigiKey to be way to tight for a interchangeable living room game system.

Are there any alternative edge connectors with a loser fit that has a "traceable" origin?
Any reason NOT to source the chinese "ZJamma" connector and even the black one with all the Chinese writing (except for the quality feel of gold writing on black plastic :P).
 
Last edited:
Non polarised caps are used in the audio section which prevents any audio signal from ever being DC grounded. You can modify the design to utilise transformers if you don't mind increasing board size, cost and degrading audio quality.

Jamma edges are available from a variety of sources, use whatever you like. I'm just trying to simplify things by having all components available from a single supplier.

I can only do so much, the BOM provides a source for high quality, easy to access compatible components. There's literally hundreds of different substitutes that may be utilised for any given component. People may have a preference for brand of capacitor for example, if so, there's nothing stopping people from using them but it's unrealistic for me to list every brand of capacitor and supplier available. Likewise with jamma edges, find what works for you. The BOM isn't a rigid list of components that need to be followed, it's just one set of possibilities.
 
Hey there,

It's been some time since my last post about the case. It has taken some time to get the new revision but on friday it has finaly arrived.
The main issues I had was the missing space for the nut in the front. Two small cutouts solved that problem:
IMG_0681.jpg


As you can see I have also added extra support for the JAMMA Connector on the top and bottom plate and the JAMMA Connector can now been screwd in ;).

IMG_0683.jpg


I had to fix two little things in the design files but I feel confident to publish them.
I've tested the case with my 1.7 and 2.2 minigun and it works perfectly.

@Frank_fjs gave me measurements for the new switch in the 2.5 version, this has been added in the 2.5 case design.


I've put togethert the single case pieces as .dxf-files, the complete drawing as .pdf and for those who want to edit the case the .f3d-file for fusion360.

here is the hardware you‘ll need:

4x Standoff 30mm
2x Standoff 8mm
4x M3x6mm Screw
8x M3x8mm
2x M3x12mm
2x M3 Nut
4x Rubber feet

the case is designed for 3mm plexi, I used 49% translucent smokegrey.

Let me know what you think ;)
 

Attachments

  • IMG_0682.jpg
    IMG_0682.jpg
    752.4 KB · Views: 193
  • IMG_0684.jpg
    IMG_0684.jpg
    809.5 KB · Views: 182
  • MiniGun-Case.zip
    757.8 KB · Views: 192
Last edited:
Should fit, I wasn’t able to test it, but only the one button changed afaik
 
The design file is within the download, it's an EasyEDA file.
Thank you very much for your response, I am new to this, so I will review how to do it and see what changes I can make. for now add pin head, on the resistors where it gives the video signals, now it works in color without problem
Before
https://subefotos.com/ver/?8371bf5f908bb07d011e6a74d0fd9809o.jpg

After
https://subefotos.com/ver/?fe263e3749b5952e69eaee8d784e5452o.jpg

https://subefotos.com/ver/?fd032bd1e5b28ca7213d03c3de7001f4o.jpg
 
What is the connector needed for the video out from the mini gun? I thought it was some sort of standard RGB VGA connector but it's not. What kind of cables and connectors do I need?
 
8-pin mini din (XRGB pin out) to whatever your input is. It outputs combined sync so depending on your TV/Monitor/whatever, you'll need to split the sync into HV for VGA.
 
Back
Top