What's new

WTB Dreamcast to Blast city pad hack.

Want To Buy

Maruchan

Enthusiast
Joined
Nov 22, 2016
Messages
237
Reaction score
109
Location
Palm springs, California
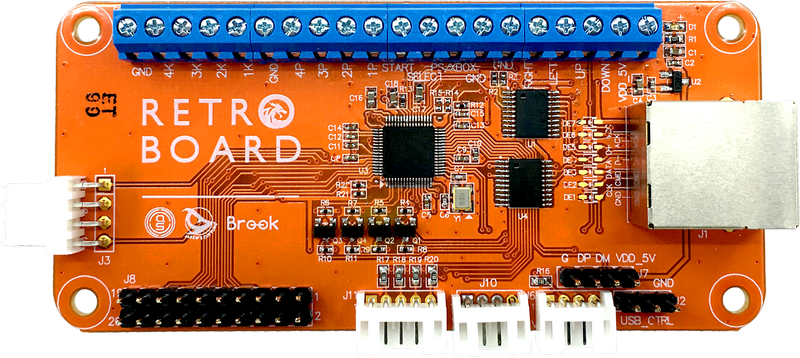
Hello fellow arcade enthusiast! I'm currently in search for a service/product that can do dreamcast to a blast city control panel.

Some things I'm looking for
  1. Would like it to be as plug-n-play as possible.
  2. Would also like for it to be as little plug and play as possible for example, having to plug in each button manually each time I happen to unplug the dreamcast and want to use a actual PCB.
  3. Not a deal breaker ,but would like for it to be in a case or concealed some how. The cleaner the better!
Feel free to PM me or comment below what you may have or point me in the right direction to someone who might be able to!
 
http://videogamekraken.com/mgcd-jamma-adapter-by-frolicker

http://hehehe.org/

Obscure and kinda hard to find one for sale .. but they exist. You can get the JAMMA harness your Blast and use it.
I have seen these around before, but it seems idk weird to me. It's weird because there are like different versions of it for the dreamcast. I seen one where it's the shell and you put the dreamcast in it and hook it up etc. .
Then I've also seen where its without the shell, but comes with some weird black box?
 
Well the Dreamcast has VGA and RCA stereo output options so at least audio and video are plug and play. Does the Blast have a service outlet in there for power? if so that give you power.

as for controls, I would think the cleanest option would be to either pad hack some controllers and wire it to a JAMMA fingerboard+ a NH connector for kick. for something more compact and less hacky you could get a fight stick PCB that supports Dreamcast like a Brook Retro Board (or something similar). and throw it all in a project box to keep it clean and easy to remove.
 
I you want 6 digital buttons be aware DC triggers are analogue. Many boards also are not common ground, which causes issues with the pad hacks.

I used to get MadCatz DC pads (6 digital buttons on the front) for my padhacks, but some of them are... very quirky.

TBH the best PCB I found for padhacking was unfortunately the one out of an agetek official DC arcade stick :/
 
There are a lot of ways to do it, some hackier than others, some more expensive.

We play CvS2 and MvC2 on a Dreamcast hooked up to a trisync monitor using the Brooker converters for fightsticks. Works great. If I wanted to move my Dreamcast into a cab I'd probably parallel wire up the cab controls to a PCB like a Brook UFB and plug that into the converter. Not the cheapest way to go, but reliable and clean.
 
Love yourself. Build a Brook Retro Board setup to Jamma fingerboard for players 1 and 2 w/ kick harness.

2 Brook Retro Boards (1 per player) https://arcadeshock.com/products/brook-retro-board
1 Jamma Fingerboard
2 Dreamcast control header cables https://console5.com/store/sega-dreamcast-joypad-controller-repair-cable-6-foot-1-8m.html
2 RJ45 jacks
Misc cabling

PLUS!!!
You can support more than just one console (as long as you crimp the required cables you need), and it'll be super clean.
You just need to crimp RJ45 to whatever console control cable the Brook supports.

That's how I got my Saturn, and NES controls to work flawlessly/lag free through my Blast City.
I recently streamed my Saturn playing through my Blast City on my Twitch this last Sunday.
All I have to plug into my cabinet is the Jamma 2 Scart (adapter I made), and wire the brook boards (on the adapter) to the console of choice.
The console either outputs via VGA or Scart to cabinet CRT.
Looks/feels good man.

This way, you're not effing up old dreamcast controllers that could potentially fail on you in the future with shit soldering/wear/and time.
These Brooks work flawlessly and cost the same as a controller would.
 
Last edited:
Love yourself. Build a Brook Retro Board setup to Jamma fingerboard for players 1 and 2 w/ kick harness.

2 Brook Retro Boards (1 per player) https://arcadeshock.com/products/brook-retro-board
1 Jamma Fingerboard
2 Dreamcast control header cables https://console5.com/store/sega-dreamcast-joypad-controller-repair-cable-6-foot-1-8m.html
2 RJ45 jacks
Misc cabling

PLUS!!!
You can support more than just one console (as long as you crimp the required cables you need), and it'll be super clean.
You just need to crimp RJ45 to whatever console control cable the Brook supports.

That's how I got my Saturn, and NES controls to work flawlessly/lag free through my Blast City.
I recently streamed my Saturn playing through my Blast City on my Twitch this last Sunday.
All I have to plug into my cabinet is the Jamma 2 Scart (adapter I made), and wire the brook boards (on the adapter) to the console of choice.
The console either outputs via VGA or Scart to cabinet CRT.
Looks/feels good man.

This way, you're not effing up old dreamcast controllers that could potentially fail on you in the future with shit soldering/wear/and time.
These Brooks work flawlessly and cost the same as a controller would.
Ok so I looked into this and seen a video about it or so. I can kinda see how this would work. But would you mind showing a lil more detail on perhaps how yours is setup?
 
Love yourself. Build a Brook Retro Board
Ok so I looked into this and seen a video about it or so. I can kinda see how this would work. But would you mind showing a lil more detail on perhaps how yours is setup?
I had a project discussion a while back while bodging a bunch of off the shelf components.
There's general pictures and understanding of how the brook is wired up.
If you look below, you can see how easy one of these is to wire up to a Jamma fingerboard.
Wire both board's directions (UDLR), first 4 buttons to the Jamma fingerboard, harness, and wire in a kick harness to buttons 3P, and 3K.
There's schematics to put it together.

Example... (REFERENCE THE BROOK CHART... EASY PEASY)
There's one pictured I did a while back. Don't mind the RGB amp, or any of that.
Just the brook to Jamma.
You can power the brooks from the Jamma too.
In that picture, I DON'T have a kick harness wired. It's wired for Saturn only.
Kicks wired on the brooks 1 2 3 4 which translate to Saturn's controller A B C and R.
You can pretty much wire the brook to how you see fit and it'll work with your Dreamcast.

Now, you'll need a set of cables compatible with your console.
The RJ45 to console connector wiring pinout is here.
Ahoy matey! Crimp Away!!!
http://filthypants.blogspot.com/2018/12/retro-console-rj45-pinouts-ps360-mc.html


The rest of my ramblings are here...
https://www.arcade-projects.com/forums/index.php?threads/wiring-a-sega-saturn-to-jamma.7538/page-2

index.php


RYU_FRONT_FN.png


Jamma_pinout.png

index.php
 
Last edited:
Love yourself. Build a Brook Retro Board
Ok so I looked into this and seen a video about it or so. I can kinda see how this would work. But would you mind showing a lil more detail on perhaps how yours is setup?
I had a project discussion a while back while bodging a bunch of off the shelf components.
There's general pictures and understanding of how the brook is wired up.
If you look below, you can see how easy one of these is to wire up to a Jamma fingerboard.
Wire both board's directions (UDLR), first 4 buttons to the Jamma fingerboard, harness, and wire in a kick harness to buttons 3P, and 3K.
There's schematics to put it together.

Example... (REFERENCE THE BROOK CHART... EASY PEASY)
There's one pictured I did a while back. Don't mind the RGB amp, or any of that.
Just the brook to Jamma.
You can power the brooks from the Jamma too.
In that picture, I DON'T have a kick harness wired. It's wired for Saturn only.
Kicks wired on the brooks 1 2 3 4 which translate to Saturn's controller A B C and R.
You can pretty much wire the brook to how you see fit and it'll work with your Dreamcast.

Now, you'll need a set of cables compatible with your console.
The RJ45 to console connector wiring pinout is here.
Ahoy matey! Crimp Away!!!
http://filthypants.blogspot.com/2018/12/retro-console-rj45-pinouts-ps360-mc.html


The rest of my ramblings are here...
https://www.arcade-projects.com/forums/index.php?threads/wiring-a-sega-saturn-to-jamma.7538/page-2

index.php


RYU_FRONT_FN.png


Jamma_pinout.png

index.php
Wow, bless your heart for giving me the info to do all this. It doesn't look hard at all,(thanks to your explanation) I might have to give this a try after I pick up a solder gun and the parts needed for this.

New to soldering as well, but I have seen tons and Tons of YouTube videos on how to. Doesnt seem hard. I was thinking of picking up any solder gun from my local home depot, unless you happen to have a suggestion for that as well? :D
 
Bit of a drive from Palm Springs, but if you get in a jam we can help you out. Honestly not a hard soldering job though.
 
Bit of a drive from Palm Springs, but if you get in a jam we can help you out. Honestly not a hard soldering job though.
You're in Torrance ? My homie Don has owns an arcade there! I go there from time to time. Usually go there if I'm buying something from him lol.
 
Why mess around with padhacks and soldering if you've never done it before?
Get a pair of Mc Cthulhu PCBs and Dreamcast RJ45 cables, done and done.

Bonus once the Cthulhu is in place you can support a metric TON of consoles...
9eTuTY4.jpg

534DFPE.jpg
 
Last edited by a moderator:
Why mess around with padhacks and soldering if you've never done it before?
Get a pair of Mc Cthulhu PCBs and Dreamcast RJ45 cables, done and done.

Bonus once the Cthulhu is in place you can support a metric TON of consoles...
The MC is a good alternative to the Brook Retro board, but he still needs to get it converted over to jamma and buttons.
That is IF he wants to build out the panel direct, yes the MC, the panel, buttons, would all do just fine.
(I see what you're spray'n, it's a good option)
Looks like they're BACK in stock at Paradise Arcade. (they never seem to have these whenever I check)
https://paradisearcadeshop.com/home.../1828_mc-cthulhu-multi-console-pcb-by-toodles

There's still soldering involved unless he gets something like a jamma edge with terminals.
OR...
RetroElekronik France offers these as a quick prototyping solution.
https://www.ebay.com/itm/Jamma-2-te...ma-vers-Borniers-Retroelectronik/293063860826

s-l1600.jpg
 
He might want to key it for JAMMA, but he don't NEED to... You can wire up the McC directly to the control panel/buttons/sticks.
whats the Benefit of the McCthulhu over the Brook Retro Board?
Cthulhu was first, Cthulhu works fine... We didn't need Brooks to create a "Retro Board" they are redundant, and in a highlander world we have no place for them. ;)

High Archery Score:
Who was first? Cthulhu 1/Brooks Retro 0
Who has perfect functionality? Cthulhu 1/Brooks Retro 1

Winner:
Cthulhu

It's just that simple in my world, if you're not first you better be doing something different/worthwhile/functionally superior.
NO COPY CATZ!
 
Last edited by a moderator:
The Brook Retro is more expensive, but it's a little more plug and play, especially if you're piggybacking with the Brook UFB, which is my stick building PCB of choice.
 
Back
Top