Thanks for the kind wordsYou have come a long way my young padawan. I'm proud.
You are using an out of date browser. It may not display this or other websites correctly.
You should upgrade or use an alternative browser.
You should upgrade or use an alternative browser.
- Thread starter hoagtech
- Start date
Moment of truth..
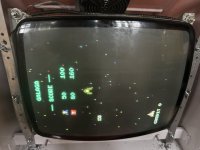
I plugged in my jamma and RGB connector to my cheapest JAMMA board: the MS Pac-man, Galaga, Donkey Kong bootleg..
I checked my voltages on my PSU rails and JAMMA edge before plugging in the RGBs connector.
YESSS.. Galaga displayed this image within seconds of warmup. I'm officially on JAMMA on a new PSU! Meanwell RT85A shoutout to @kikaso


The next step was to populate an @alberto1225 CP and connect to JAMMA.

I bought his Mortal Kombat Dinasaur King CP along with three others at a clearance discount. My JAMMA harness had the bigger connectors for Happ so it worked out to test it on an North American control panel.

I kept my joystick directions loosely tied until I could confirm the directions were per the instruction (Spoiler they weren't..)
I ordered a "mens restroom" 1P start concave button for my MK panel from ebay but it turns out he accidentally listed a 30MM..
I would love to locate a concave 24mm with the guy on it if you know of one..

I switched direction wires with the CP behind the cab until it was proper. Then I soldered and shrunk onto the JST connector on the Sanwa joystick JST harness.


I had to uninstall this plate blocking the CP wiring from the back

I was able to feed my CP its wiring and play my first game of Gradius 2

Next tasks are:
-Monitor adjustment and color calibration
-Speakers
-Coin, Service, Test
-Gutting and mounting
-Fuse above 120
This is a first for me. I feel like I can install JAMMA into my lawnmower now.
I plugged in my jamma and RGB connector to my cheapest JAMMA board: the MS Pac-man, Galaga, Donkey Kong bootleg..
I checked my voltages on my PSU rails and JAMMA edge before plugging in the RGBs connector.
YESSS.. Galaga displayed this image within seconds of warmup. I'm officially on JAMMA on a new PSU! Meanwell RT85A shoutout to @kikaso
The next step was to populate an @alberto1225 CP and connect to JAMMA.
I bought his Mortal Kombat Dinasaur King CP along with three others at a clearance discount. My JAMMA harness had the bigger connectors for Happ so it worked out to test it on an North American control panel.
I kept my joystick directions loosely tied until I could confirm the directions were per the instruction (Spoiler they weren't..)
I ordered a "mens restroom" 1P start concave button for my MK panel from ebay but it turns out he accidentally listed a 30MM..
I would love to locate a concave 24mm with the guy on it if you know of one..
I switched direction wires with the CP behind the cab until it was proper. Then I soldered and shrunk onto the JST connector on the Sanwa joystick JST harness.
I had to uninstall this plate blocking the CP wiring from the back
I was able to feed my CP its wiring and play my first game of Gradius 2
Next tasks are:
-Monitor adjustment and color calibration
-Speakers
-Coin, Service, Test
-Gutting and mounting
-Fuse above 120
This is a first for me. I feel like I can install JAMMA into my lawnmower now.
Attachments
Last edited:
SNK-NEO-GEO
Enlightened
Yes it is.. I love those little cabsDamn dude this is such an awesome project. Great progress!

The weekends over. Time to get a few tests squeezed in before the next 40.
I wanted to prep my kick harness. I got a CPS2 kick male from @ArcSys101 in his XMENvsSF kit.
While MK is not the best button placement for it. Im happy to prove the concept for my upcoming CP.
I want to do a Pocky Street fighter CP 6B panel. I figured all the ramen cues from the Sega Goldfish style could use a desert..

So I bought a Pocky pack I plan to scan into fruition.
I figured my "theory of relativity" could lead me to the proper 1P kick wires without too much troubleshooting. I compared the CPS2 Kick male on my Mini Cute Repro pins with my male. (somehow I was wrong again). I planned on it and loosely tied my wires until I could complete a test


I took the wiring out to my garage and precariously placed my CPS2 until I could boot SF2 and figure out my kick buttons.
After a proper button test I soldered and shrunk my harness, Tying my 2P and wires with many tiny zip ties. I bought a 1000 pack for $11 at Home Depot so I use them like crazy..


I couldn't fit the CPS2 and the kick without doing some gutting..
Here's the slog in the back and random hardware in the front:


I plan on keeping the original power block, Test Service panel, speaker, and yen mech

I'm getting closer by removing the motherboard off the wood panel, but I'll need to relocate the service panel if I want to front load PCB and not take the back off.
Here is my space issue demonstrated by CPS2

I felt lucky and connected my Speaker +- from my jamma to the speaker and was greeted with this!
View: https://youtube.com/shorts/LYXSzwohQBI?si=EnSIkaIECMiOmarE
That's all folks.
Many more things to fix next week amid the Aero's being finally powder coated.
I wanted to prep my kick harness. I got a CPS2 kick male from @ArcSys101 in his XMENvsSF kit.
While MK is not the best button placement for it. Im happy to prove the concept for my upcoming CP.
I want to do a Pocky Street fighter CP 6B panel. I figured all the ramen cues from the Sega Goldfish style could use a desert..
So I bought a Pocky pack I plan to scan into fruition.
I figured my "theory of relativity" could lead me to the proper 1P kick wires without too much troubleshooting. I compared the CPS2 Kick male on my Mini Cute Repro pins with my male. (somehow I was wrong again). I planned on it and loosely tied my wires until I could complete a test
I took the wiring out to my garage and precariously placed my CPS2 until I could boot SF2 and figure out my kick buttons.
After a proper button test I soldered and shrunk my harness, Tying my 2P and wires with many tiny zip ties. I bought a 1000 pack for $11 at Home Depot so I use them like crazy..
I couldn't fit the CPS2 and the kick without doing some gutting..
Here's the slog in the back and random hardware in the front:
I plan on keeping the original power block, Test Service panel, speaker, and yen mech
I'm getting closer by removing the motherboard off the wood panel, but I'll need to relocate the service panel if I want to front load PCB and not take the back off.
Here is my space issue demonstrated by CPS2
I felt lucky and connected my Speaker +- from my jamma to the speaker and was greeted with this!
That's all folks.
Many more things to fix next week amid the Aero's being finally powder coated.
I want to do a Pocky Street fighter CP 6B panel. I figured all the ramen cues from the Sega Goldfish style could use a desert..

I knew ive seen that Astro before.
Id like to see what you do for the panel.
https://twitter.com/kedamarimo/status/1603942873678106624?s=20&t=hCLwb9tXpzYuKkO0C1uaoA
My friend and excoworker Cynthia chen makes some asian snack rugs and made a Pocky one that is pretty sweetI knew ive seen that Astro before.
Id like to see what you do for the panel.
https://twitter.com/kedamarimo/status/1603942873678106624?s=20&t=hCLwb9tXpzYuKkO0C1uaoA
This afternoon I had a couple hours to tune in my monitor.
There was a lot to be desired. The tube was vibrant but yellow, off center, a little blurry and had off color black detail and greyscale.

The access panel is riveted on the top, blocking my neck PCB on my monitor.
I had to disassemble the monitor mount again and placed the monitor on the floor to make all my adjustments. (I may drill through the rivets and replace with bolts and thumbscrews)
I started by centering the image with on the HPOS Pot. The CPS2 displayed far to the left before and unfortunately turning the pot all the way did not move the image far enough.
TIme to use one of my Axunworks RGB HV adjust boards to and finished centering my image. I forgot all about the RGB gain function. Ill have to come back next time and use that feature.
https://www.arcade-projects.com/threads/axun-workshop-rgb-adjust-pcb.17094/

Horizontal, Vertical size and position worked great after that.
Next was color balance, Black detail, and greyscale. I have had limited success in this department on my RGB monitors for my consoles but something clicked when watching @BuddyC 's Worked on lots o cabs thread and noticed an even color pluge on his cabs he worked on.
I used to eyeball SMPTE and was always way off. I watched a few youtube videos and was ready to roll! The key points of info I took away was to expect a balance between your variables as adjusting one effects the other.
I started by bringing up my color pluge. I adjusted the FOCUS knob first to get razor sharp detail. (No blur anywhere even the corners) Then SCREEN until the color bars were in a range to show black level and white level.
The colors were all over the place. Blue was low, green was screaming high.
balancing the color bars required using my RGB gain pots on the neckboard.
The black detail and greyscale were calibrated by turning the SCREEN pot UP till my blacks were polluted to bring out any colors that needed to CUTOFF.
I balanced my black until it looked pretty black with a blown out image
When I brought my SCREEN back down to jet black I was so excited, I wanted to do a cartwheel. It was even, juicy, vibrant, and perfectly balanced.


Pics don't do it justice. The colors cut into your eyeballs in contrast to the jet blacks beside them..
I used the shape grab feature on my iphone and it found RYU.


This is another first for me and I'm looking forward to balancing my other monitors in my cabs.

There was a lot to be desired. The tube was vibrant but yellow, off center, a little blurry and had off color black detail and greyscale.
The access panel is riveted on the top, blocking my neck PCB on my monitor.
I had to disassemble the monitor mount again and placed the monitor on the floor to make all my adjustments. (I may drill through the rivets and replace with bolts and thumbscrews)
I started by centering the image with on the HPOS Pot. The CPS2 displayed far to the left before and unfortunately turning the pot all the way did not move the image far enough.
TIme to use one of my Axunworks RGB HV adjust boards to and finished centering my image. I forgot all about the RGB gain function. Ill have to come back next time and use that feature.
https://www.arcade-projects.com/threads/axun-workshop-rgb-adjust-pcb.17094/
Horizontal, Vertical size and position worked great after that.
Next was color balance, Black detail, and greyscale. I have had limited success in this department on my RGB monitors for my consoles but something clicked when watching @BuddyC 's Worked on lots o cabs thread and noticed an even color pluge on his cabs he worked on.
I used to eyeball SMPTE and was always way off. I watched a few youtube videos and was ready to roll! The key points of info I took away was to expect a balance between your variables as adjusting one effects the other.
I started by bringing up my color pluge. I adjusted the FOCUS knob first to get razor sharp detail. (No blur anywhere even the corners) Then SCREEN until the color bars were in a range to show black level and white level.
The colors were all over the place. Blue was low, green was screaming high.
balancing the color bars required using my RGB gain pots on the neckboard.
The black detail and greyscale were calibrated by turning the SCREEN pot UP till my blacks were polluted to bring out any colors that needed to CUTOFF.
I balanced my black until it looked pretty black with a blown out image
When I brought my SCREEN back down to jet black I was so excited, I wanted to do a cartwheel. It was even, juicy, vibrant, and perfectly balanced.
Pics don't do it justice. The colors cut into your eyeballs in contrast to the jet blacks beside them..
I used the shape grab feature on my iphone and it found RYU.
This is another first for me and I'm looking forward to balancing my other monitors in my cabs.
Back to it!
My Aero is finally done at the PC as of late friday.
They ran out of chrome PC and got a new SKU of it. They told me it looks way better than the last stuff and got me excited. Back to the Aero's on Monday
I decided to stop at my storage lockers to grab some pink foam boxes, a donor tube for the Goldfish, and say hi to my next projects..

I decided to grab my Symphonic 13" CRT for tube swap as I heard "The cheaper the better compatibility". I left the Panasonic behind.

Next was a trip to my workplace on a Saturday to grab my L-pad for Goldfish JAMMA volume control.
Little definitive wiring knowledge was found with my googling so I decided to test my "theory of relativity" and copy @hursit Repro L-pad work and follow it to the Jamma Harness..
Here is the one I used and they have stock currently:
https://www.ebay.com/itm/165449946020

A rough sketch was made and brought into the garage.

I needed F-connectors so I made a trip to the hardware store. After wiring according to my sketch I was hopeful for the volume control test..

View: https://youtube.com/watch?v=XTB9tKrZR8g&si=EnSIkaIECMiOmarE
Lucky me! lol.. I got full volume control and shut off. This volume control is sweet but later on I need to decide a crafty place to install it. No more finding a plastic Philips like a sucker and finding the PCB pot on each PCB.
Next step was tapping into the power block. I had a river of wires going from my Iso to my monitor and the same on PSU. I wanted to use the OG 120V plugin, fuse, and noise filter for JAMMA PSU.
Lets check out the Aero City manual to see how the had their 120 wired. Weird the monitor AC plug is before the switch?? Why would you want your monitor BEFORE your power switch?

I decided against it and wired the ISO and monitor after the switch and before the noise filter.
The JAMMA PSU 120 was wired after the noise filter per diagram.

I got to clean up my workspace. I haven't been able to do so since I first started repair.. Close the back and plug it in.. *Ahhhh
I plan on wiring a multi pin connector for the CP and 1P start buttons so I can detach it from JAMMA when I take the front off.
I would love to hear what 9 pin and 3 pin connectors you use for female and male CP connections? and either a 3 wire or 2 wire start button connector.
What do you guys use for a single wire connector and quick disconnect? I would love to add one to the ground wire as well. My hardware store was out of Dupont and didn't have good options

My Aero is finally done at the PC as of late friday.
They ran out of chrome PC and got a new SKU of it. They told me it looks way better than the last stuff and got me excited. Back to the Aero's on Monday
I decided to stop at my storage lockers to grab some pink foam boxes, a donor tube for the Goldfish, and say hi to my next projects..
I decided to grab my Symphonic 13" CRT for tube swap as I heard "The cheaper the better compatibility". I left the Panasonic behind.
Next was a trip to my workplace on a Saturday to grab my L-pad for Goldfish JAMMA volume control.
Little definitive wiring knowledge was found with my googling so I decided to test my "theory of relativity" and copy @hursit Repro L-pad work and follow it to the Jamma Harness..
Here is the one I used and they have stock currently:
https://www.ebay.com/itm/165449946020
A rough sketch was made and brought into the garage.
I needed F-connectors so I made a trip to the hardware store. After wiring according to my sketch I was hopeful for the volume control test..
Lucky me! lol.. I got full volume control and shut off. This volume control is sweet but later on I need to decide a crafty place to install it. No more finding a plastic Philips like a sucker and finding the PCB pot on each PCB.
Next step was tapping into the power block. I had a river of wires going from my Iso to my monitor and the same on PSU. I wanted to use the OG 120V plugin, fuse, and noise filter for JAMMA PSU.
Lets check out the Aero City manual to see how the had their 120 wired. Weird the monitor AC plug is before the switch?? Why would you want your monitor BEFORE your power switch?
I decided against it and wired the ISO and monitor after the switch and before the noise filter.
The JAMMA PSU 120 was wired after the noise filter per diagram.
I got to clean up my workspace. I haven't been able to do so since I first started repair.. Close the back and plug it in.. *Ahhhh
I plan on wiring a multi pin connector for the CP and 1P start buttons so I can detach it from JAMMA when I take the front off.
I would love to hear what 9 pin and 3 pin connectors you use for female and male CP connections? and either a 3 wire or 2 wire start button connector.
What do you guys use for a single wire connector and quick disconnect? I would love to add one to the ground wire as well. My hardware store was out of Dupont and didn't have good options
Lets check out the Aero City manual to see how the had their 120 wired. Weird the monitor AC plug is before the switch?? Why would you want your monitor BEFORE your power switch?
It's not the monitor AC plug. It's the AC outlet at the back that you can use to daisy chain multiple cabs. So when you turn off a cab, you don't turn off everything else downstream.
One Sega at a time here#freetheaeros
I went to do a tube drop today so I measured resistance.


Funai:
14.3 ohms
3.8 ohms
Sharp Image arcade tube:
44 ohms!
3.0 ohms
That’s not even close.
Should I attempt a yoke swap or try the other 2 13” I have?
The horizontal resistance seems very high on the arcade yoke to me..
Edit: Paging the Lords of Tooob
@nem, @SNK-NEO-GEO , @RealMFnG , @Rg111 @rewrite
Last edited:
SNK-NEO-GEO
Enlightened
I would suggest to try your local waste management and see if you can find other CRT.. used the yoke swap as a last resort.
Thanks @nem.I don't think you'll find a compatible, high impedance vertical yoke like that on a consumer TV.
Maybe a computer monitor?
Are the neck connectors the same on the two tubes?
I forgot to check the tubular index. I agree that impedance is high on the Sharp Image
Here's my models:
It looks like they are both CR-31
I couldn't find my Sharp Image Samsung model, but I believe its the same series. My model is SAMSUNG A34KQV42X01 and the Tubular database only had info on SAMSUNG A34KQV42X. Im guessing the last two numbers are the same model but different series.
FUNAI:
Arcade SAMSUNG
Its looking more likely I will have to do a Yoke Swap, Purity, convergence strips. Oof. Its not in my skillset yet..
Any pro tips on Yoke swap or things toob noobs should avoid?
My new plan is to grab every 13" set available. I have access to around 8 of them, hope and pray for a high impendence consumer and get the one with the best image and convergence for a yoke swap.
I also have these 13" XGA PC monitors I found locally for $100 a pop. The Gateway 2000 Crystalscan 1024 NI
I only wanted one for a Naomi tube for the Goldfish but the seller wanted to sell both so he cut the price in half
Ill check the impedance on it JIC but my hopes are not high on the neck connector being a CR-31
SNK-NEO-GEO
Enlightened
On the yoke swap, practice removing the rings and yoke on the TV first. Once you do the swap it will take a bit of work to get the yoke on the G spot and to get the colors looking acceptable to your eyes..
The Goldfish had me waiting on parts so SWITCH back to my "parts Aero"
I got most of my powder coated parts back so I decided to reasemble the topper
My gawd.. The black turned out incredible..

It was a B installing them because the powder coaters coated the screw posts again. I don't blame them though.. Their rates are low and their finish is great.
Here is the order of install if you don’t want to waste time.
TOPPER GRAPHIC > SPEAKER GRILLS > SPEAKERS > FLUORESCENT LIGHT > TOPPER
I wasted a bit of time reinstalling them.

A new light and ignitor was needed

After the topper was assembled I noticed the screwtops were rattle canned white as well.
I ran out of ISO so "White lightning" moonshine to the rescue..


A few hours and scrubbing later I had a complete topper

The topper looked so nice..
I got most of my powder coated parts back so I decided to reasemble the topper
My gawd.. The black turned out incredible..
It was a B installing them because the powder coaters coated the screw posts again. I don't blame them though.. Their rates are low and their finish is great.
Here is the order of install if you don’t want to waste time.
TOPPER GRAPHIC > SPEAKER GRILLS > SPEAKERS > FLUORESCENT LIGHT > TOPPER
I wasted a bit of time reinstalling them.
A new light and ignitor was needed
After the topper was assembled I noticed the screwtops were rattle canned white as well.
I ran out of ISO so "White lightning" moonshine to the rescue..
A few hours and scrubbing later I had a complete topper
The topper looked so nice..
Last edited:
