First off, generally speaking, there's certainly more than one procedure for adjusting a monitor. No matter how you do it, the idea is that you have a target goal in mind, and you adjust each component (RGB drive, RGB cutoff, brightness, contrast) repeatedly until you've homed in on your target. Adjusting one component shifts another, so each component is usually adjusted more than once. You use a pattern generator of some kind to display a steady pattern on the screen, and you use a measurement device to determine both what component to adjust next and whether the target has been reached.
For most reasonable folks, the Target, Signal Generator, and Measurement Device are:
Target: "Looks pretty good to me"
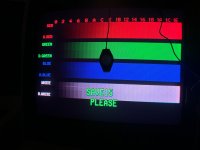
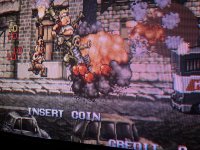
Signal Generator: Test patterns from a favorite game PCB
Measurement Device: eyeballs
For OCD weirdos like me, the Target, Signal Generator and Measurement Device are:
Target: neutral white balance at 6500 kelvin color temperature, and a maximum brightness between 30 and 40 ftL (30 for dark room use, 40 for bright room use)
Signal Generator: 240p Test Suite from a high-color console or PGenerator running on a Raspberry Pi
Measurement Device: X-Rite I1 Display Pro or Datacolor Spyder 4 colorimeter
With that in mind, let's look over the procedure in the MS9 Service Manual. There seems to be multiple manuals out there - the one I found seems to have slightly different instructions than the screenshot you posted. If you have a link to yours please share it. Here's a link to mine:
https://wiki.arcadeotaku.com/images/3/34/MS-2931_Service-manual_full.pdf
First off, Page 47-49 of the manual lists the tools they want you to use - a Sega Model 3 arcade board set to 31hz resolution for the test pattern generator and a brightness meter for the measurement device. A modern colorimeter acts as a brightness meter in addition to reading the specific R, G, and B values. No target is specified in the Service Manual from what I can see, but from context it looks like the target is a neutral white balance.
Given that a brightness meter doesn't measure individual R, G, and B values and that the Drive and Cutoff adjustments are made to match only white balance targets, following the procedure in the service manual will give you a good white balance result (the darkest darks and lightest lights will consistently match across monitors) but an inconsistent color temperature (color tones will vary across monitors).
That doesn't surprise me given that the tools for professional grade monitor calibration were very expensive back in the 90s when the Nanao monitors were being manufactured, and arcade operators didn't care about color accuracy as much as photographers and video producers (Sony PVM & BVM customers) did back then either.
TL;DR - my procedure will give your a more accurate and consistent outcome then following the procedure in the service manual.
")
") "It's close enough" pffft. I wish there was a remote board for all the geometry pots! EDIT, think I just talked myself into soldering some long leads w/ pots to the chassis....hmmm.
"It's close enough" pffft. I wish there was a remote board for all the geometry pots! EDIT, think I just talked myself into soldering some long leads w/ pots to the chassis....hmmm.