What's new
The BIOS reflash process is well documented. It's how we used to mod Xbox consoles to run backups back in the day. There's an exploit with a couple of games that you can use by loading a prepared save game and then running the reflash program. It requires one of the exploitable games and a USB controller port adapter so you can plug in a flash drive with the game save exploit.

Alternatively you can solder the program header for the bios to install a mod chip with an alternative bios.

Once either one of these things are done you can run a backup disc with a reflasher routine to reflash the bios. (I suppose you could also load your desired bios on the modchip and just run that too).

I'm not familiar with re-flashing the other chip though.
 
Not all stock biosses work when the ram has been upgraded. So you basically need to flash a bios you know that works before the upgrade.
If you have a modchip, the reflashing tools will reflash your modchip and not your on board tsop flash. There are some that can be used to flash the onboard tsop flash, but the procedure is not well documented and is usually only used as a rescue method when the tsop flash contents are corrupt.
You can find different brand of tsop flash chips on the xbox motherboards. Some of the flash tools can't reprogram all types.

I am unsure if a modchip can be used in a chihiro. The dimm board is interfaced to the LPC bus and so is the modchip. As microsoft removed the lframe signal from the motherboards on it's 1.3 revision, most modchips generate their own to indicate the start of an LPC sequence. They likely don't expect any other devices on the bus (like the dimm board) and won't work well together with one.

It's known that the serial debug port that also interfaces with the LPC bus has issues with most modchips. (Which is why I think the dimm will have issues as well.)

ConfigMagic is a tool that can read / write the xbox eeprom. Some softmods create a virtual eeprom that is basically a file on the harddrive. This protects the real eeprom contents as corrupting those can result in the system not booting. If you have it you will need to disable it first.

If something is wrong with a chihiro, it just results in a black screen. Pretty much any problem results in that same behavour. The few exceptions cause it to frag which isn't very helpfull either.
 
I am unsure if a modchip can be used in a chihiro. The dimm board is interfaced to the LPC bus and so is the modchip
Good to know.


ConfigMagic is a tool that can read / write the xbox eeprom.
Ah, yes I remember using this back in the day to backup my EEPROM in the event that it got corrupted or erased.

It'd be nice if someone put together a disc with a simple Evo-X menu for performing the bios and EEPROM reflash, and RAM check. that would greatly simplify all of this outisde of soldering the RAM.
 
Last edited:
  • Like
Reactions: nem
@obcd configmagic is actually broken and will "brick" eeproms (has an issue with checksums), the reason you don't notice this is because the scene kernels don't care about broken eeprom and softmods use a shadow eeprom, it also does not fully overwrite the eeprom when you select "copy from bin". Also RE: modchip - I wonder if xbox7887's modified OpenXenium would work, he has a fork which allowed for superio to work along side Xenium.

I actually created a tool to read & replace eeproms in NXDK just recently but I don't feel comfortable posting here, DM me on Discord and I'll share a link.
 
So what would be known to work procedure to update a valid xbox into a Chihiro mobo?
 
Softmod using any number of methods (personally I hotswap the IDE but this is dangerous), enable the flash points on the motherboard (requires 2 points on the board to be bridged), flash using XBlast OS XBE or Xromwell to a 128MB compatible kernel (XBlast OS is actually a kernel as well which supports it and allows for "testing"), solder on new RAM chips to make 128MB, "test" using XBlast, then when everything is working reflash the kernel to what is in OP.

As for eeprom which seems to be required you have a couple options, you could flash externally with a rPi using something like this or before flashing the kernel to test 128MB you could use a Xbox based tool (avoid configmagic) to replace the eeprom from software.

@twistedsymphony , it turns out that XKUtils the base all the scene tools used is broken, it improperly computes the checksums. I also don't know that EvoX allows you to edit the entire eeprom, the change required is more than just specific information, you're changing the signing on the eeprom to be a Debug eeprom (like a normal Chihiro). It's quite trivial to create a NXDK based program to replace the entire eeprom with a specific file but again I don't really want to post it here - see here for nxdk and maybe one of you guys can figure it out, you're all a smart lot :P. (again obcd please DM me and we'll chat more about the program I made)
 
Thanks whatnot.

Am I correct in that if we were to use a simple gamesave exploit the procedure would look like this:

1. prepare a thumb drive with save game exploits (someone could create a ready to go image for this) and prepare a CDR with necessary tools (someone could create a ready to go image for this)

2. Open your Xbox and solder the 2 points that enable BIOS Reflashing, then re-assemble.

3. On your donor xbox plug in a controller and plug a USB adapter with your thumb drive into one of the other controller ports. Also make sure Audio output from the xbox is hooked up and working (you need this)

4. load an exploitable game and access the save file. Listen for audio cues then swap out the game disc for your tools disc

5. use the tools to flash the bios with a new bios that works with RAM upgrade and does not need exploits to run CDR

6. turn off Xbox, remove mobo, install 1 RAM Module

7. re-assemble Xbox, boot to tools disc and run ram test.

8. Repeat steps 6 and 7 until all ram modules are installed and verify good.

9. run Chihiro BIOS flash and Chihiro EEPROM flash from tools disc

10. install mobo in your Chihiro


What we still need to make this happen:
1. someone to build a proper/functioning EEPROM reflash tool.
2. someone to put together a CD image with BIOS, EEPROM and RAM tools as well as appropriate BIOS and EEPROM files.
 
Wouldnt the Hexen 2018 disc have the tools you need on it? There is also some other discs such as Rocky5 and auto installer deluxe
 
make sure the target board works properly before you bother adding ram or flashing the bios.
most need new caps by now.

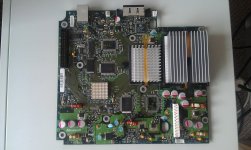
this is one of mine - i dont intend to have to do it again!!! :D
 

Attachments

  • xxxbox1.0.jpg
    xxxbox1.0.jpg
    942.7 KB · Views: 127
A couple chihiro games work on a 128MB upgraded xbox. They had the gamepad support left into the game. You need a special launcher to run them and you need the cpu cache enabled for the upper 64MB. JayFoxRox made a launcher for those. Some things like gun calibration are not possible as those are stored in a memory chip on the base board and the xbox isn't having it.
This method converts a retail xbox motherboard into a chihiro motherboard. chihiro also needs the base board and the dimm board to operate properly. You also need the filter board with the connections. Next you need a JVS IO for your controls.
So this doesn't turn your xbox in to a chihiro.
for the gun calibration, run from test executable (vc3_t.xbe), is it possible to dump this memory chip and patch the path to XBOX's HDD, for controler for other game a JVS Emulator maybe?
Great info @obcd

Did you ever see this conversion made before?
Note that xbox crystal dev kit and XBOX green debug have same mobo than Chihiro, and you can load the segaboot (chihiro bios?) via a bios loader (volatile)
but black screen sure missing hardware.

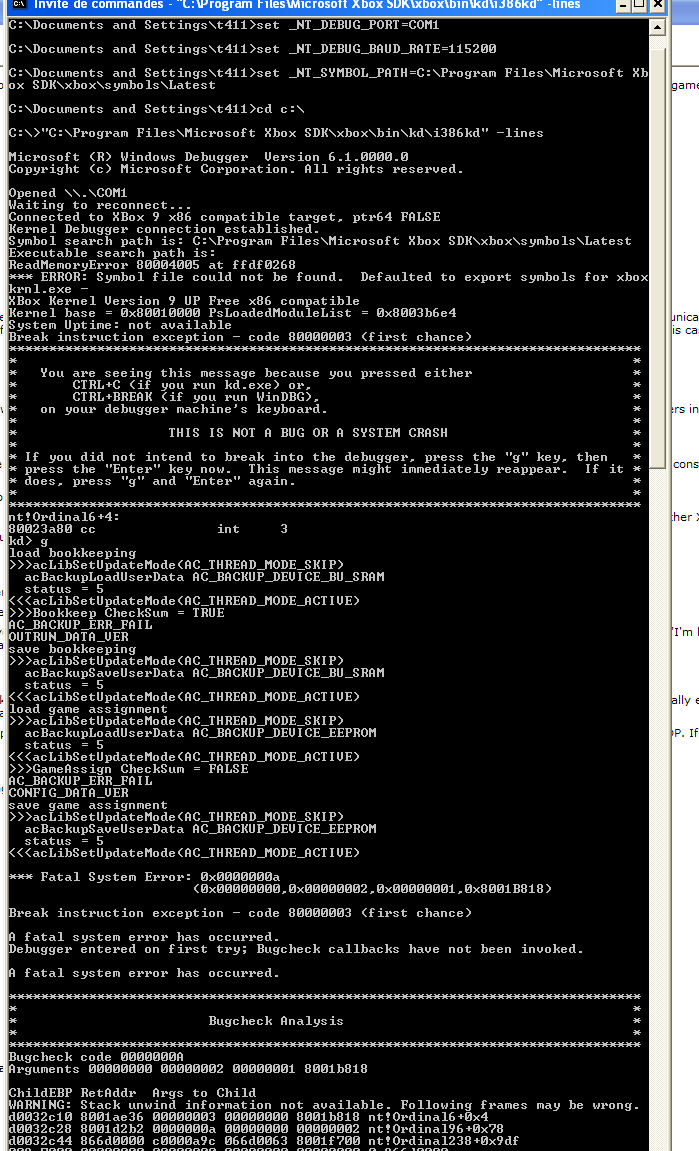
I try to debug (kernel debug) Outrun 2 Chihiro on my xbox debug kit:

kd_xbo10.png
 
segaboot.xbe isn't the bios. It's the dashboard that generates the image with the chihiro logo you see when the chihiro boots up. It also contains the main test routines you see after you pressed the test button. The gun calibration memory chip is connected to one of the baseboard controllers. It's read and written with some usb commands over the gamepad 3 and 4 ports. The usb io libraries are part of the game code. They are not part of the kernel.
 
is the arcade bios really doubled-up?
because if it's really only 256k it opens up the useable boards greatly.
 
It's 512KB * 2 to make 1MB, you could split in half but you'd still need 512K, there are ways to make this smaller but it seems that irepairsega doesn't know how even though he likely has stolen source code. ;)
 
well unless you use a modchip to connect the bios via the LPC bus, only xbox 1.0 and 1.1 have the space/pads for a 512/1m flash.
the newer boards only support 256meg - you cant upgrade that even if you buy a new chip because the package is larger.
 
The original chihiro bios is 256KB * 2 Haven't checked this one. Just split it in 4 sections of 256KB and see if they are identical.
The fact a chihiro doesn't has embedded flubber animation largely reduces it's size compared to a retail bios.
 
well unless you use a modchip to connect the bios via the LPC bus, only xbox 1.0 and 1.1 have the space/pads for a 512/1m flash.
the newer boards only support 256meg - you cant upgrade that even if you buy a new chip because the package is larger.
Modchip might not actually be out of the question, a user in a Xbox Development community recently was able to get modchips and SuperIO working at the same time, it's likely the changes he did are the same which would allow Chihiro hardware to work with modchips as well. Just takes someone trying.
 
This would only allow to use 1.2 boards as well.
1.3 has the missing lframe and connecting it directly to the mcpx chip is very tricky.
1.4 has a different video encoder (focus instead of conexant)

The replacement bios posted here has bank 0 and bank 1 that are identical and bank 2 and 3 that are identical.
A bios in a 1M flashchip only uses bank 0 and bank 3. So as those are different, you need at least a 512KB flashchip.
 
Connecting LFRAME from MCPX is a lot less tricky than soldering down the RAM (imo) even I was able to do it.
 
I know you did it but I can't remember seeing it working.
 
Back
Top