What's new

Robertguy09

Professional
Joined
Nov 5, 2021
Messages
278
Reaction score
452
Location
Texas, USA
Hi everyone!

Can someone tell me what size screws are needed to mount the chassis remote board on a New Astro City? Mine came with out it and I can't find anything online.
Also if someone could share a pic too that would be great!

So far I've tried some m2, m2.5 and m3 that I had laying around, but no luck.

Thanks!
Robert

PXL_20230102_223414919.jpg
 
If I were to guess I’d say M4, but I would just buy a small quantity of each metric size up a few sizes from what you tried and see what works. Then you’ve got some on hand for the next thing missing screws
 
I should add m2 was too small and m2.5 was too big. Not sure if someone messed up the threads in the past or what.
 
Hi there!

I looked at the New Astro City manual for ya and on page 28, there’s a diagram called “INSTALLATION OF ADJUSTMENT BD.” And from there, I see the following parts referenced:
  • 101 x2
  • 102 x1
  • 201 x1
  • 206 x2
You can then find the parts for the spacers and screws listed on the next page. Just FYI because I just tried to find replacement screws for my non-New Astro City as well — I believe “M SCR PH” means pan head machine screw and “TAP SCR” means self-tapping screw.

Here’s a link to the manual: https://wiki.arcadeotaku.com/images/9/96/Sega_New_Astro_City_Manual.pdf

Hope that helps!
Aaahhh it's self tapping screws!! Thanks that does help!
 
Sorry to hear that you're having trouble finding the right screws to mount your chassis remote board on your New Astro City. Based on your description, it sounds like you've already tried a few different sizes with no luck.
I figured it out after poppy pointed out it needed m3 self tapping screws. I was trying machine... In retrospect, I'm not sure why I thought it would use machine screws 😂
 
Hi Robert,

Could you share the file for 3D printing the spacers?

Thank you!
 
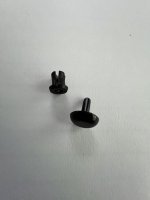
My Egret II had these HORRIBLE plastic things that go in the hole, then a pin get's pushed into the middle to space it out. Fucking horrible to get out, but worse to get back in. I used zip ties to reattach.

IMG_5791.jpeg
 
Here you go. The original metal spacer has an inner diameter of 3mm, an outer diameter of 6mm, and it's 12.6mm long. This 3D printed is slightly bigger (but not longer), so that it's more printer friendly.
 

Attachments

  • astro_city_monitor_remote_spacer.zip
    2.8 KB · Views: 59
Beautiful. Thank you. I noticed there is one in the middle as well. Is it the same size? It looks longer. If you know the length I can make it. Or maybe you have a file for it as well. Thank you so much!
 
Sure. See attachment.

The original screw is M3, 12mm long.
 

Attachments

  • astro_city_monitor_remote_center_leg.zip
    2.4 KB · Views: 52
Back
Top