Hi guys,
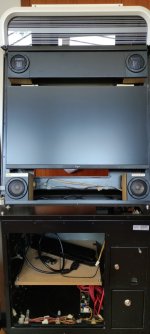
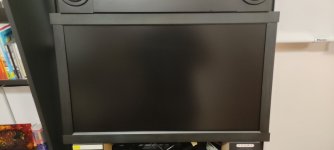
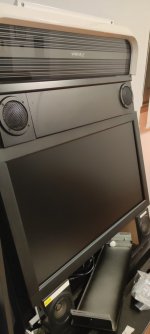
This is my first thread in arcadeprojects,I´ve looked up here for many useful information so I´d like to share how I did the Vewlix stock monitor replacement in my recently acquired Vewlix L for anyone interested in,hope this helps.
I´ve done a lot of research to get ideas on how replace it on internet,including the UMB VESA 100X100 at Hadouken Arcade option,but well...it is not precisely cheap and also I live in Europe,so it wasn't an option since the beginning,the info on the net is also unclear so instead I did some inverse engineering doing tests and measurements and with patience is finally done!
MATERIAL:
1x Monitor --> https://iiyama.com/gl_en/products/g-master-gb3271qsu-b1/
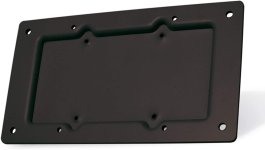
1x VESA 100x100 adapter: https://www.amazon.es/dp/B0026UVVPK?psc=1&ref=ppx_yo2ov_dt_b_product_details
2x VESA 50x50 to 200x200 adapter: https://www.amazon.es/dp/B008KL72F2?psc=1&ref=ppx_yo2ov_dt_b_product_details
4x M8x30 Hexagonal nuts: https://www.amazon.es/dp/B086JN4VSQ?ref=ppx_yo2ov_dt_b_product_details&th=1
4x M8x70 Allen screws
4x M8 Wing nuts
4x VESA regular screws
4 x VESA 4x50 screws
STEPS:
The VESA 100x100 hump format is key on this project,it provides an empty space to drill two kind of VESA screws.

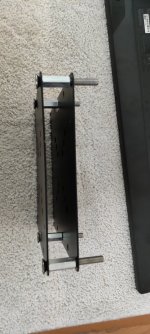
This image is just for reference about how the Allen screws position:

I did two additional holes (the original has not) in the two big VESA plates to fit the measures (200x200&100x100) in the existant cabinet holes and created a 2x VESA mount squeezing the screws and hexagonal nuts firmly,as you see the mount has the same measures as the hump in the stock monitor:


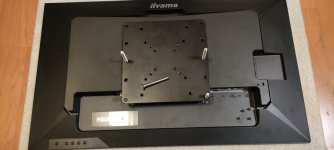
It is set in the cabinet using the two existent holes (just for position reference):

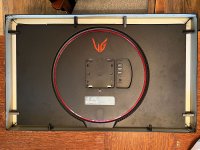
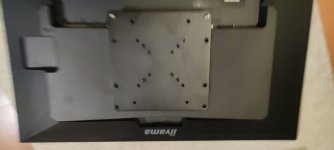
I set it in the monitor with the 4x VESA additional screws in the 75x75 holes: (Take care setting up the small screws to avoid damage in the plastic monitor!)

This is my first thread in arcadeprojects,I´ve looked up here for many useful information so I´d like to share how I did the Vewlix stock monitor replacement in my recently acquired Vewlix L for anyone interested in,hope this helps.
I´ve done a lot of research to get ideas on how replace it on internet,including the UMB VESA 100X100 at Hadouken Arcade option,but well...it is not precisely cheap and also I live in Europe,so it wasn't an option since the beginning,the info on the net is also unclear so instead I did some inverse engineering doing tests and measurements and with patience is finally done!
MATERIAL:
1x Monitor --> https://iiyama.com/gl_en/products/g-master-gb3271qsu-b1/
1x VESA 100x100 adapter: https://www.amazon.es/dp/B0026UVVPK?psc=1&ref=ppx_yo2ov_dt_b_product_details
2x VESA 50x50 to 200x200 adapter: https://www.amazon.es/dp/B008KL72F2?psc=1&ref=ppx_yo2ov_dt_b_product_details
4x M8x30 Hexagonal nuts: https://www.amazon.es/dp/B086JN4VSQ?ref=ppx_yo2ov_dt_b_product_details&th=1
4x M8x70 Allen screws
4x M8 Wing nuts
4x VESA regular screws
4 x VESA 4x50 screws
STEPS:
The VESA 100x100 hump format is key on this project,it provides an empty space to drill two kind of VESA screws.
This image is just for reference about how the Allen screws position:
I did two additional holes (the original has not) in the two big VESA plates to fit the measures (200x200&100x100) in the existant cabinet holes and created a 2x VESA mount squeezing the screws and hexagonal nuts firmly,as you see the mount has the same measures as the hump in the stock monitor:
It is set in the cabinet using the two existent holes (just for position reference):
I set it in the monitor with the 4x VESA additional screws in the 75x75 holes: (Take care setting up the small screws to avoid damage in the plastic monitor!)
Attachments
Last edited:

 )
)