What's new

yavuzg

Professional
Joined
Aug 25, 2015
Messages
316
Reaction score
419
Location
Turkey
I know there are various scattered tutorials and videos scattered around the internet regarding this subject. I recently needed to install this switch in my Neo Geo cabinet and I wanted to put every mod in writing while I'm doing this so that anyone can benefit as a single point of reference.

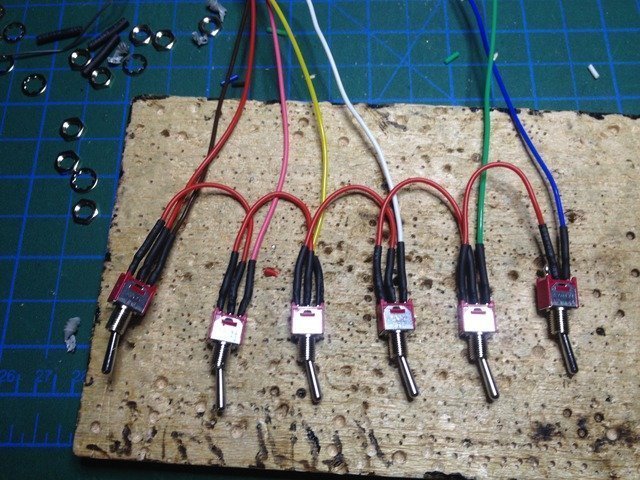
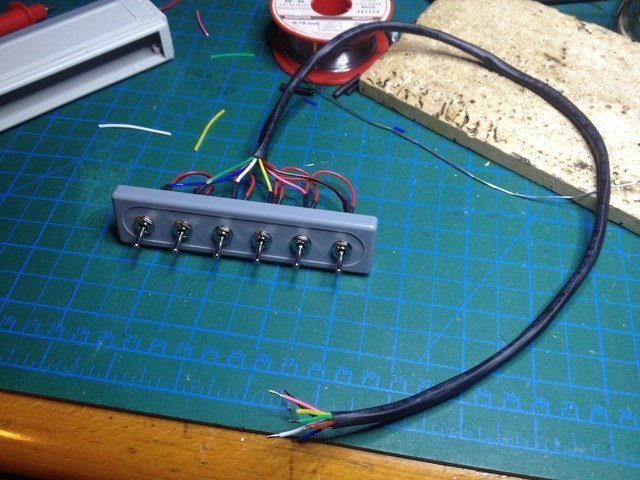
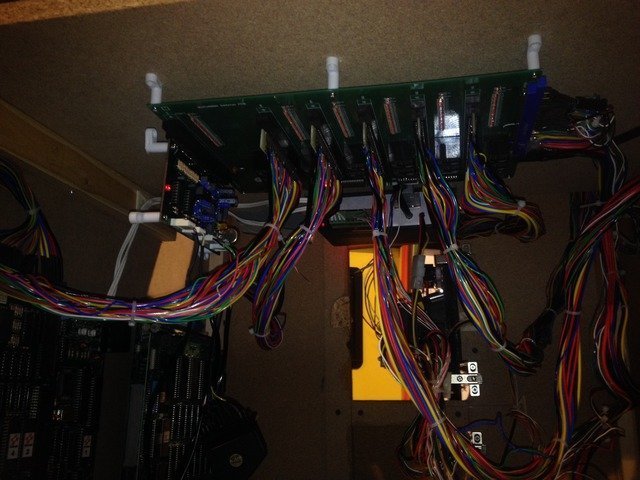
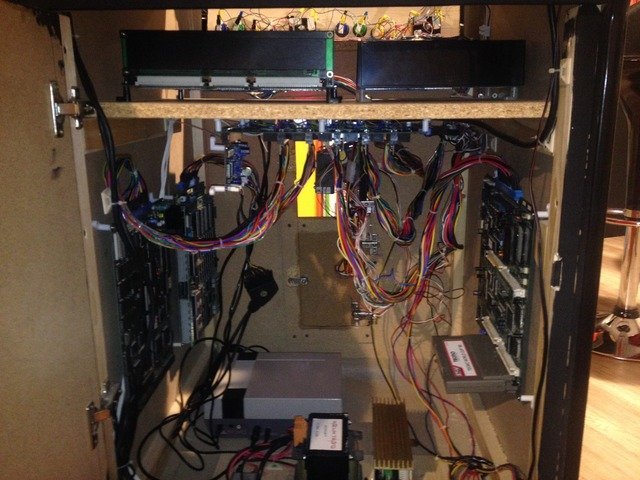
First you have to plan how you'll connect your JAMMA PCBs to this switch. You can either connect them by plugging them directly to the JAMMA sockets on the switch. I find this not so convenient since some PCBs might be too big/heavy that the JAMMA conector cannot support them physically. You either have to physically stabilize these 6 PCBs OR you can use JAMMA extention harnesses. I chose the extension harness option and etched some finger boards and made my own set (they are also sold ready-made on aliexpress)...

IMG_2557_zpskgeygtg9.jpg


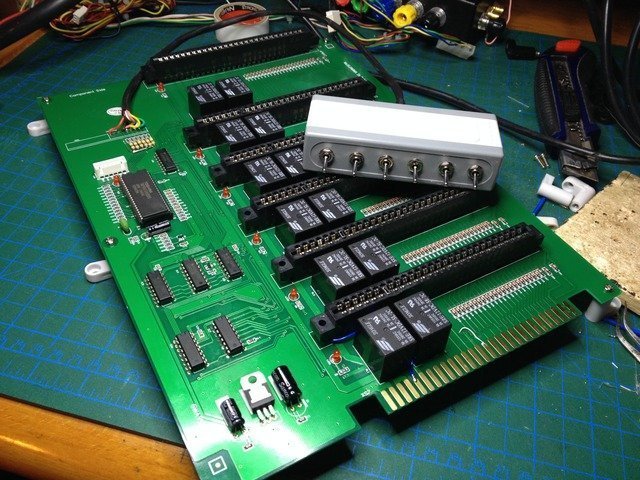
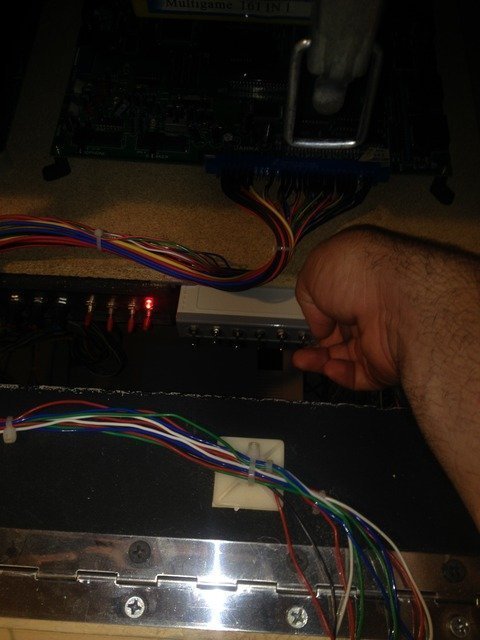
Anyway, lets start with the test switch mod...

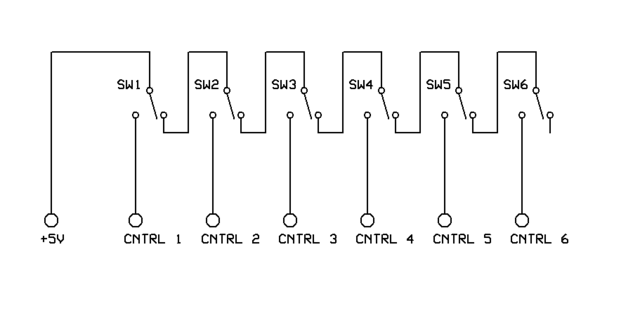
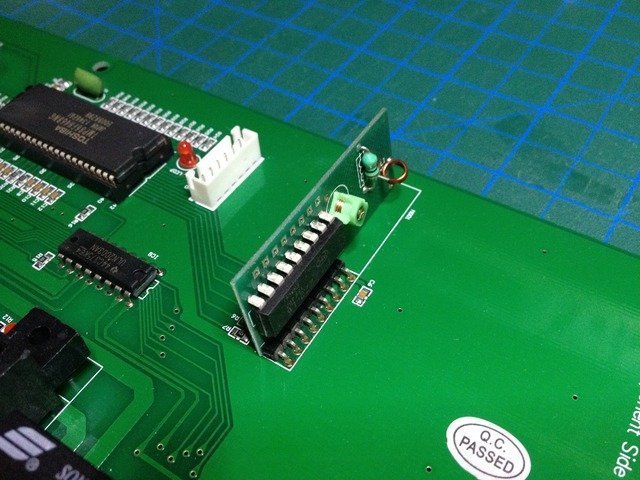
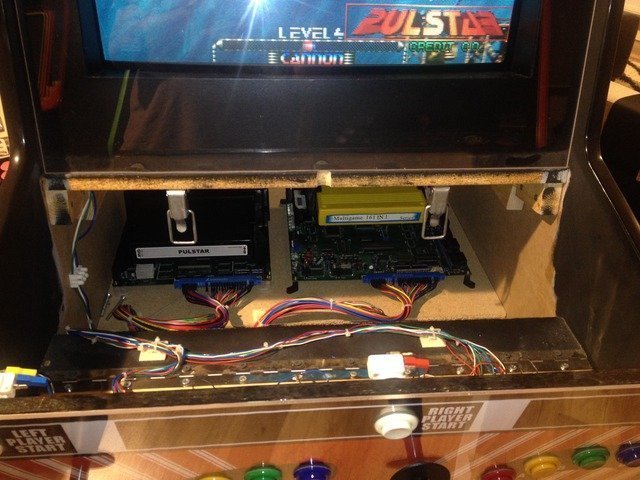
Not every JAMMA connection is implemented in these Chinese switches. Some of them are not required anyway in a home arcade such as coin meter, slam/tilt switch etc. But from time to time, I DO require a test switch to enter in the test menus of the PCB which is NOT wired by default...

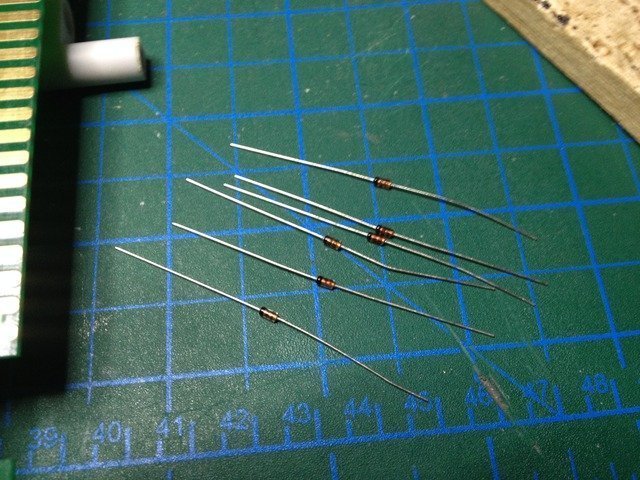
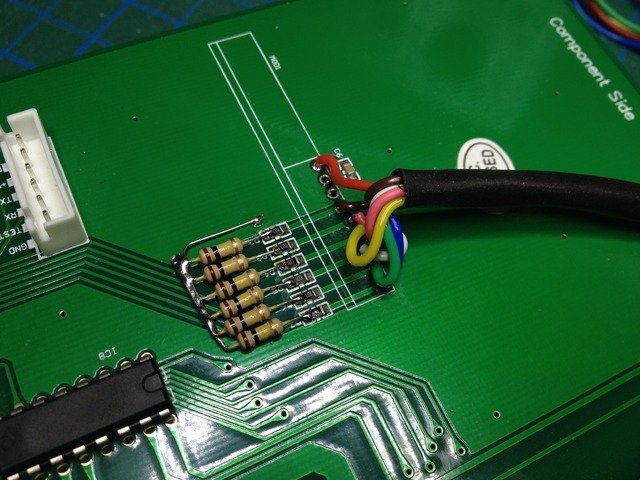
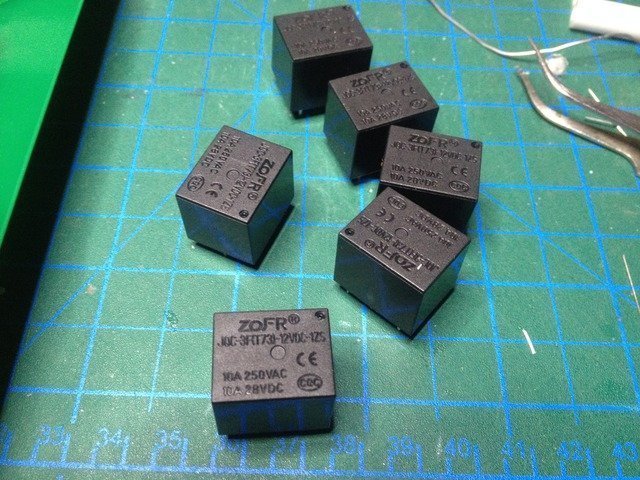
To wire the test switch to all of the 6 JAMMA connectors we have to use some diodes. I used 1N4148 diodes.

IMG_2569_zpscxz7ecvk.jpg


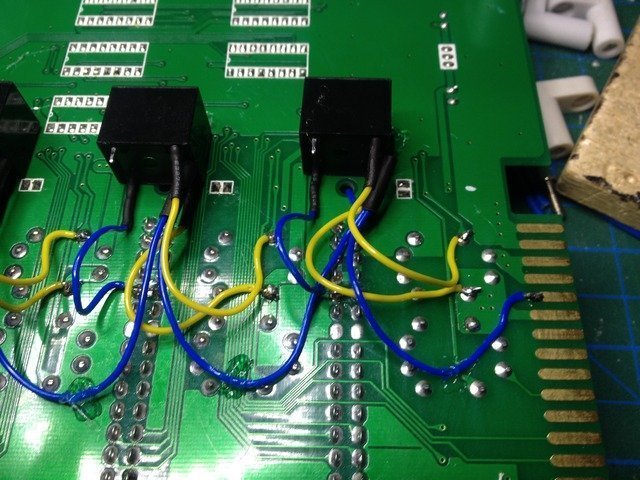
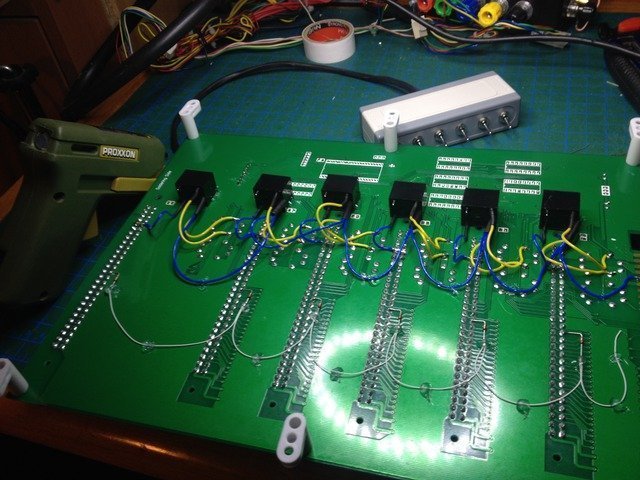
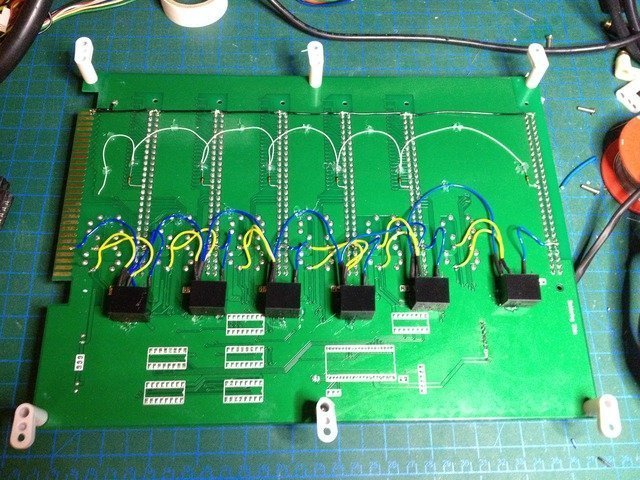
I used 28 AWG isolated kynar wire to pass through a via hole (wire is not touching to the hole) to connect the diodes to "parts side" pin 15 (Test switch pin).

IMG_2570_zpsf0b4kind.jpg


IMG_2573_zpsywirlsfo.jpg


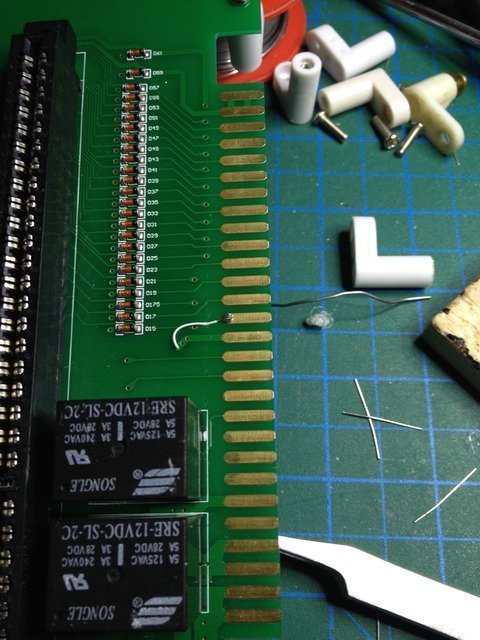
Then daisy-chained the all 6 diodes as in the photo. Notice how diodes are connected because polarity is important. The common wire coming from pin 15 (test switch pin) should be soldered to the cathode (the band marked on the diode) of all diodes. The anodes of each diode should be soldered to the pin 15 of respective JAMMA connector.

IMG_2571_zpsiyjlurve.jpg
 
Last edited:
Next, is to get rid of the remote control...

The reasons to get rid of the remote:

1) They operate at the same frequency. If you have 2 or more jamma switches, they ALL switch at the same time. King of useful feature for the operators who run casino games but I really don't need it.
2) When the cabinet first powered up, none of the PCBs are selected untill you find the remote and press any button. Kind of sucks because I like to turn my arcade on when I turn on the main power switch. Also I want to keep the last game I selected automatically boot every time a power on the cabinet.

To accomplish the above tasks some used commutator switches which I also used that on my first JAMMA switch (which was installed on my Galaxian cab). I didn't like the operation of that switch. Forinstance, if you want to switch from game 1 to game 5, while you are switching if you are not fast enough the 2,3 or 4th game could get powered on momentarily. Not a big deal but this time I wanted to use normal switches...

I used 6 x SPDT switches and wired them like this...

remote_switches_zpslfk1wmjf.png


With the above wiring, there is no risk of switching more than one game at the same time although the 6-in-1 switch does not power on multiple games at the same time even though you send multiple ON signals (the code on the MCU seems to switch only the lowest numbered one).

And the actual implementation...

IMG_2564_zpsiyf6vwxq.jpg


And installed the selector swithes to a small box...

IMG_2565_zps90vnzkwz.jpg


IMG_2566_zpsxczeztid.jpg


Now, the connection to the PCB...

First you have to de-solder the small remote receiver PCB.

IMG_1227_zpsicugzc8s.jpg


Then connect the wires coming from your manual switch(es)

IMG_2580_zps4nmvkqlu.jpg


Also, I soldered 6 x pull-down resistors as instructed in other mod write-ups. I'm not sure about the values (100 Kohm were used in other tutorials) but I also used 100K resistors and they worked well...

The remote control is gone now ;)

IMG_2581_zps8mghkzw5.jpg
 
Last edited:
Now the -5V mod...

On other tutorials, a single daisy-chain wire is used to connect -5V to ALL of the JAMMA connectors at the same time...

Although noone seems reported a negative effect of this wiring, I found it a bit risky. I mean you literally feed ALL of your PCBs with live -5V at the same time regardless of which PCB you actually powered with +5V and 12V.

So I decided to use small extra relays for the -5V connections. These are very cheap (less than 50 cents each) single contact relays. You can use any relay as long as it is 12V (which means the actuator coil shoul be operated with 12V)

IMG_2575_zpszojawwox.jpg


I wired the control signal of these extra relays paralel with the 5/12v relays which are already on the PCB. Btw, there are 2 relays per JAMMA channel used on this siwtcher PCB. One might think that one of the relays is for +5V the other is for +12V. No, not really... One of them is used for both +5V and +12V, and the other relay is for Audio connections.

Anyway, my wiring can be seen on the photos... The yellow wires are the control signals and the blue wire is the -5V. I used hot glue to fix the extra relays...

IMG_2579_zps0a5kyfh8.jpg


IMG_2578_zpsokcbtwrq.jpg


And lastly the ground wires for the last pins of JAMMA connectors. Originally these pins have also be left unconnected to GND as if they will be used for some controls (some Chinese multis such as Pandora etc use these pins as kick-harness). I wired a common ground cable on these pins to make it JAMMA standard...

IMG_2584_zpswj3naadg.jpg
 
Last edited:
Nice write-up, thanks for sharing.

I went for @DogP 's NoMote hack, to replace the RF remote switch, nothing wrong with how you solved it though!

 
Thank you very much. We have one on order and your pics and instructions will help immensely :)

Cheers
 
Finally installed it! :)

IMG_2591_zpszrklth3p.jpg


Now my Neo Geo cabinet is capable of running the following games...

1) MVS single slot with 161-in-1 for now (waiting for Darksoft's multi ;) )
2) Empty slot (Currently another MVS with Pulstar cartridge I recently converted - great game btw)
3) Sega ST-V (waiting for Darksoft's multi)
4) Final Fight (A classic ;) )
5) Sunset Riders (Another classic ;) - One of my daughter's favorite)
6) NES with Krikkz Everdrive N8 connected via my NES2JAMMA PCB

IMG_2592_zpseluamvqg.jpg


IMG_2593_zpsen4to6js.jpg


No more plugging, un-plugging, playing around with the PCBs, cables etc.. :)

IMG_2594_zpsiixiim9m.jpg
 
Last edited:
Really impressive work and a great write-up of these mods. That cabinet is just incredible.
 
Really impressive work and a great write-up of these mods. That cabinet is just incredible.
I sweat like a pig while installing this switch, I cannot believe how I built that cabinet years ago :P I guess we are getting old :D

Here is my simple video about building that cab from scratch, enjoy ;)

http://youtu.be/YkYNMMvnA14
 
need to get me one of those switchers as well... :D
How much is a reasonable price if they are for sale?

How nice it would be the have some of my favorite PCB's available under the press of a button...
Final Fight, MVS, CPS2 multi and some Konami stuff
 
another question on this switcher; does it have headers for boards with Stereo audio?
Otherwise I would need to connect audio differently for the stereo boards I want to use it with, Konami, MVS etc.

EDIT, looking at the pictures there are no additional headers... so either stick with mono or connect audio outside of the switcher...
Just a reminder, if you simply connect them together, I do not know the effects of a powered PCB's stereo audio output to other non-powered PCB's depending on how the dc coupling (if any) is handled on each PCB. This might put the main cabinet amplifier and the audio output section of each PCB in risk, depending on their design...

If I were you, I would use separate dual-contact relays (as I did for the -5V line) for each PCB's stereo output lines. Then connect each relay's control signal to the main mono audio relay's control line on the switch. This way, they'd be isolated for sure. Probably you have to built an external PCB/perf board to hold those relays and audio connectors/cables etc in one piece...

OR

Just stick with mono :P
 
connecting them together is nothing something I want to do without isolating them ;)
I don't think diodes would be the best solution as they might put extra stress on the PCB's audio amp.
The relax kind of fix would be the best, I agree...

Better to start with setting it up as mono first, and see after that to get stereo ;)
 
Back
Top