What's new

djsheep

Multi Boyz Overlord
Immortal
Multi Boyz
Joined
May 20, 2016
Messages
7,957
Reaction score
14,621
Location
Brisbane, Australia
I've looked into purchasing one of the awesome repros from @Lions3, but the postage to Australia is more expensive than product itself.

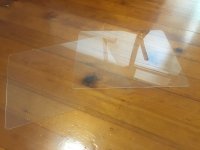
I'm going to get some simple ones cut from a local shop, and I've done some research and found the following measurements:

Material: 2mm clear acrylic

Specs:
Height: 13-9/16"
Bottom Width: 18-1/2"
Top Width: 17"
* Top corners have 3/4" radii

What I am missing are the location and width between the screws on the top and bottom.

2astro4.jpg


If anyone has any further information they want to share, let me know. Had anyone ever drawn up templates for these? I couldn't find them.

Cheers.
 
Thanks for the help. Got it all sorted. Cheers!
 
Been wanting these for the Astro City for years. If you end up making extras, how much would you estimate shipping to USA for two? Or am I better off just having them made locally like you're doing?
 
Been wanting these for the Astro City for years. If you end up making extras, how much would you estimate shipping to USA for two? Or am I better off just having them made locally like you're doing?
Shipping would be absolutely ridiculous, the prices are really out of this world for anything that isn't around 1kg (a couple of pounds).

However, what I will do is post up progress of how I go, along with the process I took, here so others can follow lead?
 
As far as I know yes, but I've only ever seen one original holder which is what I took my dimensions from. I do know that the mounting holes etc are exactly the same on both cabs though.
 
As far as I know yes, but I've only ever seen one original holder which is what I took my dimensions from. I do know that the mounting holes etc are exactly the same on both cabs though.

Cool thank you sir, a buddy of mine was trying to figure out if it would work, so this is good to know.
 
Hey @FrancoB

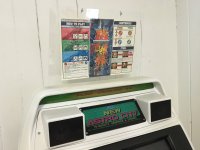
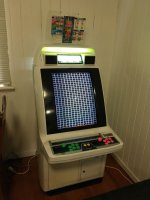
Thank you so very much. I went and got these made up today -- they look great and work a treat.

marquee1.jpg
marquee2.jpg
marquee3.jpg

I was just wondering what that little tab of plastic is for. I only got one with my print?
 
I think there should be x 2 tabs and they're meant to go behind the holes for the mounting screws.

P.s. change those wing nuts to proper nuts.
 
I think they're should be x 2 tabs and they're meant to go behind the holes for the mounting screws.

P.s. change those wing nuts to proper nuts.
I'll have to get another tab cut eventually, but for the meantime it's working!

Good call on the wing nuts, had to improvise with what was in the drawer! ha ha...
 
Haha just giving you grief. Nevertheless, the wing nuts have to go! JayCar have the correct screws and nuts, otherwise Bunnings would most likely have what you need.

On the originals the tabs are welded to the back, or glued or something.
 
If you're going to use those pieces then you do need two. I'll add another one to the DXF in case anyone just gets one of everything made that's in the file.

Here's the back of the N/AC cabinet. The marquee mounts to the holes circled in red. There are three screws circled in yellow that bolt the back metal piece to the top of the cabinet. If you bolt a sheet directly to the cabinet then the plastic will sit against the bolts.

NAC_rear_bolts-L.png


If you look at an original marquee holder you can see there are two rectangular 'bosses' that are cast into the front section of the holder at the bottom:

astromarquee3-L.jpg


When the marquee holder is mounted to the cabinet these bosses give clearance between the main section of the holder and the bolts to stop them from fouling. Are they strictly necessary? Probably not but I used to make these from 4mm acrylic and chemically bond them to the front sheet of the marquee holder using Extrufix.
 
Back
Top