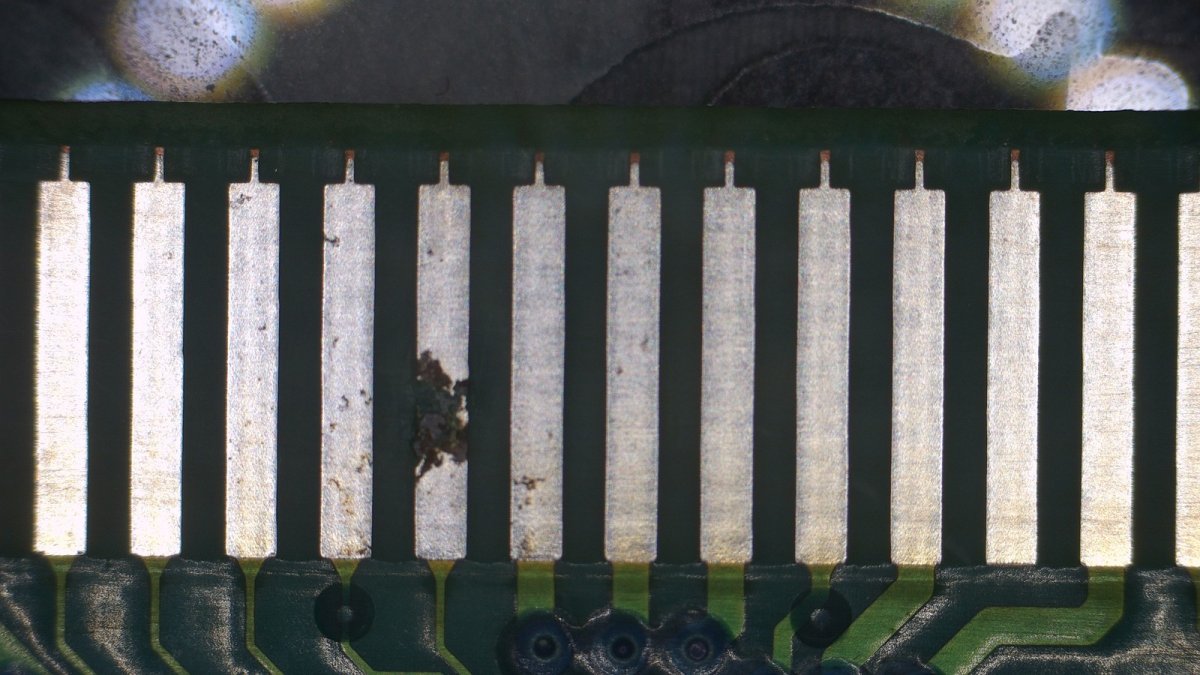
Corroded/damaged cartridge pins...

Kujako

Champion
Joined
Jun 3, 2020
Messages
1,562
Reaction score
990
Location
USA, California
So, I have a copy of Kizuna Encounter: Super Tag Battle sitting on my workbench. Everything works other than sound (not even boot/test sounds). This of course is indicative of an issue with the M1 ROM. Taking everything apart, I found a spot of bad corrosion on an otherwise clean board.
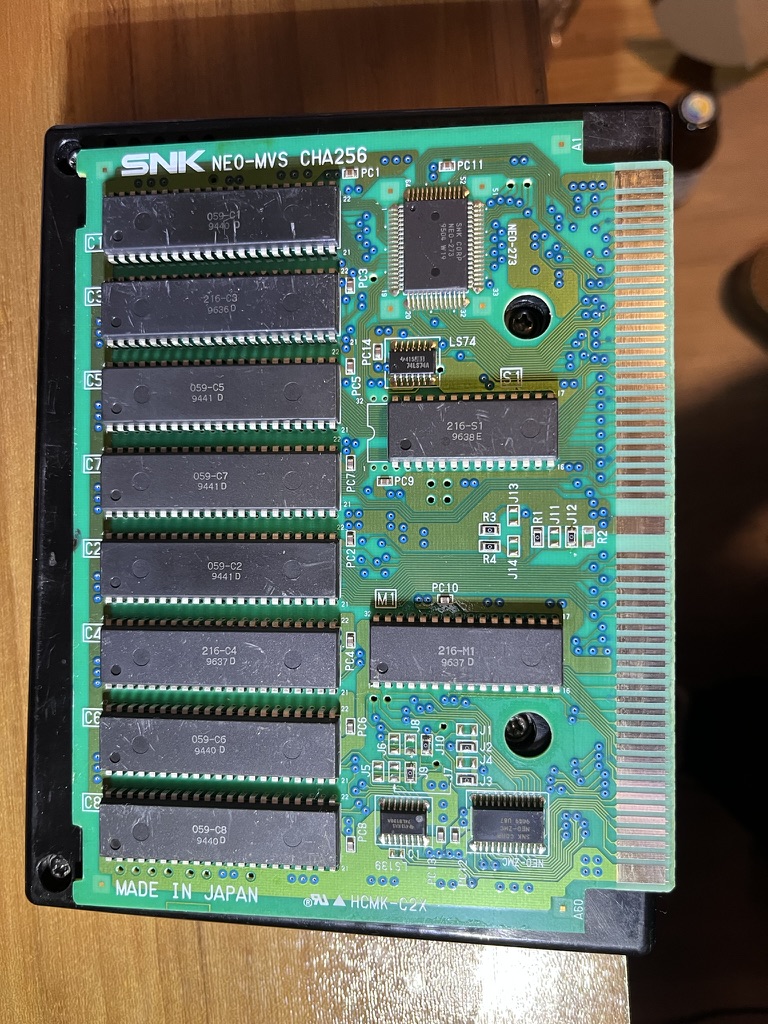
1775652625218.jpeg


s-l1600 (2).jpg


Short of replacing the CHA256 board, anyone have any thoughts as to what I can do about this?
 
Last edited:
You can use the fiber optic pen, if the rust is just a superficial layer, you can easily remove it.
The problem is if it has penetrated too deeply.
obviously you will remove the layer of gold on top but never mind.
If it were me I would have changed the card anyway, the work comes out very well, it is not noticeable.
 
You can use the fiber optic pen, if the rust is just a superficial layer, you can easily remove it.
The problem is if it has penetrated too deeply.
obviously you will remove the layer of gold on top but never mind.
If it were me I would have changed the card anyway, the work comes out very well, it is not noticeable.
Should have clarified, there is no conductivity from one side to the other. The damage is through the copper. So I would need to bridge the gap after grinding off the corrosion, which I never see as a good idea as the results would be uneven and could over time damage the cartridge slot.
 
I thought maybe you could remove the rust by digging with the pen, fill in the space with soldering tin, and then level the excess tin to the right height with the pen.
 
I thought maybe you could remove the rust by digging with the pen, fill in the space with soldering tin, and then level the excess tin to the right height with the pen.
Hum... perhaps with some really high grit wet/dry sandpaper. Worth considering.
 
A bodge wire could also help bridge the missing surface, provided you can solder it neatly & evenly.
I need to check how far away from the pins in the cart slot this is I think. I don't want to put unwanted pressure on the pins with solder or a wire.
 
the right way to repair this would be to
1. remove the pad completely
2. clean up the remaining surface
3. strip some of the mask off of the trace that goes to the pad
4. Place and cut a replacement pad (they make sheets of these you can buy)
5. Solder the replacement pad to the trace it connects to.
6. epoxy down the pad and cover the solder bridge and edges of the pad well + Cure it with UV lamp
7. mask off the near by circuit and sand down the epoxy to make it flush again.

Here are a couple of videos showing the process.
View: https://www.youtube.com/shorts/4LWDsRMUdEQ

View: https://www.youtube.com/shorts/98oguNdhso4


To be honest it's much harder/trickier than just getting a replacement PCB from a donor cart... but I guess you could try and worst case you'll PCB swap anyway.

any other option is going to add thickness and run the risk of deforming the pins on the cart socket of your mobo.
 
Last edited:
High temp 2 part epoxy and copper trace tape will be what you need. The copper trace tape will not be sticky enough to hold on a cart edge connector. Clean all the sticky off with some Goof Off and Q-Tips. Cut it to size and mix up a very small amount of the 2-part high heat epoxy. Use a toothpick to put it down on the PCB, place the copper tape down and cover it with wax paper and a weight to hold it down to the PCB.

When cured, pull the wax paper off and clean up excess epoxy. Use some bare 30 ga Kynar wire to connect the trace to the tip of the copper tape to connect that to the circuit properly.
 
the right way to repair this would be to
1. remove the pad completely
2. clean up the remaining surface
3. strip some of the mask off of the trace that goes to the pad
4. Place and cut a replacement pad (they make sheets of these you can buy)
5. Solder the replacement pad to the trace it connects to.
6. epoxy down the pad and cover the solder bridge and edges of the pad well + Cure it with UV lamp
7. mask off the near by circuit and sand down the epoxy to make it flush again.

Here are a couple of videos showing the process.
View: https://www.youtube.com/shorts/4LWDsRMUdEQ

View: https://www.youtube.com/shorts/98oguNdhso4


To be honest it's much harder/trickier than just getting a replacement PCB from a donor cart... but I guess you could try and worst case you'll PCB swap anyway.

any other option is going to add thickness and run the risk of deforming the pins on the cart socket of your mobo.
My concern is I don't know off hand of a replacement pad kit with appropriate sized templates.
 
My concern is I don't know off hand of a replacement pad kit with appropriate sized templates.
if you look at the comments in the first video I asked the poster and he responded:
Mechanic magic tags , google search easily available
someone else also suggested:
Circuit Medic

or as channelmaniac mentioned you can use copper trace tape, but you'll need to essentially cut your own pad out of it. it's essentially the same stuff just not pre-cut to shape.
 
If you have a bootleg/parts cart you don't care about, you could also steal a pad from there. Heat the pad up really hot with hot air and it should delaminate from the pcb substrate.
 
To remove rust: cotton swab, a little cleaning vinegar, moisten the pad and leave for 1 hour or more. If it has not completely disappeared, repeat the treatment again.
 
Back
Top