
You are using an out of date browser. It may not display this or other websites correctly.
You should upgrade or use an alternative browser.
You should upgrade or use an alternative browser.
Haggard lookin' Konami Windy Restoration now 100% Complete!
- Thread starter opt2not
- Start date


Ape Cosplay
Grand Master
Hey,I'm in the midst of a pony mark IV restore. I'm curious about the results on how the painting comes out. I'm indecisive on what I want to do right now lol
Would you happen to have the exact reference for the fluorescent tube? Should be FL10 something.
I'm building a list, so far I have
Combo: Hitachi GMK-29FJ
CRT: A68KFS60X
Fluorescent tube: G13/T8 10W 34cm FL10?
Fluorescent tube starter: FG-7E 10W
Fluorescent tube ballast: Nec FBAB-11L-US7
Coin mechanism: AD-81P
PSU: Omron S8XA-0531-400

mourix
Enthusiast
Awesome restoration right here. Enjoyed reading the whole process including the fails.

Ziggy Cheetos Dust
Champion
I’m late to the party but enjoyed this thread. Some great info and pics that will help me with my Windy II.

Thanks, I'm really happy with how it turned out. The cab is gorgeous now. Few last things to do on it is to install an audio pot or amp to control the volume easier.
edit: looks like I haven’t updated this with the new repro panel. I bought a 1 and 2-player panel but have the 1P installed right now:
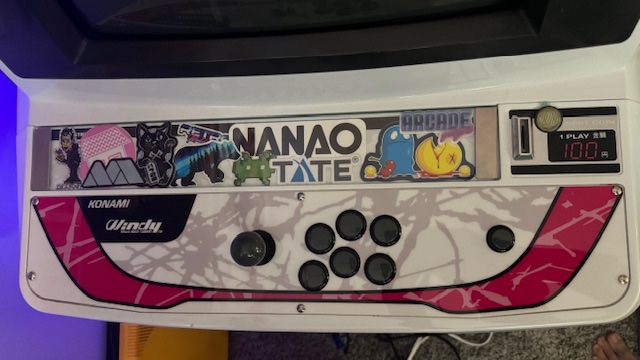
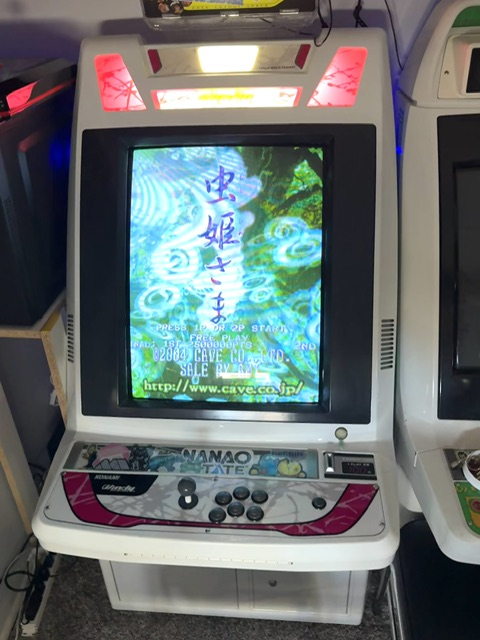
edit: looks like I haven’t updated this with the new repro panel. I bought a 1 and 2-player panel but have the 1P installed right now:
Last edited:

Man I remember when you picked this up. Night and day, man.Thanks, I'm really happy with how it turned out. The cab is gorgeous now. Few last things to do on it is to install an audio pot or amp to control the volume easier.
edit: looks like I haven’t updated this with the new repro panel. I bought a 1 and 2-player panel but have the 1P installed right now:
Hope you’re doing well!

ner38073
Enthusiast
Nice project done. I see the Windy came with the same Toshiba tube as the new astro city. Looking at the frame of the Tosh tube you have, the frame of the new astro city won't fit. I see the hole spaces on the mount are different than the frame on the new astro city. I have a spare Tosh tube that I was planning to install this tube on a windy cab coming my way, without tube. I will have to modify. I did not know about it. Thanks for all the pictures shared.
Ziggy Cheetos Dust
Champion
You wouldn’t be the first to come up against this challenge. If you don’t have the dedicated Windy monitor brackets you’ll have to source them from somewhere. @Molehill had the same issue and had to search high and low for a set.Nice project done. I see the Windy came with the same Toshiba tube as the new astro city. Looking at the frame of the Tosh tube you have, the frame of the new astro city won't fit. I see the hole spaces on the mount are different than the frame on the new astro city. I have a spare Tosh tube that I was planning to install this tube on a windy cab coming my way, without tube. I will have to modify. I did not know about it. Thanks for all the pictures shared.
ner38073
Enthusiast
I got you. There is hope then. The monitor I have if burning free and would like to mount it on the Windy.
Yeah you definitely want the mounts that are meant for this cab. It's a fickle beast, it doesn't like any frames on it's monitor, and uses just the 2 pieces to mount directly to the cab. Once you're able to find a set, you have to remove the tube from the frame, be careful with this since it will be just glass, nothing really to grab onto. Then attach those the top and bottom mounting pieces to connect to the cab.
Hopefully you're able to source those mounting parts.
I for one am not messing with this monitor for a long time. It's set to vertical right now, and I don't really have any interest in putting back to horizontal. Especially since there is no real frame on it, there is a risk of breaking the neck if mishandled.
btw, thanks for the kind words. I love this cab, ever since I was at Neon Retro Fest in Florida a few years ago, they had 3 Windy's to play on and I was hooked. Got lucky finding this cab locally for a really good price, considering it's condition too. I put in a lot of work to make this baby shine!
Hopefully you're able to source those mounting parts.
I for one am not messing with this monitor for a long time. It's set to vertical right now, and I don't really have any interest in putting back to horizontal. Especially since there is no real frame on it, there is a risk of breaking the neck if mishandled.
btw, thanks for the kind words. I love this cab, ever since I was at Neon Retro Fest in Florida a few years ago, they had 3 Windy's to play on and I was hooked. Got lucky finding this cab locally for a really good price, considering it's condition too. I put in a lot of work to make this baby shine!

Mrhide
Legendary
well well .. this is one inspirational thread that might kick me to do mine.
Awesome work man!
Awesome work man!
I’m happy to say the Windy is now 100% complete! The last thing to do was to add the L-pad potentiometer back into the cab to control volume.
Early releases of the Windy didn’t include this volume pot, while later ones did.
Having followed the instructions posted on AO by PunkicCyborg, I was able to get this all mounted and wired up.
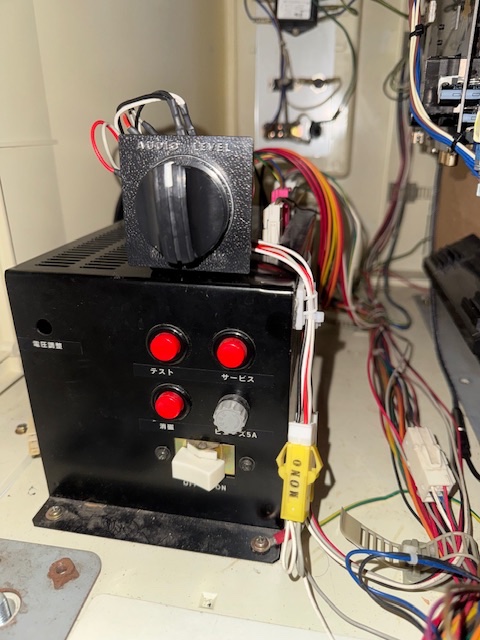
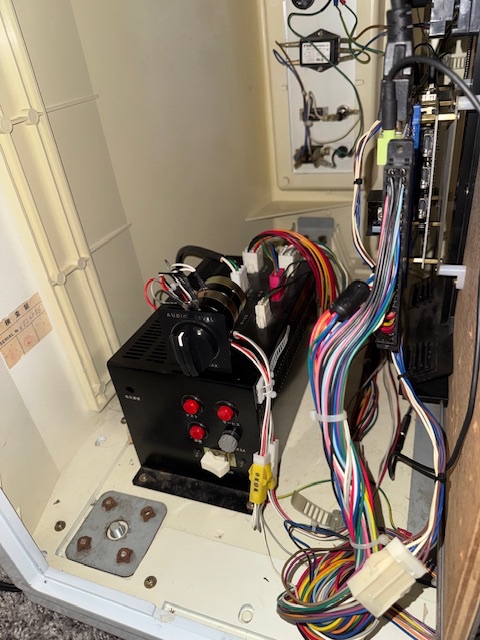
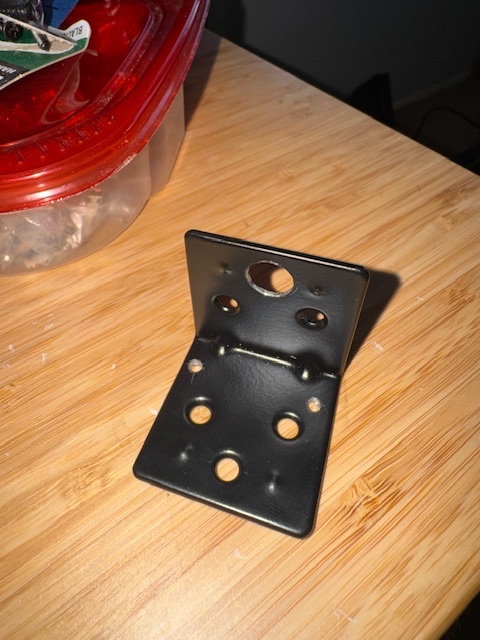
Found some wide brackets at Home Depot and drilled some mounting holes in it:
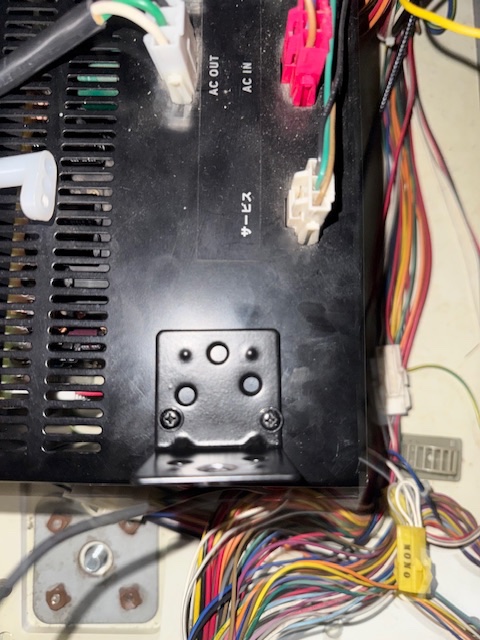
Followed the spacing of the mounting holes on the PSU:
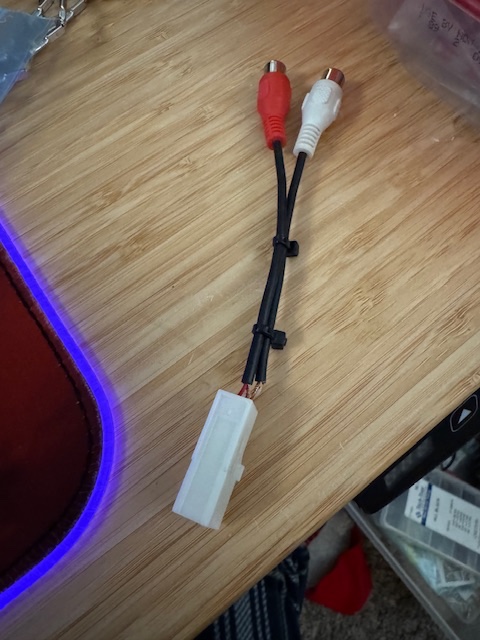
I’m happy to be able to control the volume now, and have the stereo option. I built an easy stereo harness that quickly snaps into the existing wiring.
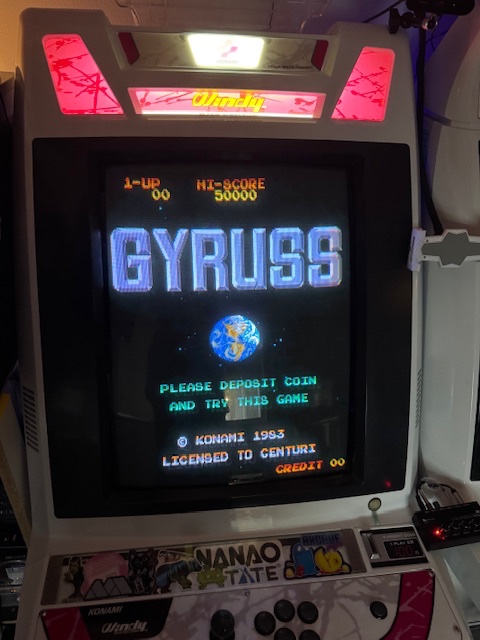
For example games like Gyruss have a whole better experience with the proper stereo audio separation.
That’s all! This cab is DONE done.
Early releases of the Windy didn’t include this volume pot, while later ones did.
Having followed the instructions posted on AO by PunkicCyborg, I was able to get this all mounted and wired up.
Found some wide brackets at Home Depot and drilled some mounting holes in it:
Followed the spacing of the mounting holes on the PSU:
I’m happy to be able to control the volume now, and have the stereo option. I built an easy stereo harness that quickly snaps into the existing wiring.
For example games like Gyruss have a whole better experience with the proper stereo audio separation.
That’s all! This cab is DONE done.
Last edited: