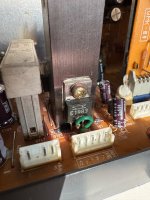
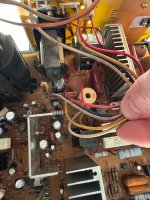
Hitachi GMK-29FSN possible horizontal collapse?

The cabinet has a PSU that outputs 100V via a standard two prong plug. When I plug the monitor into that and turn on the cabinet the monitor doesn’t turn on.

However, when I plug in the monitor to an external 100V PSU (my step-down converter) it powers on.

The odd thing is when I then connect the monitor (powered externally) to the cabinet and turn the cabinet on I still get no picture and the monitor seems to not work.

This is why I now suspect the cabinet PSU, but I don’t understand why the monitor would work when the cabinet is off and then not work when the cabinet is powered on.
 
Here are the pictures of the cabinet PSU (top) and the step down converter (bottom)

When I plug the cabinet into the step-down and then the monitor into the AC100V outlet on the PSU the monitor never turns on.

When I plug the monitor directly into the step-down it turns on.

However, when I then turn on the cabinet with the monitor plugged directly into the step down it doesn't work. So I'm trying to understand if I'm missing something or if this is just a "simple" PSU fix.

Again I appreciate everyone's help with this. I'm really determined to bring this cab back to life and just don't want to do any further harm to it.

IMG_5192.jpeg
IMG_5193.jpeg
 
The cabinet has a PSU that outputs 100V via a standard two prong plug. When I plug the monitor into that and turn on the cabinet the monitor doesn’t turn on.

However, when I plug in the monitor to an external 100V PSU (my step-down converter) it powers on.

The output from the power supply labeled "100v" does not output 100v, it is simply an AC passthrough and outputs whatever the wall is providing. It's labeled 100v because the cabinet comes from a country that has 100v coming from the wall. If you meter it, you'll see it outputting 120v since that's what we have in North America.

The odd thing is when I then connect the monitor (powered externally) to the cabinet and turn the cabinet on I still get no picture and the monitor seems to not work.

In this situation, does the monitor completely fail to start (no heater, no static) or just no video signal? It seems unlikely that the monitor would power up with the step down but then fail to do so with the step down but also the video signal connected.

Sorry for taking it step by step I'm just trying to make sure I understand exactly what's happening. :)
 
No apologies necessary @trashedcabs, definitely like the questions being thorough makes sure I don't miss something.

I did test the the step down and it is output ~98V and the pass through was reading the same when the cabinet was plugged into the step-down. So I think that means the cabinet PSU is functioning correctly.

Now for the bad news... I went to go confirm everything before responding and I got the monitor shutting off and the magic smoke (smells like burnt plastic). So everything is now powered off and I've pulled the chassis. Something obviously got fried or committed seppuku.

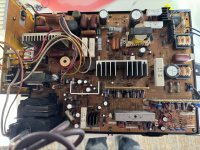
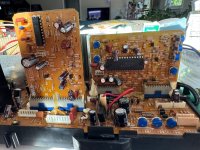
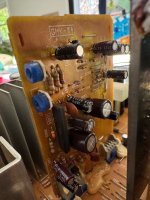
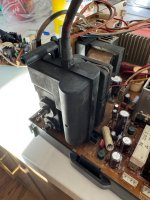
Again I'm looking at the board and not seeing any obviously damaged components. I've attached more pics of the board in case anyone is better at spotting damaged components. However, I'm suspecting the flyback given the weird power issues I saw. Also the smell seems to linger closest to the flyback. Am I crazy or is there some other part I should be also considering.

IMG_5194.jpegIMG_5195.jpegIMG_5196.jpegIMG_5197.jpegIMG_5198.jpegIMG_5199.jpeg
 
My GMK 29FSN had a similar issue, Sharp image replaced the flyback. I had recapped it but still wouldnt power on. The cab it came in was a capcom impress. After the flyback repair its looked amazing.
 
Hey everyone. I know it has been awhile, but I've been taking all the suggestions and continuing to work on it and have finally got it working and looking good!

For starters, thanks a ton @YerpS3s for the Sharp Image referral. After taking everyone's guidance and troubleshooting as many things as I could I had to seek additional help. The lack of any documentation on this chassis really limited my ability to troubleshoot much beyond the usual suspects. I reached a point that I thought I was at risk of doing more harm than good so I reached out to Sharp Image and they took on the project. When they got it they discovered that whoever recapped the chassis previously had installed a few out of spec caps. So they swapped those out and also reflowed the board. Definitely would recommend Elvis at Sharp Image for anyone needing chassis help!

Once I got the chassis back I hooked it all back up and unfortunately it didn't immediately work... Sharp Image had sent me a video of the chassis working before returning it to me so I started to troubleshoot more things on my end. I checked my PSU, step-down converter, connectors and everything checked out. I was starting to lose hope but then decided to watch the videos from Sharp Image to see if I could spot any differences, as a last ditch effort, and noticed that they had things connected differently than I did…

I always take pics of things before I disassemble them so that I can reference it and put it back together. I went and checked those pictures and I had things connected like my original pictures. Throwing caution to the wind I then hooked things up how they were in the videos and then it worked! So obviously someone had messed with this before and then hooked it back up wrong. I had no way to really know this because I didn’t have documentation to say otherwise. Quite ridiculous, but I guess par for the course considering that some of the caps were out of spec.

Anyways once it was fired up I degaussed the screen, adjusted the G2 pot on the flyback (it had been moved from the factory position and the screen was extremely dim), dialed in the the geometry, and it looks fantastic now!

Again thanks everyone for the help along the way! I know this is not a common chassis with very little information available, but if anyone else comes across one and needs some help getting it back in tip-top shape feel free to reach out and I'll be happy to provide whatever insights I can. I'm no expert, but I've taken this chassis apart several times now and fiddle with most parts of it.

IMG_5433.jpeg
IMG_5434.jpeg
IMG_5432.jpeg
 
Back
Top