
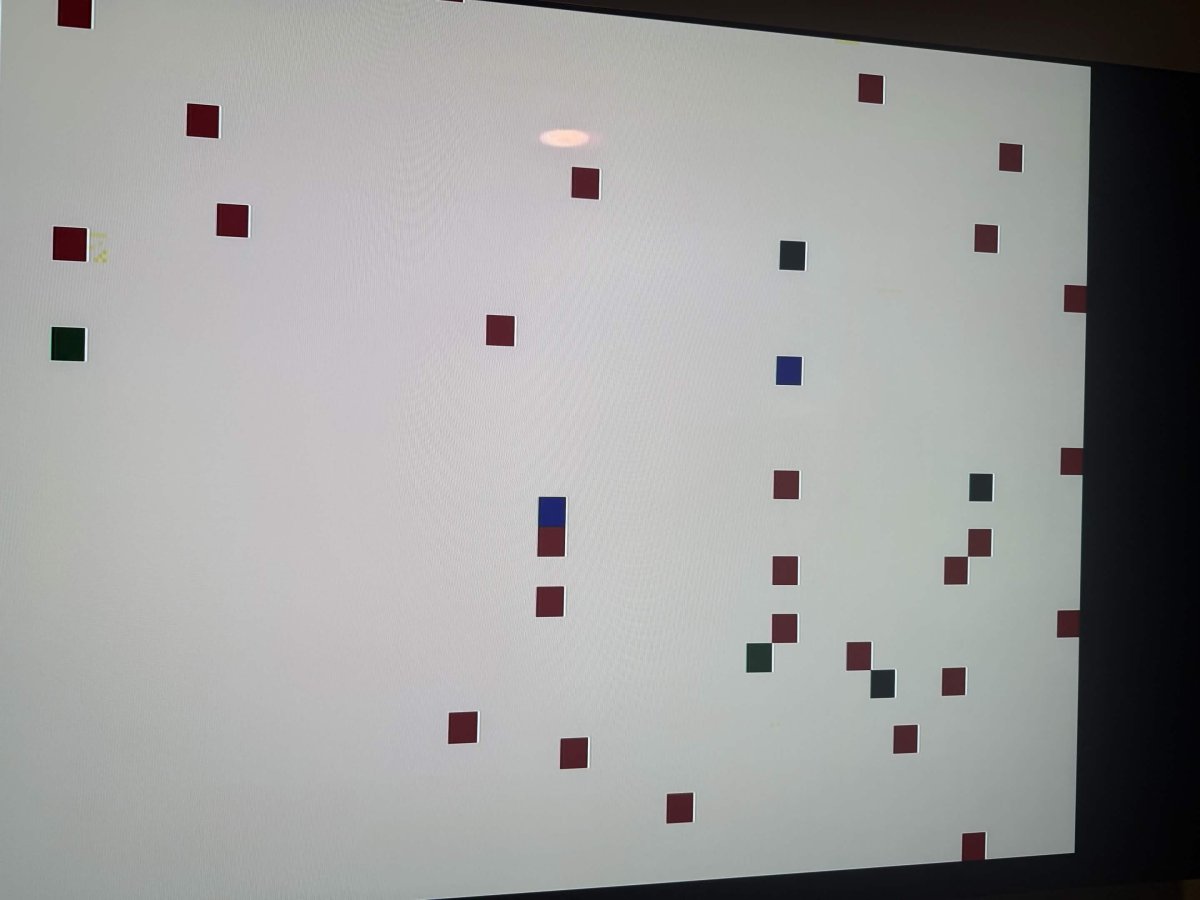
I just recently came back from Korea with an Irem M92 w/ Hook PCB. This was tested "working" by the techs, but when tested in front of me, it showed this screen upon immediate boot. I believe them when they say it worked cause I tested 6 other PCBs in the same "working" section and they all indeed worked. Their tech tried to figure out why it wasn't booting thinking the main CPU needs to be swapped, but before I start hunting one down, I'd like to get the expert's opinion here on what may cause this prior to the CPU possibility. (btw, since they had issues booting, I got a hefty discount on it, which is why i took the chance and the fact it "was" working).
You are using an out of date browser. It may not display this or other websites correctly.
You should upgrade or use an alternative browser.
You should upgrade or use an alternative browser.
Irem M92 Hook Boot Screen Garbage
- Thread starter raynex
- Start date

XtraSmiley
Legendary
Clean that edge connector first, christ, it could be so dirty it's causing a boot problem!
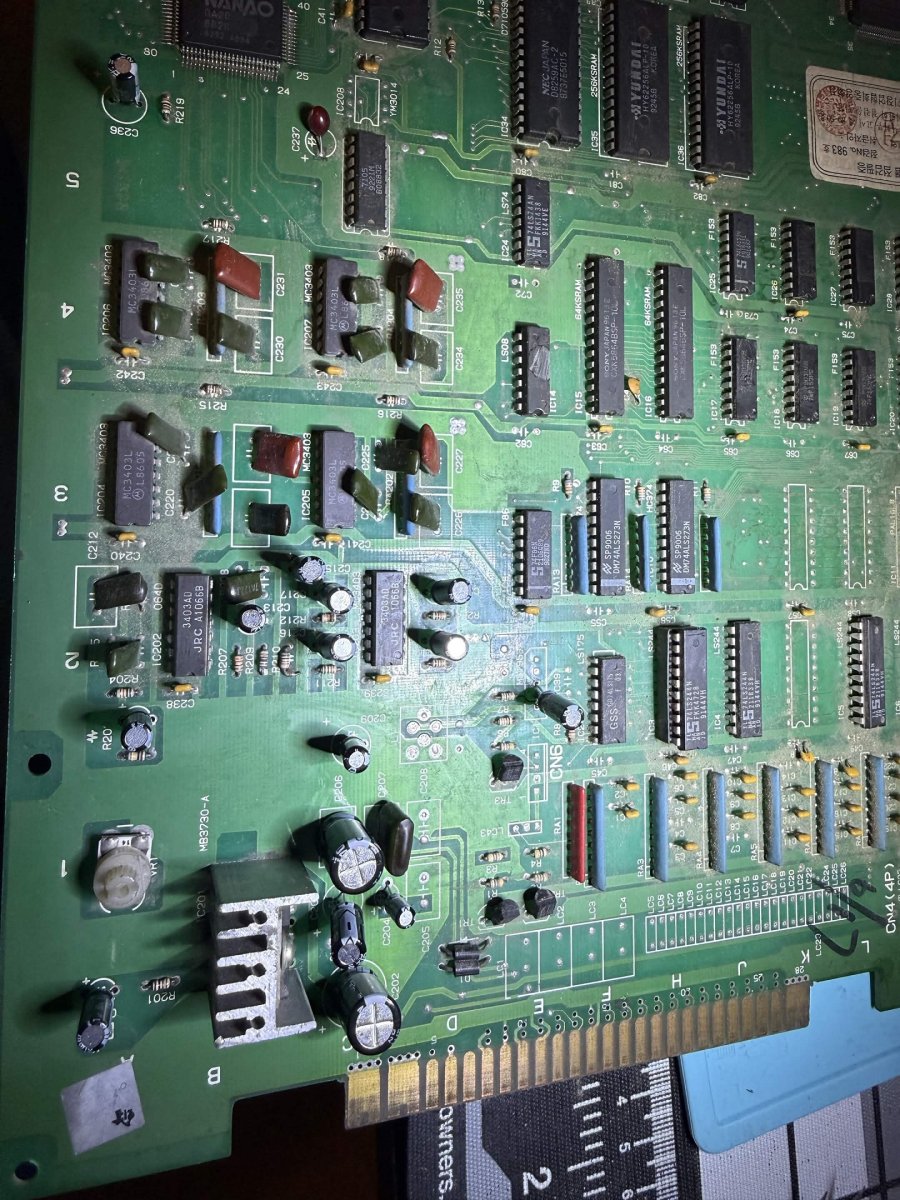
Is this a Korean bootleg or a Korean version of the Japanese M92 board? Is it single layer? Provide some pictures of the full board, trying to help online is hard enough as it is, but just a picture of a portion of the PCB sure doesn't make it any easier!
Is this a Korean bootleg or a Korean version of the Japanese M92 board? Is it single layer? Provide some pictures of the full board, trying to help online is hard enough as it is, but just a picture of a portion of the PCB sure doesn't make it any easier!
Clean that edge connector first, christ, it could be so dirty it's causing a boot problem!
Is this a Korean bootleg or a Korean version of the Japanese M92 board? Is it single layer? Provide some pictures of the full board, trying to help online is hard enough as it is, but just a picture of a portion of the PCB sure doesn't make it any easier!
-It's not the JAMMA edge. I previously cleaned it already but decided to use dexoit for good measure and no change. (photos from before I cleaned the edge)
-I reflowed the CPU socket and a few through-hole components with no change.
-I checked for any cracked solder and didn't see any.
-I checked for any questionable traces and there were some but the connections were all in-tact; verified with a multimeter.
-No bent pins in the 3 ROM board connectors.
-I pulled the CPU to check the connectors and socket; all looked good. Cleaned the connections anyways; no change.
-board has been recapped.
-This is a legit Korean version, single layer M92. Matches the korean variant photos from Jammarcade.net
I think that covers what I've done with it. Shootthecore recommended dumping some ROMs to verify against MAME, which I will do soon.
Do the easy things first.
Clean edge connector
Check 5v is 5v
Reseat all socketed chips
Reseat the rom board to the main board.
Measure the clock speed at the cpu
Dump the roms and confirm they match mame
After that it's pcb component testing. Personally I start by desoldering all the ram chips and testing them.
Clean edge connector
Check 5v is 5v
Reseat all socketed chips
Reseat the rom board to the main board.
Measure the clock speed at the cpu
Dump the roms and confirm they match mame
After that it's pcb component testing. Personally I start by desoldering all the ram chips and testing them.
XtraSmiley
Legendary
It's also probably a conversion. I'd check all the EPROMs agains MAME. Them not being covered could have caused some erasure. If that's the case, should be an easy fix. Also, double check the re-capped area. It might have already leaked before the recap and some traces were eaten or being eaten which got worse as it was in storage.
Do you have a way to check the A/B boards separately with a working M92?
Do you have a way to check the A/B boards separately with a working M92?
Clean edge connector - previously done; no changeDo the easy things first.
Clean edge connector
Check 5v is 5v
Reseat all socketed chips
Reseat the rom board to the main board.
Measure the clock speed at the cpu
Dump the roms and confirm they match mame
After that it's pcb component testing. Personally I start by desoldering all the ram chips and testing them.
Check 5v is 5v - will double check; 5v was verified before purchase, but I can do that as well.
Reseat all socketed chips - will do.
Reseat the rom board to the main board. - done this 3 times so far; verified pins and sockets and their respective solder connections are super clean, not bent, and solder joints are good.
Measure the clock speed at the cpu - hmm...haven't done that. I have a scope, but haven't learned how to properly use it yet (only used it with extreme hand-holding...lol.). Don't have anything else to actually measure the speed.
Dump the roms and confirm they match mame - on my list to do next.
I will try that. That's one of the easier things to do at least.It's also probably a conversion. I'd check all the EPROMs agains MAME. Them not being covered could have caused some erasure. If that's the case, should be an easy fix. Also, double check the re-capped area. It might have already leaked before the recap and some traces were eaten or being eaten which got worse as it was in storage.
Do you have a way to check the A/B boards separately with a working M92?
I cleaned and verified the connections when I recapped it. It's all good on that front.
I don't have another M92 unfortunately. Would be extremely helpful if I had one, of course, to eliminate which board and can easily verify the CPU operation.
With that said, are all these suggestions really a possibility in causing that garbage screen immediately upon turning the PSU on?

It's also probably a conversion.
It's the correct sub board for Hook and the mask roms are original.
XtraSmiley
Legendary
Well @nem says it's original so that's good at least. I think yeah, a lot of these things can cause problems. That edge is dirty as heck, at least from the picture, but I'd give it a little more power too, a double M92 board eats some juice.
Where in FL are you? A lot of members here in FL, probably at least one of them has M92 and you can meet up to do some trouble shooting.
The first step for me is cleaning all those connections, re-seating the chips, and if you have a reader, double checking the data. Without labels on them, sunlight can start to erase them.
Where in FL are you? A lot of members here in FL, probably at least one of them has M92 and you can meet up to do some trouble shooting.
The first step for me is cleaning all those connections, re-seating the chips, and if you have a reader, double checking the data. Without labels on them, sunlight can start to erase them.