Killer Instinct - I think it can it be saved

St4rgalaqtic

Professional
Joined
Jun 26, 2017
Messages
230
Reaction score
165
Location
Pittsburgh,PA
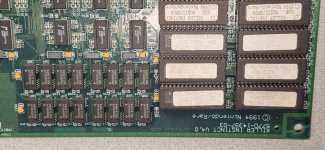
Came across this board and had to grab it, $200 was the price which i think is fair for the amount of work that needs to be done.

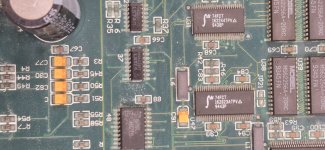
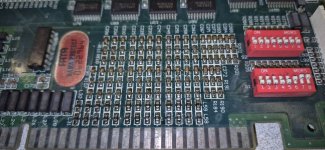
When I got it on the bench I noticed a heavy amount of surface corrosion on the bottom half of the board. So I bathed it in cleaning vinegar for 8 hours, then cleaned it off with baking soda and water. Let it dry for a day, and began my inspection.

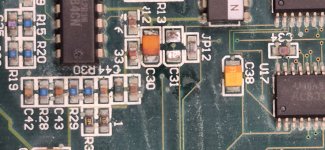
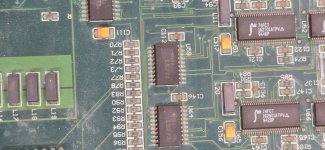
Summary of work:

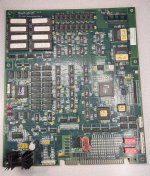
Heat sink needed for cpu, about 16 lifted legs on cpu.
Missing resistors in sound area.
Every component on the board will have to be touched up with the soldering iron. EVERY ONE!!
All resistors and capacitors will have to be tested for continuity, and if faulty replaced.

Lot of work, but I think it can be saved.
 

Attachments

  • 20260129_191115.jpg
    20260129_191115.jpg
    398.3 KB · Views: 78
  • 20260129_191237.jpg
    20260129_191237.jpg
    220.5 KB · Views: 74
  • 20260129_191135.jpg
    20260129_191135.jpg
    170.5 KB · Views: 67
  • 20260129_191152.jpg
    20260129_191152.jpg
    153.4 KB · Views: 64
  • 20260129_191132.jpg
    20260129_191132.jpg
    170.5 KB · Views: 71
First section done, look at at all the shiny solder. Thinking I may have to wait until the end of the solder work to clean up all the flux. And just give it an IPA bath and gentle scrub.

Plus I am thinking I may have to remove all the components with plastic housing. Melted the corner of a dipswitch last night.
 

Attachments

  • 20260129_200457.jpg
    20260129_200457.jpg
    187.3 KB · Views: 54
So I am going to work on the second bottom half tonight and hopefully start the IC this weekend. Just a quick question for folks, has anyone ever used an ultrasonic cleaner for a motherboard? And if so what prep did you take to make sure nothing got damaged during the process.
 
I’ve researched ultrasonic cleaning for arcade boards and decided that it’s too risky. Manufacturing tolerances for components weren’t as tight in the 80: and 90s as they are today. Cleaning fluid can get pushed by the ultrasonic waves into micro gaps around the component legs and become trapped inside the component, causing it to corrode from inside.

I’ve settled on light scrubbing with dish soap and a soft brush in the sink, rinsing with isopropyl alcohol, drying with compressed air, and then letting the board air dry for a further 24 hours.
 
I’ve researched ultrasonic cleaning for arcade boards and decided that it’s too risky. Manufacturing tolerances for components weren’t as tight in the 80: and 90s as they are today. Cleaning fluid can get pushed by the ultrasonic waves into micro gaps around the component legs and become trapped inside the component, causing it to corrode from inside.

I’ve settled on light scrubbing with dish soap and a soft brush in the sink, rinsing with isopropyl alcohol, drying with compressed air, and then letting the board air dry for a further 24 hours.
Thanks for the input, the mentioned method is what I have done in the past with diluted dawn and a soft detail brush.

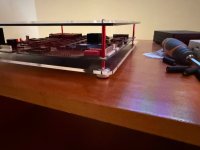
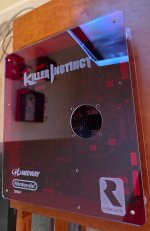
But I have never had a board this dirty, and I want to make sure I propely clean and perseve it in an acrylic case. As I know how rare these boards are.
 
I’ve researched ultrasonic cleaning for arcade boards and decided that it’s too risky. Manufacturing tolerances for components weren’t as tight in the 80: and 90s as they are today. Cleaning fluid can get pushed by the ultrasonic waves into micro gaps around the component legs and become trapped inside the component, causing it to corrode from inside.

I’ve settled on light scrubbing with dish soap and a soft brush in the sink, rinsing with isopropyl alcohol, drying with compressed air, and then letting the board air dry for a further 24 hours.
I have used ultrasonic successfully on battery corroded boards.
Such as game gear and cps2.
I think ipa 99% and a toothbrush is a better choice when it isn't severe.
 
About a decade ago a local arcade operator dropped off a bin with about 15 KI1/KI2 PCBs. I was able to restore 5 of them. The rest of them all had pretty much the same failure - dead CPU.

The CPU is very fragile and it didn't help that the Nintendo prototype had a fan on the CPU, while the production board didn't. Finding replacement CPUs was impossible (lots of fakes or bad pulls even a decade ago!) I would focus my attention to the CPU before doing anything else. I recall those legs were very poorly attached and in many cases the legs would detach from the PCB on their own.
 
About a decade ago a local arcade operator dropped off a bin with about 15 KI1/KI2 PCBs. I was able to restore 5 of them. The rest of them all had pretty much the same failure - dead CPU.

The CPU is very fragile and it didn't help that the Nintendo prototype had a fan on the CPU, while the production board didn't. Finding replacement CPUs was impossible (lots of fakes or bad pulls even a decade ago!) I would focus my attention to the CPU before doing anything else. I recall those legs were very poorly attached and in many cases the legs would detach from the PCB on their own.
Yeah I have had 3 boards in the past year come to me with lifted legs. Its not a hard repair if you have a really good digital microscope and small angle tip on a good soldering iron.

The only thing that I am thinking about the cpu legs is that is there a way that once the solder is refreshed and cpu tested. Is there a method to lock the legs down to the board. Either through glue or solder mask. I say this because even the best solder job will not make a difference since the legs and pads are so small. And its located in a flex area of the board.

I think solder mask would be the best option. Just a small strip from the bend of the legs to the end of the pad.
 
You can go compact flash with a short extender.
Will really take the strain off.
 
You can go compact flash with a short extender.
Will really take the strain off.
Read my mind, I already have the compact flash kit ready for this. Just need a short extender cable, and I’m going to look up to see if I can find a small 3D print bracket design to mount to the bottom acrylic sheet.
 
Read my mind, I already have the compact flash kit ready for this. Just need a short extender cable, and I’m going to look up to see if I can find a small 3D print bracket design to mount to the bottom acrylic sheet.
Have you made any progress? I was working on two KI boards and I was able to repair one. Have you tried to power it on? If so could you post some pictures of the boot screen? I made a couple fan grills for the open source acrylic case.
IMG_7364.jpeg
IMG_7363.jpegimage.pngimage.png
 
Have you made any progress? I was working on two KI boards and I was able to repair one. Have you tried to power it on? If so could you post some pictures of the boot screen? I made a couple fan grills for the open source acrylic case.
IMG_7364.jpeg
IMG_7363.jpegimage.pngimage.png
I'm still working on reflowing the componets and I have to replace 2 caps before I power it on. Will post a boot screen when I do. Side note, where did you get your acrylic cut? Or did you do it yourself?
 
Back
Top