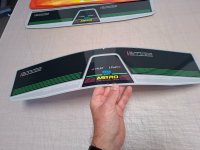
SpecialWhenLit
Beginner
Hi !
First post here, not sure i f this is "Project Showcase" yet or more "Project Ideas" but anyway
Long story short, I have 2 Windy Cabinets (the 1 & 2) which have been hibernating in my father's basement for the past 10 to 15 years. They were in working order last time they were fired, but in need of a good refurbishing to be fully enjoyable.
I also have a lot of spares with them, especially for the Windy 2 where I have basically a second set of electronics (PSU, Monitor Chassis, JVS converter), 3 original marquees, japanese stools...
Spares I bought back in 2011 from Sanwa :
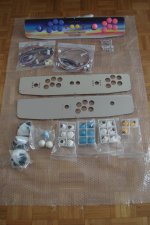
Original windy panels to use as reference :
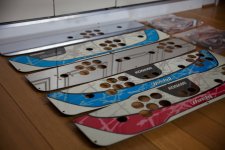
Headers (Also have the blue one from the Windy 2 not pictured) :
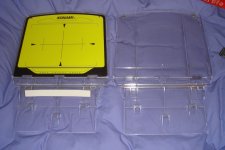
Before working directly on the cabinets, which will more likely be for next spring, I would like to start making new contol panels. I plan to do following :
- 1L4B + 2L8B with the pink scheme of the Windy 1 --> To play classic JAMMA / Konami and Neo-Geo MVS.
- 1L6B + 2L12B with the blue scheme of the Windy 2 --> Capcom CPS here.
For the Windy 2, no issues I have the two original Sanwa NOS stainless panels what I will be using. Now for the Windy 1 I would like to do exactly this button layout for both the 1 player and 2 players panels (this is from the Konami manual BTW) :

I saw this layout refered to as "Sanwa Licensed Astro City 2L8B Panel" (Which is different than the Official SEGA 2L8B panel, or the Vitrual Fighter 3 layout) :
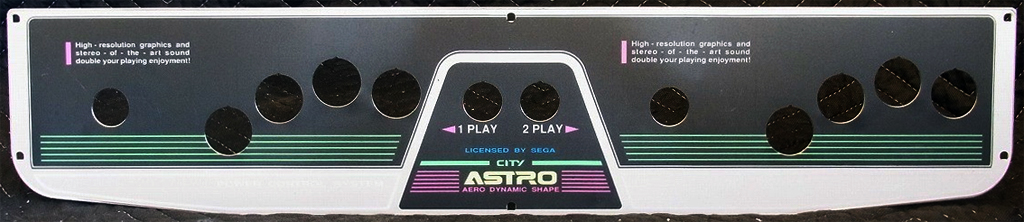
- So the question is : where to find new panels that will conform exactly to this layout (both 1 player and 2 players), an show a similar quality to my original Sanwa 6 buttons panels ? I guess obtaining this layout directly from Sanwa is clearly inpossible these days ?
- And the second question obviously is where to obtain the reproduction overlays for all 4 panels ? Who's making the best repros these days ? I would like to the as close to the genuine models, which are very slick and glossy.
- Sticks and buttons will be classic Sanwa of course, I need to check what I have already and buy some move. Maybe reinforced swtches as well. I migh use SEGA yellow for the start buttons, I always found the green from Konami to be too weird.
- And who's making good harnesses these days as well ? I saw I guy selling on eBay specifically for the Windy. Also have Sanwa harnesses as spares here, but not sure if the Konami standard is different from SEGA ?
Thanks for the inputs !
First post here, not sure i f this is "Project Showcase" yet or more "Project Ideas" but anyway
Long story short, I have 2 Windy Cabinets (the 1 & 2) which have been hibernating in my father's basement for the past 10 to 15 years. They were in working order last time they were fired, but in need of a good refurbishing to be fully enjoyable.
I also have a lot of spares with them, especially for the Windy 2 where I have basically a second set of electronics (PSU, Monitor Chassis, JVS converter), 3 original marquees, japanese stools...
Spares I bought back in 2011 from Sanwa :
Original windy panels to use as reference :
Headers (Also have the blue one from the Windy 2 not pictured) :
Before working directly on the cabinets, which will more likely be for next spring, I would like to start making new contol panels. I plan to do following :
- 1L4B + 2L8B with the pink scheme of the Windy 1 --> To play classic JAMMA / Konami and Neo-Geo MVS.
- 1L6B + 2L12B with the blue scheme of the Windy 2 --> Capcom CPS here.
For the Windy 2, no issues I have the two original Sanwa NOS stainless panels what I will be using. Now for the Windy 1 I would like to do exactly this button layout for both the 1 player and 2 players panels (this is from the Konami manual BTW) :
I saw this layout refered to as "Sanwa Licensed Astro City 2L8B Panel" (Which is different than the Official SEGA 2L8B panel, or the Vitrual Fighter 3 layout) :
- So the question is : where to find new panels that will conform exactly to this layout (both 1 player and 2 players), an show a similar quality to my original Sanwa 6 buttons panels ? I guess obtaining this layout directly from Sanwa is clearly inpossible these days ?
- And the second question obviously is where to obtain the reproduction overlays for all 4 panels ? Who's making the best repros these days ? I would like to the as close to the genuine models, which are very slick and glossy.
- Sticks and buttons will be classic Sanwa of course, I need to check what I have already and buy some move. Maybe reinforced swtches as well. I migh use SEGA yellow for the start buttons, I always found the green from Konami to be too weird.
- And who's making good harnesses these days as well ? I saw I guy selling on eBay specifically for the Windy. Also have Sanwa harnesses as spares here, but not sure if the Konami standard is different from SEGA ?
Thanks for the inputs !