

Sp33dFr34k
Champion
The video amp is better on the later Sega IO.
I would recommend staying away from the Ultimarc. It's just a crappy generic amp that was pulled from the J-pac design.
Okay, excited to see the difference once the IO gets in.
The video amp is better on the later Sega IO.
I would recommend staying away from the Ultimarc. It's just a crappy generic amp that was pulled from the J-pac design.


Thanks to @PascalP and @Sp33dFr34k for always dropping unshilled science on the forum!


Hello,Today I did a quick proof of concept using GBS-C to downscale Naomi 31Khz 480p mode to 15Khz. Did not have a spare standalone 15Khz TV/monitor handy nor a spare fingerboard so I went with the following configuration to test with:
- Naomi at 31Khz > VGA out to 1x4 distribution device
- Distribution device > 31Khz VGA monitor
- Distribution device > GBS-C VGA in > VGA out to Jammacon (there is a HD15 to SCART passthrough installed) > Astro City cab #2
Naomi is connected to the Capcom IO (minus the video of course) which is then connected to Astro City #1. In this test configuration this will route controls to cab #1 while the video goes to cab #2.
Here are my results:
View: https://youtu.be/SxAPARGmjUc
Tried snapping some pics but I'm not really good at this for CRTs, at least not with my current phone. This one is the best of the bunch:
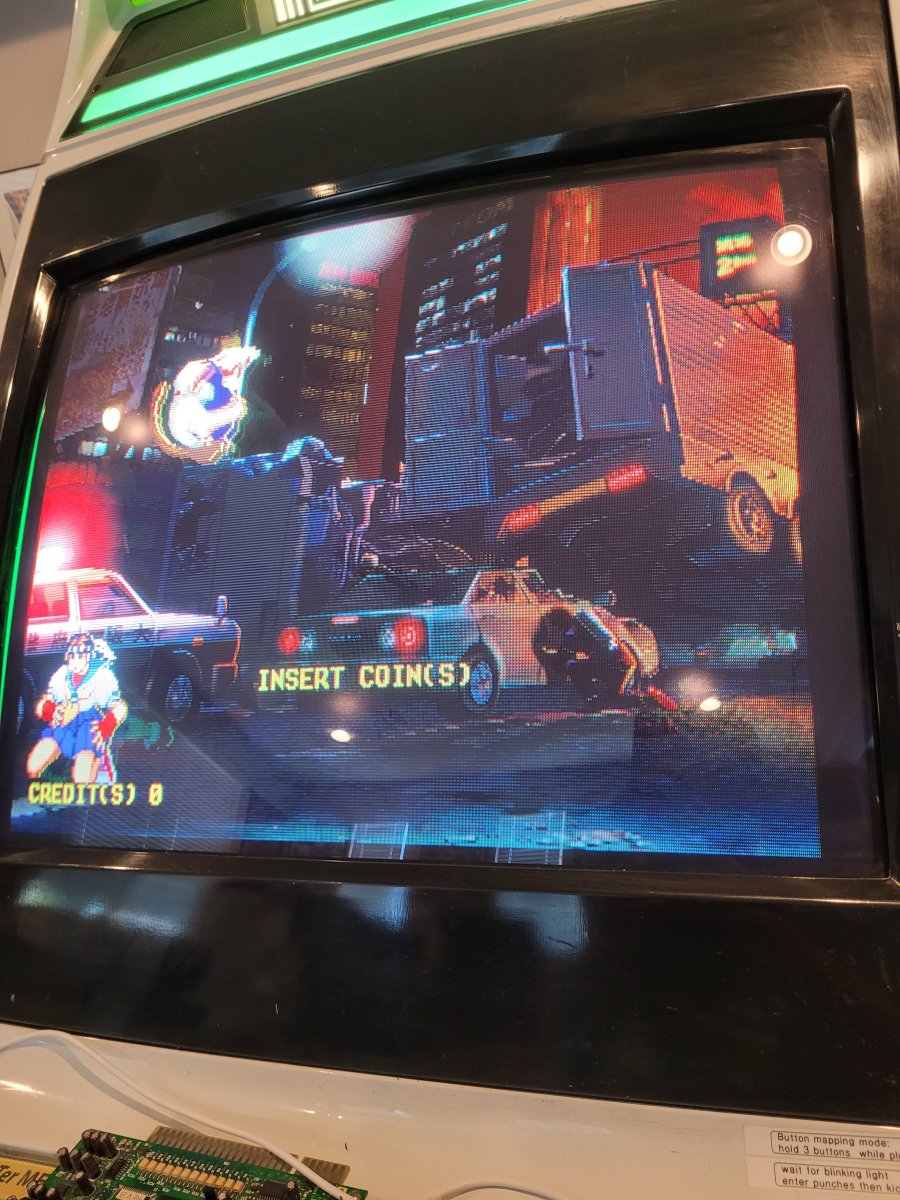
The video might paint a better picture, I let the Capcom vs SNK attract mode run through to the end. Although funny enough the Naomi froze when it ended haha.
Again, not really sure how well it will translate through video or pics but to my eyes this is a vast improvement over the capabilities of the Capcom and Sega IO boards. Colors are now vibrant, no motion blur, no ghosting from what little I've seen so far during testing. Need to find time to test further, try other games, etc but as a starting point I think this is significant progress.
Things to note:
The display appeared to not want to lock in initially. What I did to correct this was to play with some resizing and position settings in gbscontrol. Whatever those changes did, it caused the video signal to stabilize. From there I adjusted h-size and h-position on the monitor remote board and we were in business. I should have taken pics prior to the changes but I'll probably see it again in this state as l test further.
I have a netboot setup and while it goes through the options during a game load, this apparently resets the Naomi hardware to a point where the video signal is temporarily lost. GBS-C doesn't react to this well and while my VGA monitor did automatically sync afterwards, GBS-C did not. I needed to switch off and re-select the downscale preset before the signal came back.
In the end, it's a positive first step. Next is finding a jamma fingerboard and wiring up a female HD15 setup to try the video passthrough solution which was suggested earlier in the thread, give it a shot all in one cab this time.


Not sure what’s the issue with your IO boards, you might want to maybe check the caps on the video lines. I run my UVCs into a Sega Jamma IOs with no issues, at 31 kHz downscaled to 24. Here’s the hardware stack I put together for both of them.Outputting the downscaled UVC video signal into an IO board prior to reaching the monitor yields variable results, which are mostly not good.

Damn, tell me more about that stack of yours!Not sure what’s the issue with your IO boards, you might want to maybe check the caps on the video lines. I run my UVCs into a Sega Jamma IOs with no issues, at 31 kHz downscaled to 24. Here’s the hardware stack I put together for both of them.


Rgb output from the UVC goes directly into the IO vga input.

nice and bright image. In fact the image is much brighter coming out of the amped IO video output.

for 2D games like cvs2 or some of the Atomiswave converts, I run it at 15 since I feel it looks better. But most of the time it’s 24khz on my nanao MS9’s, or the MS8’s in my Aeros.
The stacks consists of the Sega Jamma IO (low lag input IO, better than the Capcom one ), a JNX Atlas which interfaces with the IO for hooking up the cps2 kick harness, and modded for coin spoofing since some Naomi games require the extra coin counter for p2, and the UVC.Damn, tell me more about that stack of yours!
Sounds good. I was mainly curious about the plexiglass that connects them. Any files or measurements available or did you just create them yourself on the go? I also have the NVS4000 and just wired a molex cable to it from and old PSU which works well. Just looking to make it as compact as possible, like you. Also the fact that you're wiring the UVC out to the Jamma JVS IO is interesting, as I read before that it was problematic for some people. Now I need to try it for myself, I think I have the exact same Jamma JVS IO as you so results should theoretically be the same. Although I'm using the latest Reco from rgb instead of the JNX Atlas but that shouldn't make much of a difference I guess.The stacks consists of the Sega Jamma IO (low lag input IO, better than the Capcom one ), a JNX Atlas which interfaces with the IO for hooking up the cps2 kick harness, and modded for coin spoofing since some Naomi games require the extra coin counter for p2, and the UVC.
I also modded the Atlas to have 5v, 12v, and GND accessible from the left side so the UVC plugs directly into it.
VGA connector out of the UVC goes into the IO, with a ferret ring for reducing noise interference.
That’s about it. It was a solution I put together mainly to save space and make my Naomi setups more compact.
This Naomi setup uses a CF Card reader and Dreamcast PSU. The DC PSU interfaces with my Windy cab’s PSU to get AC.

This setup uses a naopi Netdimm, and no PSU since the Astro it goes into has an NVS-4000 PSU that supplies voltages directly to the Naomi.

Totally on the go. It’s so rough, some of it is pretty crooked, and the cuts aren’t clean. I don’t have any fancy tools, just used a dremel and a filing set to make it. lol I don’t even have a torch for the edges!Any files or measurements available or did you just create them yourself on the go?
Honestly it looks pretty good on the pictures. But I like your idea of how you put them together, kudo's.Totally on the go. It’s so rough, some of it is pretty crooked, and the cuts aren’t clean. I don’t have any fancy tools, just used a dremel and a filing set to make it. lol I don’t even have a torch for the edges!
I figured out the Atomiswave problem a couple months ago. It still sends video over the jamma edge even when using vga. I covered the rgb pins on the jamma edge with kapton tape and it works great. I was pulling my hair out with that one.Was able to do a bit more testing with UVC, this time with misc arcade hardware outputting at 480p. Curious how my results stack up with others.
Namco 256: no go. This will not sync at all for me, which is consistent with every other attempt I've made. Not sure what the secret sauce is for this hardware but I've never been able to get a 31khz signal natively to display on any VGA monitor I've tried with. With UVC, it didn't work via Namco IO nor directly into the Jamma fingerboard. 15khz via Namco IO works perfectly and the image is clean, so I can definitely work with that moving forward.
Atomiswave: does kinda sync via UVC but I'm probably doing something wrong in the Jamma chain as the image is duplicated on the MS9. Works fine when plugged into a VGA monitor so I know the dip settings are right and I'm getting 31khz output from the board. In this case also, not a big loss as I'm able to get a nice 15khz native signal and if I really want to play these games at 31khz, I'll do it via Dreamcast ports which is way easier anyway.
Naomi: much more successful with UVC in the chain. Video syncs easily and looks fantastic in person. Some screen curl is there but I saw similar problems when testing with consoles earlier. That went away after finding the right dip setting combination on the UVC side and doing some monitor adjustments, so I'm confident this will be solved easily enough. I'm very pleased with the results here, although the pics don't really translate well.


Probably the biggest win in this setup is the complete removal of the Capcom IO from the chain. Instead I'm using a custom Tuscon Logic JVS board that terminates to a pair of 20 pin Brook style connectors. The plan moving forward is to populate and connect this to a 2L12B panel to create a semi-permanent Naomi setup. All of the games I care about seem to like this IO board, so hopefully I'm done with my Naomi tinkering, at least until there's a proper multicart someday.

@opt2not what you mention re: brightness when UVC is connected to the Sega IO is exactly my issue. I found the image way too bright in my case with no way to drop to acceptable levels. Maybe it's a matter of trying with different monitors but I'm not going to mess with it anymore. I'm happy with bypassing the IO board for video.
I suspected this was the case - thanks for the confirmation and I'm going to try this also!I figured out the Atomiswave problem a couple months ago. It still sends video over the jamma edge even when using vga. I covered the rgb pins on the jamma edge with kapton tape and it works great. I was pulling my hair out with that one.
It might be that your monitor might need a calibration pass. With the brighter image I’m able to turn my flyback down, not running as hot, and just using the brightness/contrast controls on my remote board to dial it in. It’s nice that I don’t have to push the flyback as hard.what you mention re: brightness when UVC is connected to the Sega IO is exactly my issue. I found the image way too bright in my case with no way to drop to acceptable levels. Maybe it's a matter of trying with different monitors but I'm not going to mess with it anymore. I'm happy with bypassing the IO board for video
 Just to confirm, the one you saw in action is the 838-13683-02.