
You are using an out of date browser. It may not display this or other websites correctly.
You should upgrade or use an alternative browser.
You should upgrade or use an alternative browser.
New Astro City PSU 400-5198-01Y - Voltage Pot Extender
- Thread starter Fixon
- Start date

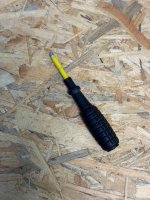
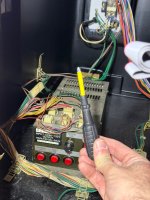
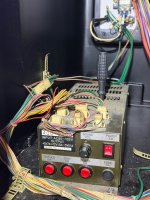
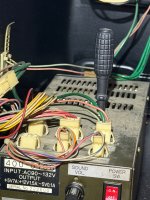

ner38073
Enthusiast
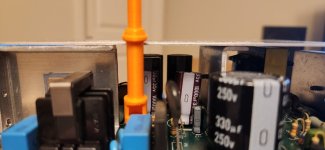
Really good modification and access to the pot.Adjusting the +5V on the 400-5198-01Y PSU inside of a New Astro City is pretty cumbersome. You need a small screwdriver, lower it through a hole, and then hopefully hit the pot inside the PSU to adjust. That's why I made this thing to make that process easier.


This pot extender is keyed to fit on top of the voltage pot. It also has a tab at the top that secures it in place, meaning you can't lift it up either. The tip that sticks out of the PSU when assembled is sized for these pot knobs that you can find all over the internet.
The PCB of the PSU is held in place by six screws and is very easy to disassemble.
You can get the print here:
https://www.printables.com/@Fixon_2861390
Enjoy but please respect the license!
No selling and credit if shared/modified.

We know, IPD already posted that solution and you replied to it in Januari.Another option
Yes, I also added photos of your mod, and that’s the best way to do it! Haha. Very elegant! By the way, how did you manage to add the potentiometer knob? Since the diameter is 5.5mm, and these potentiometer knobs are usually 6mm, did you glue it? Thanks so much for your amazing work!We know, IPD already posted that solution and you replied to it in Januari.
Thank you! Glad it worked for you. Looks really nice!Yes, I also added photos of your mod, and that’s the best way to do it! Haha. Very elegant! By the way, how did you manage to add the potentiometer knob? Since the diameter is 5.5mm, and these potentiometer knobs are usually 6mm, did you glue it? Thanks so much for your amazing work!
For me, it was a press-fit with the potentiometer knob. That may differ from printer to printer but you can always modify the tip in Blender a tiny amount to make it perfect for your pot knob.

AeroCity20XX
Enthusiast
Would you be able to share the actual 3d file for this? I'd like to modify it for use with an Aero City PSU, which is even harder to get at the voltage adjustment pot while it's inside the machine. I did try your file but looks like the bulge in the shaft needs to basically end where it starts on the current version. Also the diameter of the bit above larger bulge needs to be reduced slightly(like by 1mm) but that might have been my printer settings.Adjusting the +5V on the 400-5198-01Y PSU inside of a New Astro City is pretty cumbersome. You need a small screwdriver, lower it through a hole, and then hopefully hit the pot inside the PSU to adjust. That's why I made this thing to make that process easier.
This pot extender is keyed to fit on top of the voltage pot. It also has a tab at the top that secures it in place, meaning you can't lift it up either. The tip that sticks out of the PSU when assembled is sized for these pot knobs that you can find all over the internet.
The PCB of the PSU is held in place by six screws and is very easy to disassemble.
You can get the print here:
https://www.printables.com/@Fixon_2861390
Enjoy but please respect the license!
No selling and credit if shared/modified.
Too bad!Would you be able to share the actual 3d file for this? I'd like to modify it for use with an Aero City PSU, which is even harder to get at the voltage adjustment pot while it's inside the machine. I did try your file but looks like the bulge in the shaft needs to basically end where it starts on the current version. Also the diameter of the bit above larger bulge needs to be reduced slightly(like by 1mm) but that might have been my printer settings.
You can convert the stl file to step and edit away to your liking: https://imagetostl.com/convert/file/stl/to/step