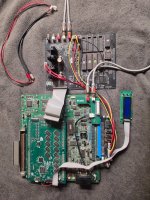
Project: Helper board for Mitsu's Repro Batman Forever Sound amp board

First one out to @RepairGuy95 in a couple of days. This is the only one I can make right now until those darn 4PDT switches ship from aliexpress. I am thinking they don't actually have 9,000 on hand, and I am in some sort of backorder loop.

This is what I think will come standard for most folks - unless someone has a special need.

18" power cable that goes from the helper board to the amp board
18" amplified speaker back from the amp board to the downmixing input on the helper board (if you are driving speakers directly off of the amp board - let me know, and I can just make that connector with bare wires)
12" input RCA male to line-level input connector (if you mount the amp board above the ST-V, this fits perfectly)
18" line-level output connector to bare wire (if you are using the RCA's on the bottom you won't really even need this connection)

IMG_2754.jpeg
 
I got a note from the aliexpress vendor - saying that the 5mm switch version was out of stock, how about the 7mm one. So - hopefully those will all be shipping soon to me.
 
Was having a little bit of an issue getting enough heat on the RCA Ground lugs after intsalling the volume pot - not a lot of room to maneuver - I ended up getting a hot plate where I could get the entire board up to 200 degrees celsius, and then using a larger tip on my soldering iron - apply enough local heat that didn't get pulled out quickly by the large ground layer so I could get solid solder joints! I guess one of the downsides of having such a large ground plane, and a very small area to work in for that particular part.

IMG_2784.jpeg
 
Here's an example of how it looks connected.
I am mainly using phono out so your setup may differ.
Pardon the dust, it's been a minute since I played with this.
I am using an old og Xbox ide cable cut down.
If you wanted longer, use the other end.

You really don't need the everten for this.
This add on covers it for sound/but not kick.

I'm planning to top mount this sound board.
I highly recommend adding extra pcb feet all over the st-v board wherever possible to prevent flex.

J11-J10 are in.
J14-J13 go to the amp.
If doing phono.
 

Attachments

  • 20260417_155121.jpg
    20260417_155121.jpg
    407.5 KB · Views: 51
Last edited:
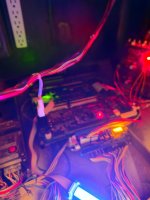
Works great.
I used it to test play thru shenryu.
The audio passback from soundboard to jamma works flawlessly.
Batman sound also works this way.
Button remap & audio works right.
Heatsinks stayed relatively cool, could probably be smaller if not in constant use.
 

Attachments

  • 20260417_191933.jpg
    20260417_191933.jpg
    110.9 KB · Views: 50
Last edited:
I have completed all the soldering and the line-in/out testing for 15 boards. My hat off to anyone who does this full time - it's kind of painstaking work!! The next step is to solder the JAMMA connectors on - and that is going to take some TIME... my wrists are already getting sore... :)

The good news is that the next soldering batch and testing is pretty simple:

validate that everything in passthrough works
validate that the button remap works
validate the 12v headers work
validate that the mono-mixing back to jamma works
calibrate the voltmeter (as best as possible)

That's it! The switches are on their way to me, so no board changes, thankfully.

I am hoping that I can get these going in earnest next week and start sending messages to people regarding what kind of connectivity they will be wanting as I work through the list, and get my crimpers out.

Matt
 
Quick note - as I slowly start to build these and get them out there - there is a small adjustment screw on the back of the voltmeter that you can dial in more if you want - the sampling seems to be a bit slow, and it's probably not the most accurate voltmeter - but I have pre-calibrated them here at home and its generally within 1-2%.
 
Got the final piece of the Batman puzzle in the mail, a fantastic little device!

Button remapping is great and will always be set to "ON"

I have got sound routed from the sound board to JAMMA mono with no problems.
Flipping the switch to ST-V routes audio back from the motherboard with no issues.

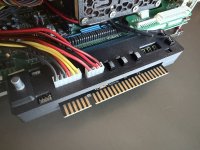
Here's some pics of the helper board connected:

IMG_6527.jpeg
IMG_6538.jpeg


Bonus pic, the OG ST-V Multi and the Dark Knight Multi:

IMG_6536.jpeg


p.s. I have some issues with my sound board; the Line Level from the RCA's is busted so couldn't test other features of this device... will have to get to the bottom of it (nothing to do with the helper PCB, but the sound board). Adding it to the never ending pile of things to get fixed!
 
Update - I still have one person who is pending a response.

Outside of that - I have finally finished building the rest of the batch, and crimping all the cables!

I have 5 ready to go and likely won't make another batch - as is always the case, these little projects tend to be a labor of love, and you never actually charge for all the hours of prep/testing/assembly... :) - wihch is why i opensourced the whole thing, it doesn't have to stop if someone needs one after this batch is gone.

Matt
 
Last edited:
Back
Top