Vs City Restoration

Big_P Big_p

Grand Master
Joined
May 2, 2024
Messages
514
Reaction score
720
Location
Australia
Not sure how heavy it will go on this one but at the very least I will get it running.

This came in a 4 cab lot @Ziggy Cheetos Dust put me on to. All 4 cabs (2x Vs City and 2x New Vs City) free as long as you could have them out by last Saturday.

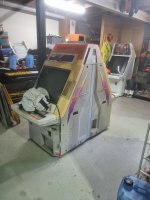
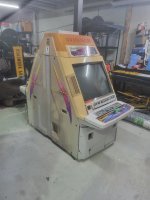
As of now I moved 1 Vs City into work for a restoration, packed a new Vs city into my back room and broke down the 2 parts cabs. Just realised I can't post photos so I guess they will come at some point.
 
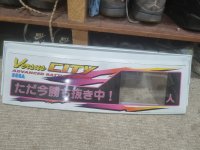
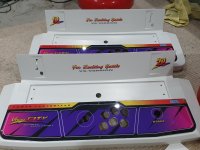
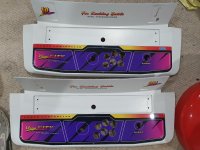
Photo are back. A photo of the one at work, which will be the first one that is restored.
 

Attachments

  • 20260528_163121.jpg
    20260528_163121.jpg
    155.9 KB · Views: 96
  • 20260528_163128.jpg
    20260528_163128.jpg
    147.5 KB · Views: 95
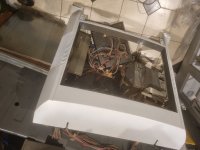
First thing to get sorted on this cab is power. It was powering but it was running a Sun Model 2/3 PSU in tandem with the standard JAMMA PSU and things were a bit or a wiring mess.

I pulled both the Sun and original Sega PSUs and am planning on replacing them with the PSU out of the New Versus City parts cab. In doing this I noticed a bit of buggery with the original power wires and a toroidal 220v to 100v transformer doing the mains voltage conversion. Toroidal transformers are nice for some applications but I need to check its isolation. It also dosent really mount neatly so ill likely change it out for one of the isolation/voltage reduction transformers in the other cabs. I have checked all these and they are all isolated and appear to work.

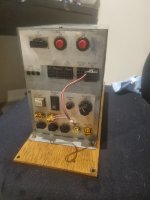
I picked out the worst of the two New Vs City PSUs and proceeded to strip it down to clean and inspect it. While it looked pretty bad, it actually cleaned up nice. It had a layer of black shit found in a lot of cabs that have been in a smoking environment but once that was cleaned everything visually looked into order.

The Amp.and PSU comming out of the cab were not as happy a story. While the Sun PSU was functioning cleaning uncovered a few chipped and decaying resistors. They measure correctly but can't be long for this world. Ill likely replace these, wire brush and paint the case and then sell the Sun PSU to cover new Control panels or something.

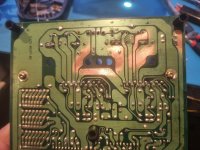
Likewise the Sega amp looked pretty bad. The back of the board was pretty corroded with a few of the resistors basically falling off at the slightest touch. Again they all measured correctly even with their legs totally corroded away. These were an easy fix what worried me more was the corrosion to the traces on the back of the board. I checked them for continuity and they all looked ok. One of the resistor pads was half eaten away with the leg corrosion so I decided to brush the corrosion out, fix the pad and reapply a UV setting solder mask. Looks ugly but should fix the issue.

With this done it appears to be working (it was actually working in its original condition). While there are a number of other resistors beginning to corrode, without a circuit diagram I am not sure if I can be stuffed working out all their values. I actually dont need this Amp so it was really just an opportunity to practice my fixing corroded pcb skills. While a little ugly I was pretty happy with the results.

 

Attachments

  • 20260609_165912.jpg
    20260609_165912.jpg
    193.6 KB · Views: 53
New Versus City PSU clean and ready for install, fingers crossed it works. Would be nice to not have to do anything to it.
 

Attachments

  • 20260611_211258.jpg
    20260611_211258.jpg
    135.8 KB · Views: 44
Put in the PSU today, fired it up... and nothing. Walking away sad I realised there was a second switch. Second time around I fired.it up and... click, click from one monitor, nothing from the other, all the lights and LEDs on the marquee came to life and everything metered as it should. The PSU fan was totally dead so that will need replacement but all in all very happy.
 
Turned a few yellow things white. I did a lot of investigation about how to best deal with the yellowing on the ABS parts. Short answer is there is no magic solution. All have their good points and bad.
RETEOBRITE: takes the parts back to almost original colour. It reverses the oxidisation but leaves the plastic open to new oxidisation. The best example is can give is its like sanding out rust but nit sealing it... its just going to rust again and this time quicker. I have seen this happen on consoles, sometimes back to where it was in 12 months. Thats cool with a console but I dont want to be doing this every 12 months.
SANDING AND BUFFING BACK TO WHITE: works for small parts but these have too many details and angles you would never get it all.

So that left...

PAINTING: I did the white with cans of Candy White (LB9A), but if its had my time again I would hit it with a spray gun. Ill do the grey using Light Grey (RAL7035) and a gun. Primed everything with a plastic primer and it came up ok.

I ended up choosing paint because it will stay white longer and may add a bit of strength to ABS tgats starting to get pretty brittle.

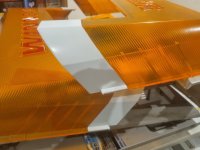
Cleaning up the topper marquee I tested a few solvents on the clear plastic and isoproponal was fine... but not with the sticky stuff holding down the film behind. I found this out the hard way after I cleaned it all with iso & distilled water and a bit of the isolation must have not completely dried under the film. I came out in the morning to a foggy marquee disaster which took a lot of buffing to resolve.

AND I CANT ATTACH PHOTOS AGAIN SO YOU WILL HAVE TO IMAGINE WHAT IT LOOKS LIKE.
 
Anyone know where I can get side art for a versus city?

Currently I can only find it for a New Versus city.
 
I just restored a versus city and had the art re created. Ill attach it here and in the art section of this forum. I ended up keeping the original shell of the PSU but was able to fit a brand new mean well inside the casing. Best thing I did. Couldn't get my NVS 4000 psu working. I also completed the sharpness mod on the ms9"s and playing 3rd strike on this cab has been a real pleasure. have fun dude I really enjoyed restoring a versus city.
 

Attachments

I just restored a versus city and had the art re created. Ill attach it here and in the art section of this forum. I ended up keeping the original shell of the PSU but was able to fit a brand new mean well inside the casing. Best thing I did. Couldn't get my NVS 4000 psu working. I also completed the sharpness mod on the ms9"s and playing 3rd strike on this cab has been a real pleasure. have fun dude I really enjoyed restoring a versus city.
Thanks for the artwork, its been fun so far. Looking forward to a working cabinet. This will be a CVS2/MVC2 cabinet.
 
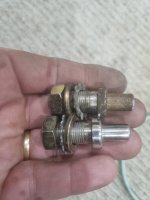
Sometimes things slow down a bit during cab restoration and this is when losing motivation can be easy. I just try to keep doing small tasks and set small goals. Today I polished some coin return buttons.
 

Attachments

  • 20260622_224827.jpg
    20260622_224827.jpg
    122.8 KB · Views: 34
Are those control panel surrounds painted or just cleaned?
Hey mate hope all is good.

They are painted. I cleaned them all first, sanded with 240 grit to remove small scuffs and scratches, filled larger stuff with 2 part auto body filler, sanded again with 240 grit, primed with grey plastic primer, sanded with 400 grit and applied 4 coats of VW Candy White lightly wet sanding with 800 grit between coats. I put the stickers on and will apply 2-4 coats of clear top coat, wet sanding with 1200 grit between coats and buffing the final coat with an auto cut and polish.
 
Last edited:
Back
Top