Big_P Big_p
Grand Master
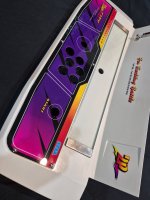
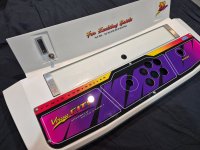
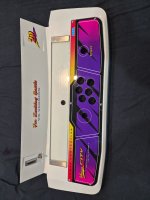
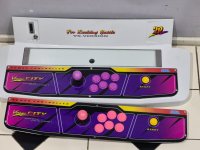
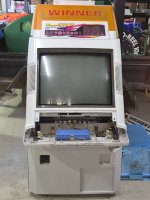
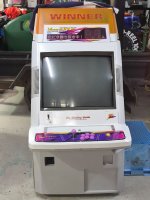
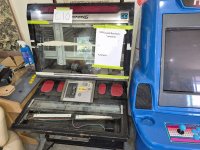
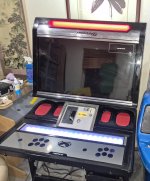
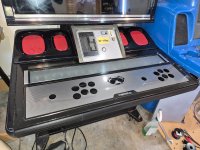
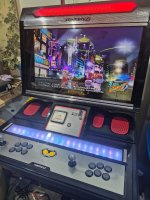
The control panels (the metal bit with artwork) are restored. I had 5 metal CPs. 1 went to @Ziggy Cheetos Dust. I then put aside the best 2 to sell, and was left with 2 pretty poor ones. The overlays were worn and lifting due to rust. I removed the overlay, wire brushed the rust off and sanded with 240 grit. I then used an all in 1 rust converter, primer and top coat and applied 4 coats.
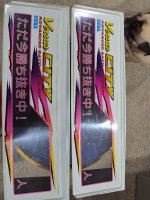
I was a little unsure of what to do about overlays. I just happened to be in contact with Arcade Art Repro in the Netherlands about the 1p and 2p and "for exciting battle" stickers who offered me a nice price all combined with shipping.
I would typically use @alberto1225 and I had discussed this with him. @alberto1225 had suggested selling the original CPs and doing a complete replacement. I liked this idea however the 2 I used for this were too far gone to be worth much. I did however keep 2 to sell and will use 2 @alberto1225 panels on the New Vs City Restore (comming after this one).
In the end it came down to a combination of "right time and place". Arcade Art Repros worked well for 2 reasons. The first is that i already know @alberto1225 panels are first rate (better than originals in most cases) so this gave me the opportunity to try someone elses without being scared that if they were terrible i would have serious regret. The second being that if I do have to replace these with full panels they were quite cheap so I wont feel like it was a massivd waste.
How do they compare to @alberto1225 panels? They are good, but they are not quite as good. If they come out at a similar price I would take @alberto1225 panels, where the price/quality point is you will have to decide yourself. Despite this I am very happy with them. The one point is on the other stickers. They have a matte finish not a gloss one like the originals. This is actually better if you atr clear coating over them but could suck if you wernt planning on doing this. The second point with these is that the top clear placememt sticker is too sticky. You need to make 100% sure you have fully pressed the stickers down before removing it. You also need to make sure you leave an edge to remove it from and finally you need to be careful when removing it you dont rip a sticker or lift paint. I would recommend at least a week or 2 of drying befor application of the stickers.
All in all happy with the result but looking forward to the SS panels I am used to on the NVS.
I was a little unsure of what to do about overlays. I just happened to be in contact with Arcade Art Repro in the Netherlands about the 1p and 2p and "for exciting battle" stickers who offered me a nice price all combined with shipping.
I would typically use @alberto1225 and I had discussed this with him. @alberto1225 had suggested selling the original CPs and doing a complete replacement. I liked this idea however the 2 I used for this were too far gone to be worth much. I did however keep 2 to sell and will use 2 @alberto1225 panels on the New Vs City Restore (comming after this one).
In the end it came down to a combination of "right time and place". Arcade Art Repros worked well for 2 reasons. The first is that i already know @alberto1225 panels are first rate (better than originals in most cases) so this gave me the opportunity to try someone elses without being scared that if they were terrible i would have serious regret. The second being that if I do have to replace these with full panels they were quite cheap so I wont feel like it was a massivd waste.
How do they compare to @alberto1225 panels? They are good, but they are not quite as good. If they come out at a similar price I would take @alberto1225 panels, where the price/quality point is you will have to decide yourself. Despite this I am very happy with them. The one point is on the other stickers. They have a matte finish not a gloss one like the originals. This is actually better if you atr clear coating over them but could suck if you wernt planning on doing this. The second point with these is that the top clear placememt sticker is too sticky. You need to make 100% sure you have fully pressed the stickers down before removing it. You also need to make sure you leave an edge to remove it from and finally you need to be careful when removing it you dont rip a sticker or lift paint. I would recommend at least a week or 2 of drying befor application of the stickers.
All in all happy with the result but looking forward to the SS panels I am used to on the NVS.
Last edited: