Windy 2 "let's call it project for now"

Mrhide

Legendary
Joined
Aug 17, 2016
Messages
3,080
Reaction score
5,340
Location
Montréal, Canada
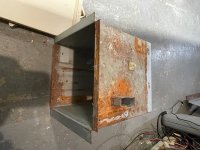
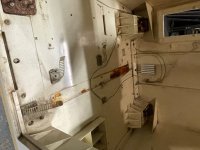
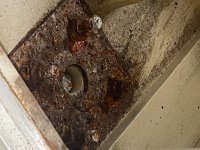
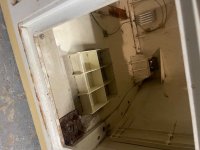
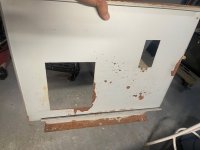
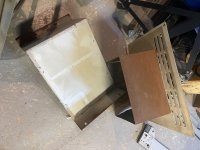
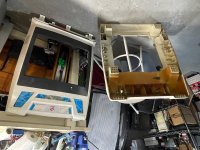
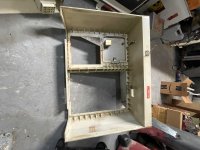
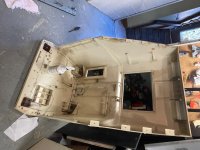
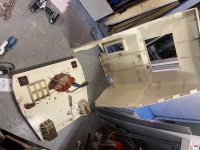
All right, so here' the Windy 2 "shell" I picked up yesterday.


IMG_8066.jpeg
IMG_8067.jpeg
IMG_8068.jpeg
IMG_8069.jpeg
IMG_8073.jpeg
IMG_8075.jpeg
IMG_8076.jpeg
IMG_8077.jpeg
IMG_8078.jpeg


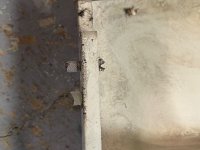
As you can see, it's missing a lot of things.
Do I bring it back to original state or do I simply make it jamma? we'll see but jamma is pretty darn simple to do.

What I am missing that is essential is the screen holders: any charitable soul that can take measurements and pictures from the front please?!
windy_ii_screen.jpg
 
Last edited:
When you buy a project, you dont ask many questions: you take what is given.

I realized the screen brackets were missing and had a friend (@Barth0lin0) measure a few things, with the intent on fabricating them.

Then i get a msg from the seller, after @SnakeGrunger told him that the brackets are needed, telling me he didnt know and has them for me.

Thanks guys! Things will move faster now!
Ps: if anyone had wiring, power supply back door or io, I’m listening!

IMG_8163.jpeg
 
@Mrhide yes ! when I saw your post I told him, why did you keep those if you're getting rid of the shell?
For the IO I made an adapter and pcb to mount a Sega JVS IO board into the Windy2 CP area. Lemme know si ça t'intéresse!
 
Last edited:
@Mrhide yes ! when I saw your post I told him, why did you keep those if you're getting rid of the shell?
For the IO I made an adapter and pcb to mount a Sega JVS IO board into the Windy2 CP area. Lemme know si ça t'intéresse!

I saw that … but since i dont have any wiring right now, i might just jamma it or the other option i am considering is to take everything from a sega US naomi universal (aka virtua golf) and stick it in.
It’s summer… and the Honda Vamos is getting a lot of my time ;)
Merci encore!
 
That’s great you got those brackets back. I remember @Molehill had to search high and low for his restoration. These machines have so many bits/boards to bring back to OG you might be better just getting it working with alternative bits you can find. There’s the IO. The link boards in the back, the power supply, the JAMMA JVS adaptor, the monitor fan box, crazy amounts of wiring etc. But maybe the US has a better supply of parts than here in Australia. Anyway I’m following and all the best with the project.
 
Disassembly…
More cleanup to do.
Sanding, powdercoat ? For sure ;)
 

Attachments

  • IMG_1271.jpeg
    IMG_1271.jpeg
    185.1 KB · Views: 39
  • IMG_1270.jpeg
    IMG_1270.jpeg
    170.4 KB · Views: 41
  • IMG_1268.jpeg
    IMG_1268.jpeg
    183.9 KB · Views: 36
  • IMG_1267.jpeg
    IMG_1267.jpeg
    163.2 KB · Views: 36
  • IMG_1265.jpeg
    IMG_1265.jpeg
    145.1 KB · Views: 38
  • IMG_1264.jpeg
    IMG_1264.jpeg
    204.7 KB · Views: 40
  • IMG_1272.jpeg
    IMG_1272.jpeg
    204.3 KB · Views: 30
  • IMG_1275.jpeg
    IMG_1275.jpeg
    172.7 KB · Views: 32
  • IMG_1274.jpeg
    IMG_1274.jpeg
    181.7 KB · Views: 34
Looks like I'm going to also be removing glue soon.
(ps: he does have the small marquee in BLUE ... he just didn't list it yet but that is what I'll get cause mine is cracked and glued badly)
1769618315510.png
 
Last edited:
well since my back door has no hole for the fan:
1770253093563.png


And i am missing the bottom small door to connect 2 cabs, i printed one… and i then I decided to put a fan in there .. and then I designed this one which I think is pretty cool now :)

1770253035898.png

1770253072197.png


Edit: well it's pretty "cool" but the 120mm fan doesn't fit in the hole dufus ! :huh: trying to make it work with standoff but I don't like it. more on this later.
 
Last edited:
Nice solution there. I was of the impression that the fan in mine blew air onto the chassis - but the way I received it at least - it blew air out of the cab. So yours will do a similar job I imagine. Do you have any vents to allow cross flow?
 
My reject button was rusted
IMG_1411.jpeg


and after having powder coated the door, there was no way I was putting that back in.
Didn't want to have to pay to have such a tiny part chromed so I just bought a "chrome" finish spray paint and voila. The texture kinda matches the coin reject hole
1770650434384.png
1770650401011.png

Since I am never going to press that button anyway, I'm happy with the result.
 
Last edited:
Awesome project and progress! I did something similar with a Blast City shell way back when and it's such a rewarding experience. Thanks for sharing!
 
Back
Top