What's new
No two transformers are the same when one buys these arcade machines it seems. This one had two in it. A small Japanese 240v-100v one was disconnected. A second and larger of the two had some surface rust and some sort of dried goo on it which reminded me of flux on PCBs. But maybe it’s some sort of glue.
IMG_8804.jpeg
IMG_8803.jpeg


Without going over the top I simply cleaned the brackets and gave them a spray with lanolin. The body of the transformer I painted with Galmet to stop the surface rust. I put the nuts and bolts into my redneck tumbler. This one has a cocktail of dried sticks, eggshell and small nails in it. Funny I agree but it works.

IMG_8805.jpeg

IMG_8806.jpeg
IMG_8807.jpeg
 
The speakers are pretty grubby and I couldn’t just brush the dust off, so as these are fairly easily replaced, I just took a risk and gave them a scrub with isopropyl alcohol and a toothbrush and then just went with some simple green. This is only possible because the cones are not paper and perhaps aluminium. The results are good but will wait and see how they sound. The mounting plates are quite pitted so I’ve sprayed them with some primer for now and will decide what to do next.
IMG_8811.jpeg
IMG_8813.jpeg
IMG_8812.jpeg
IMG_8814.jpeg
 
Okay, so while I’m trying to restore this machine nicely I’m saving money where I can. I have a few rattle cans lying around and one of them is an interesting paint for restoring old black bumper bars. I ended up using that to paint the speaker holders. They’ll be hidden under the grille anyway but I wanted them to be sealed against moisture. The finish is really cool - like the “crinkle” finish on Stern pinball legs.
IMG_8827.jpeg
IMG_8828.jpeg
IMG_8829.jpeg
 
I put the transformer back together with the tumbled nuts and bolts, and tested it out. Using eucalyptus oil I removed as much silver over-spray from the wiring and noise filter as I could. Someone who must be brain dead decided that to inhibit the rust in the base why not just spray cold-gal type paint over everything. I also tidied up the related wiring with a bit of heat shrink here and there, repaired some hacks, added spade connections to the fuse, and ditched the terminal block for a Molex type connector. I’ve clipped on a couple of a Wago connectors back-to-back (double-sided tape) as well - instead of the ugly terminal connector. There’s other ways to do this, but for now it’s okay as a place holder. It’s basically power in and a power out to the power supply and a power out to the chassis. I might switch this out later for a two-in, six-out adaptor that I’m waiting on from TEMU. I’m also a bit unsure about some of the cut ground wires in the system and whether I need to re-introduce them.
IMG_8817.jpeg
IMG_8821.jpeg
IMG_8824.jpeg
IMG_8825.jpeg

These white and black cut wires are just a reminder to me what goes where later on.
IMG_8819.jpeg

A cut ground wire above that I’m unsure about. I’ll know more when I pull apart the wiring harness.
 
Last edited:
I’ll be backlighting the control panel on this one. A method I’ve done on one of my Lindberghs is to get a tube used for water cooling PCs and stick a 5v LED strip through it. I used coloured adhesive tape in the past to cast the light colour I wanted. This time I tried painting it with white primer and then purple paint. But it failed. The purple wasn’t opaque. So I removed all the paint and stuck on a couple of layers of purple masking tape on one side only. It casts enough of a purple/white for what I want. It doesn’t photograph well. The light cast is somewhere in between the two photos.
IMG_8831.jpeg
IMG_8832.jpeg
IMG_8833.jpeg
IMG_8834.jpeg
IMG_8850.jpeg
IMG_8848.jpeg
IMG_8847.jpeg
 
Good work man.

Have you got a marquee holders for this? I think I still have a spare one of my repros if it's any good to you.

Let me know and I can dig and check it out. Yours for postage if you could use it.
 
Good work man.

Have you got a marquee holders for this? I think I still have a spare one of my repros if it's any good to you.

Let me know and I can dig and check it out. Yours for postage if you could use it.
I did get what I thought was a pair of them but they’re actually for Cyberleads. So I had to drill new holes. When I removed it from my other machine to get the metal mounting powdercoated I broke it. Then I glued it with the wrong stuff 🥹 So I do have one but wouldn’t say no to your kind offer (if you still have it).
 

Attachments

  • image.jpg
    image.jpg
    236.6 KB · Views: 39
I’ve been doing a bit of button planning after hours. This is what I’ve come up with. The grey of the grey button and joystick will look much more suited when you can see them with the grey/silver cabinet and grey control panel. I’ve got myself a new pair of limited edition LSH-56-01s with the sexy frosty shaft and a sweet set of ultralight buttercade hollow nylon Bandit Bullet tops. Thanks to @xb74 at CQB arcade for stocking those. Sorry about the carpet ☺️
IMG_8856.jpeg

IMG_8857.jpeg
 
I’ve put the spade connectors on the ends of all the control panel wires. These were all munted in some way or the wrong size for the button tabs so I cut them off. This machine has an “extra button” harness that is wired to buttons 4 & 5 (however that works on Jamma). It also has a 5v and ground wire, so I’ve wired in a connector for that to power the LED strip. If it’s too much of a drain on the PCB I’ll rethink it. I work with aviation engineers and a couple of them frowned at me for using cable ties on harnesses and said I should be using wax string - with the proper knot. I thought this was funny seeing as it has no functional justification in an arcade machine. But I thought it would be fun to try and master the technique. So all the little black ties you can see are wax string.

IMG_8861.jpeg
IMG_8863.jpeg
 
Last edited:
Part of the impetus to restore this machine depended on me getting a decent tube and chassis. I’d had my eye on this cabinet for a long time. It was sold as not working with no game board. However the seller told me he thought it worked and that the old game board was at fault. So I pulled the pin and bought it for $250AUD. Delivery was the obstacle and it cost me about $325 as well. So about $350 USD/EUR/GBP give or take 20.

IMG_8844.jpeg
 
Last edited:
The reason behind me getting this odd Spanish machine that had some history in Finland was the tube is a Toshiba A68KTB189X with a matching original chassis. So the perfect tube for this machine. Same as the MS9.
IMG_8851.jpeg
IMG_8841.jpeg

Lo and behold there’s a wiring harness laced up with wax string.
 
Last edited:
Its glass is beautiful and clean. An added bonus is all the wiring inside. I think I’ll be able to use this step down transformer instead of the one I spent a couple of hours on 😣
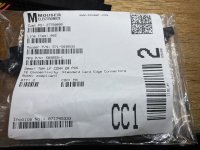
. It’s also good for teaching me some stuff and I can clearly see how everything is wired and set up. There was still a moment of truth to establish however. Does it work? I dug out my pcb junkie Jamma test card and wired up a little adaptor (hadn’t done this before so winged it). I turned it on and ‘k-yeah we have a good image.
IMG_8860.jpeg
IMG_8859.jpeg

It’s at the max of the horizontal size adjustment on the remote board because the games bezel was quite small. I’m expecting I’ll be able to adjust it more on the chassis itself but will wait ‘til I pull it out of the machine.
 
Now getting into some focused work I’m transferring the Jamma connector over to one I saw on here. I think it was @RealMFnG who was interested in seeing how it went. Doing the pins is a bit fiddly. I have a few crimpers and one does the job but I don’t think any of them are the “right one”. I have to examine each pin to make sure the little springy bit has not been squashed. Some of the pins were a bit marginal in the manufacturing. When I reach the thicker 5v and ground wires I’ll have to swap them out with a thinner gauge as well. The retention crimp on the pins won’t hold the thicker cable.
IMG_8872.jpeg
IMG_8875.jpeg
IMG_8873.jpeg
IMG_8876.jpeg

These are pricey as well. Pins over a dollar each. Does anyone know where I can get an adaptor that has Jamma male and female sides? Once, I plug into this I don’t want to pull boards in and out.
 
That is an excellent image. I thought MS9 Toshiba tubes were all A68KJU96X? I did a full yoke and convergence process with one a few weeks ago and I was able to get a really good and sharp image, so I am not afraid to go that route going forward. Only mentioning as if the yoke on your tube does not perfectly align with the MS9-29 specs for the horizontal, you may see some compression. I did with my impress tube (A68KJU96X-02). The differences with the Hitachi tube and MS9-29SU are also well documented.
 
That is an excellent image. I thought MS9 Toshiba tubes were all A68KJU96X? I did a full yoke and convergence process with one a few weeks ago and I was able to get a really good and sharp image, so I am not afraid to go that route going forward. Only mentioning as if the yoke on your tube does not perfectly align with the MS9-29 specs for the horizontal, you may see some compression. I did with my impress tube (A68KJU96X-02). The differences with the Hitachi tube and MS9-29SU are also well documented.
Thanks @JohnRambo'sKnife. I’m happy to be corrected on that. It’s just that my other Exceleena has the same A68KJU96X tube which is labelled MS9-29S. It also has an MS9 chassis but I don’t know anything about the yoke. The particular tube and chassis (Toshiba PB6643-1) combination I believe is in the Konami Windy I.

edit: @JohnRambo'sKnife i just re-read the above posts. I got mixed up here. You’re absolutely right about the tubes. For some reason I was thinking the replacement tube I found was the same as in my other Exceleena but it’s clearly a different model number. Maybe I read somewhere that the A68KTB189X was compatible with the MS9? I just can’t recall now but obviously had the confidence the tube would fit in the Exceleena when I bought it.
 
Last edited:
Oooh where did you get the acrylic pinout adapter from thats really useful.
 

Attachments

  • IMG_8874.jpeg
    IMG_8874.jpeg
    171.7 KB · Views: 36
Sorry I meant the adapter guide.
That's a really handy little tool to have.
IMG_8874.jpg
 
Back
Top