What's new
Joined
Sep 28, 2021
Messages
37
Reaction score
74
Location
Illinois
Finally had a chance to post up a build thread on this. Still trying to find the 27" Japanese mounting brackets in this thread HERE

Very warped, no 246 and no monitor assembly but otherwise a great project cab and we needed a dedicated SC2 machine with the popularity of it here. So here is the cab in route to us!

1703864943644.png


The control panel here, which was actually brought over a couple weeks before the cab due to logistics issues, so the first thing we did was order new levers and buttons, went with the following:

1703864778660.png

Next step was to buy a 27" frame! Which I found one relatively cheap and in great condition. It's a NEOTEC NT-500DXP7
1703864868265.png

Here it is all assembled,
1703864887907.png

Once we got the parts for the CP, we just set it on two stools and long night rotations started kicking off on this thing,
1703865029127.png


Now for the CP, figured since we didn't have cab yet, it was time to start recreating the CPO for SC2 which felt impossible to find. I had seen someone online had scans of it, but was told to let that one go. So I went ahead and got the dimensions of everything and sent them off to a friend in the marketing department at my company along with a bunch of (super low rez) pictures of Soul Calibur 2 CPOs to see what he could do!

1703865299828.png


So the next step was cleaning up panel face and removing the old tekken laminate. This panel was crazy warped so it took a lot of wood block, towel, clamps and hammering but got it to a nice flat surface again.

When looking at the underside, there are 2 additional knockouts to give the 6 button layout option, which we went with so we could do other older 3D fighter layouts with hole plugs as we see fit.

1703865557147.png


About a week later, the cab arrived! But there was a problem! The frame I had bought, didn't mount in place! The spots where the dogears would sit on the tube, are cutout there as shown below

1703865886000.png


After a bit of digging, it turned out that it's the Japanese style of mounting brackets. So they are needed along with the frame of the tube. These guys here,

1703866011682.png


When looking for monitor brackets, I came across a video of someone doing an LCD conversion of this cab and got an even better picture of the bracket by itself so I knew exactly what we needed next,

1703866064571.png


And that's when I started asking other operators and friends, then posted in WTB on here: https://www.arcade-projects.com/thr...dedicated-tekken-5-monitor.28247/#post-407522

More up next!
 
Another detail of what I mean about the importance of those brackets!

1703866561226.png

So the CPO turned out great! Figured out how everything went back together and got it all mounted up, though there is still a lot of metal reforming being done since this cab is super warped. Just about every panel has 2 of 4 or 3 of 4 holes that don't line up LOL but here it is now:

1703866306683.png


I asked him if I could post a link to the files so others in need of a CPO could print it, but he declined at this time. Hit me up and ask anyway if you stumble across this, and I'll ask him again if it's cool to share. I just can't, because I didn't do the work :( I think his intent is to list some online, not sure though. I got permission to share! Post updated.

Still need to pull the doors off and carriage bolts to clean off the rest of the vinyl, then clean up all the doors and add all the locks since it came with none.

Next while waiting for those monitor brackets, since we have a tube/chassis for this, was to start recreating decals but in a Soul Calibur 2 style.. Which to a lot of people would make zero sense at all considering this game didn't use cards (at least that I know of, but my knowledge on arcade stuff is pretty limited), but I think it would look cool and more complete.

Going off more low rez and super hard to read photos, I was able to finally figure out what stuff said and tried my best in inkscape, and I think they turned out really cool!

Had a friend print and drop into his vinyl cutter,
1703866776427.png


(Purchaces should Purchases, it's part of our lore/inside joke here -- in provided files, I will correct the spelling for whoever would want these)
1703866825491.png


Even worked out the Namco logo in the SC2 looking blue :joyful: to which he tested by applying it to his cutting machine haha

1703866919810.png


Next would be the instruction strip here but making an SC2 version of this is bit outside my ability,

1703867104009.png


Put it out there that I had found this set, and could just scan in the instruction sheet part and edit it for English text then resize, and what happened? One of the SC2 players ended up ordering it for us as a donation to the cab!

1703867199350.png


1703867958892.png

As for the general instructions decal, the fitting dimensions for the strip, leaving 1/4" on either side between the card readers, is:
attachment.jpg

18" Width x 3-1/4" Height

Soon as I do an English Ver. I'll be sure to add it to the drive link and update this post ^^

If anyone wants to print their own of the 3 decals that are done now, I can share these since I made these ones, kinda doubt it but hey here they are. If you wanted them for Tekken, you can always change the blue to red and update all the fonts to those of your liking. I could really see this being useful for people keeping it Tekken, since sooooo many photos I saw didn't have any of these decals. Remember, these are not 1:1, just me having fun and doing my best to get it as close as possible. If you're looking for exact accuracy, hire an artist to recreate them and provide really good reference images and measurements <3

Sizing:

1P Card Reader Decals: 2-1/8" Width x 3" Height (Printing Size)
2P Card Reader Decals: 2-1/8" Width x 3" Height (Printing Size)
Card Dispenser: 4" Width x 6" Height (Printing Size)
Card Purchase: 4" Width x 6" Height (Printing Size)
Namco Logo: 6" Width x 1-1/2" Height (Printing Size)
Control Panel Overlay: 37" Width x 12" Height (Printing Size) <- Updated Print dimentions.txt to add

Google Drive Link:


https://drive.google.com/drive/folders/17ruT_y2WZEUZNlvNdMBAPmDQ9skYDIoP?usp=sharing

Note, the card purchase decal is spelled correctly in the uploaded link in the event you want the straight up SC2 version. Otherwise, just colorize it red, find a font you can match best and type it in how you want. The white area is where you write the card cost. The NAMCO logo is red you will notice. It was not printed, but cut from blue vinyl.

This is the color spec for the blue used on everything

1703868499841.png


With who you take these to, they might have to change some sizing on the actual PNGs, not the image of the "canvas" or whatever else. But they are the exact ones we used to do this!

( Edit: Was going to post pics of the decals applied but have to wait a bit, lunch with friends!! )

So I can't seem to post drafts.. I'm coming back to edit this in like an hour, this is the second time I've had to write this ;(
 
Last edited:
Got the decals on!

PXL_20231230_011941358.jpg


Not much I can do at this point without the monitor brackets, aside from finishing all the locks, wrapping up some still missing bolts here and there, then of course clear off any remaining vinyl but here it is for now!

Also currently working on recreating the instruction card that goes between the readers , so will have updates and downloads for that soon !
 
Looking great! If you already didn't know, US machines also came with an instruction sheet and a character sheet, so you could always use that if you wanted.
 
My cab has the sheet, here's a photo from google:
(I can't find a scan of them yet, if they aren't out there I could look at scanning mine while my cab is apart, but I'm not sure if i have a large enough scanner)
 

Attachments

  • 8681EBB9-503C-46E2-9264-C31602021A07.jpeg
    8681EBB9-503C-46E2-9264-C31602021A07.jpeg
    252.4 KB · Views: 35
My cab has the sheet, here's a photo from google:
(I can't find a scan of them yet, if they aren't out there I could look at scanning mine while my cab is apart, but I'm not sure if i have a large enough scanner)
Hey! Thanks! Yeah, actually I'm working on scanning a copy. I couldn't find anything. There is a site zona arcade I think, I contacted them and they didn't even have em.

I was waiting to post updates in a larger format, I had posted elsewhere in far greater step by step detail but I got scans of the Japanese ones, started removing all the JPN text to make into English then do a cool blue BG to it :D But a friend had dug through his stuff and found the full set. I thought about editing to make it color match instead of being orange. I'm really undecided.

(WIP but example)
1704736757845.png

Though, once I scan the original set, I'll be sharing here, along with the JPN one and then my version of it. Joined 3 pics here of it to give a better view. I have to scan one half, scan the other then join them together, I too do not have a giant scanner haha I think is how most do it. Or just have access to an industrial one.

1704736770657.png

He's got the whole set so I'll be sure to scan everything so it's finally out there.

I have a ton of updates on the cab, I'm really excited to share but yeah ^^ want to get it a bit further along so I'm not being super spammy with it haha
 
Personally I really like the US art, because it matches the one side of the US side art. But if you still need scans of things when you are done let me know. I would also love a copy of the control panel side art if you could post that, I'm thinking about redoing my control panel because I don't like how the layout is. Looking forward to the updates too :)
 
Personally I really like the US art, because it matches the one side of the US side art. But if you still need scans of things when you are done let me know. I would also love a copy of the control panel side art if you could post that, I'm thinking about redoing my control panel because I don't like how the layout is. Looking forward to the updates too :)
Control Panel side art? Would that be the big circle one? I thought that went on the cab. It's hard for me at least to tell what was original, since a lot of SC 2 i see have SC or SE side art or just use the big circle ones here:

1704740748493.png
"

I don't think the orange instruction sheets matches the electric blue ocean stuff they have going on. Unless there was an orange side art?

The only things I've been able to work out that come with the kit is that one above, seen used as side art, or in that case they stuck it on the panel,

Move list:
1704740836357.png

instruction sheet:
1704740896140.png

Soul Calibur 2 logo stuck to the control panel pictured here, also that side art (on the bottom) which looks to be SC2, I think SC was mostly black and this has that ocean
1704740939498.png


The kit would also have the button stickers. It would be nice to see documented evidence of what the kit has, all we can go off is what random tiny photos you can find on google to put it together in your head haha

All I have access to are the Instruction Sheet (US), Move List (US), Marquee (US). Then all this JPN stuff:

1704741149728.png


All the above will be scanned and shared here also once it comes in.

If you have an example of the CP side art, can you post it? It might be something I could get recreated, at least keep an eye out for you for sure! I'll totally try and hook you up. There is just not enough out there for SC2 it seems like and I want to help try and change that. It's really been getting a growing player base where I'm at. I'm also a big fan of the game.

Once all of this is said and done, I'll go back and edit the first post and put every single attachment there, so people don't have to go digging for downloads and such :)
Don’t know what I was thinking when I said that, I meant the ocean control panel art, from what I know there was no control panel side art. On my cab those are put above the side art. With my art kit the one side art is blue while the other side is red.
 
I also have my control panel taken apart and with me so *maybe* I could take a photo of the button labels for you, I can’t guarantee how good it will be though, you might have to do some photoshop work on your end.
 
I also have my control panel taken apart and with me so *maybe* I could take a photo of the button labels for you, I can’t guarantee how good it will be though, you might have to do some photoshop work on your end.
Okay, so in the first post where I said I wasn't allowed to post the CPO but ask me anyway if someone wants it and I can bug him again..

He said I can share it!!!!!!

Here is, finally, the full SC 2 CPO!! It's as close to a 1:1 as you're going to get (pretty high chances at least). I'm uploading 3 versions, one is the one I used with the SC2 logo on it, the other is the "OG" variant, and also including the PSD files if you wanna like, do your own thing with it :joyful:

Too large for server. Adding with the SC2 pack on the google drive link:

https://drive.google.com/drive/folders/17ruT_y2WZEUZNlvNdMBAPmDQ9skYDIoP?usp=drive_link
1704774682881.png


1P Card Reader Decals: 2-1/8" Width x 3" Height (Printing Size)
2P Card Reader Decals: 2-1/8" Width x 3" Height (Printing Size)
Card Dispenser: 4" Width x 6" Height (Printing Size)
Card Purchase: 4" Width x 6" Height (Printing Size)
Namco Logo: 6" Width x 1-1/2" Height (Printing Size)
Control Panel Overlay: 37" Width x 12" Height (Printing Size) <- Updated Print dimentions.txt to add

The CPO-Araiguma is sized for this specific machine. I used EscapePodOnline, it was 70$ to print. The PSD is there if you need it resized, whoever your printer is might also be able to help you. And you can remove the SC2 logo from it if you want it closer to an OG.
 
Out of commission for a while from some medical stuff and figured I might as well post an update! Since this left off looking very much undone lol.

So first, got a crap load of stuff to scan! The SC2 stuff is in, and got a bunch of Sanwa stickers to also scan that will be used. Everything here:

PXL_20240220_232908261.jpg


Got the monitor loaded too. For anyone wondering how to do this, you need to lay the entire cab down, and drop it in,

PXL_20240126_180541715.jpg


Here it is stood up and powered,

PXL_20240128_000215677 (1).jpg


Once installing the 256, will post an update for that including more scans. Currently running the PS2 version as we always have here. Really looking forward to the 256!!
 
The System 256 and TD I/O donation came in from Birdand!!

Got a new PSU (Was missing) and exhaust fan (also missing) and the 256 installed,

PXL_20240305_200452674.jpg


Something else on this cab, Tekken 5 is wired 1, 2 for the bottom two and 4, 5 on the kick harness for the top two. So the cab is missing those pins completely on the JAMMA edge so that had to be wired in, not a big deal!

PXL_20240307_224908899.jpg


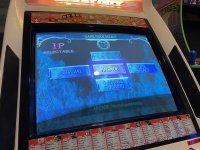
All hooked up, monitor tuned and fully ready to go for locals!

PXL_20240307_233314180.jpg


No Conquest yet! Still waiting on that to come in. I'll have to post up some pics of the whole thing in action. I'm sure at some point this thread will be useful in someone's hunt for something, be it SC2 or Tekken 5/5DR or doing their own thing

<3
 
Back
Top