You are using an out of date browser. It may not display this or other websites correctly.
You should upgrade or use an alternative browser.
You should upgrade or use an alternative browser.
- Thread starter Darksoft
- Start date
-
- Tags
- cps2 setup multigame
SmokeMonster
Champion
That looks glorious. Brilliant idea.if you do go with my enclosure I'm currently working on a holster that mounts to the front that fits my enclosure too
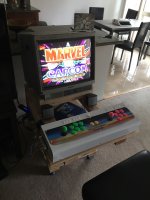
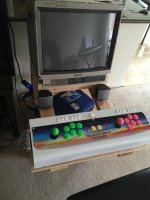
My mutil was here about a week ago but could not be delivered because there was no apartment number, so now it has to go to italy and back, sad, oh well. This gives me time to plan. HAS is en route as well. Still need to pretty this up but I have been busy and I am playing games. CPS2!!!!!!
Attachments
thanks! That’s awesome! I’m printing yours tonight and definitely let me know when the cradle is done!https://www.thingiverse.com/thing:857175https://www.thingiverse.com/thing:2413990Are there any 3D print files for a case for the selector?
I think most people run it out the circular "register" port. at least that's whats recommend in the official installation instructions.How did you guys run your ribbon cable out of the enclosure?
EDIT: thanks gusmoney
if you do go with my enclosure I'm currently working on a holster that mounts to the front that fits my enclosure too

Bit of a necro-bump but I've finally finished my CPS2 multi setup and thought I would share. I bought mine back in March 2015 (how time flies!) and the kit has been through a fair upgrades/updates thanks to Darksoft and Co and now finally I think this is its final form 


Crackle fixed by Pablo (thanks again dude! ) running the latest firmware and wired to support key writing/encrypted ROMs.
I originally wanted to mount the LCD in the front of a spare case I bought where the three plugs are but there isn't enough clearance unless I wanted a gap in the case which I didn't want to have. I decided instead to mount the LCD in the top of the case. I'm not a fan of the original long buttons so I used some shorter ones which are much nicer to use. I can't see the ROM set changing much now but I bought the SD extension years ago so I thought I might as well use it.
CPS2 Multi sticker courtesy of Olly @ [Arcade Art Shop] which was a bargantastic £1.50. Thanks dude!

Crackle fixed by Pablo (thanks again dude!
 ) running the latest firmware and wired to support key writing/encrypted ROMs.
I originally wanted to mount the LCD in the front of a spare case I bought where the three plugs are but there isn't enough clearance unless I wanted a gap in the case which I didn't want to have. I decided instead to mount the LCD in the top of the case. I'm not a fan of the original long buttons so I used some shorter ones which are much nicer to use. I can't see the ROM set changing much now but I bought the SD extension years ago so I thought I might as well use it.
CPS2 Multi sticker courtesy of Olly @ [Arcade Art Shop] which was a bargantastic £1.50. Thanks dude!

samplehunters
Student
Beautiful mod! That's unfortunate that the LCD doesn't fit in the front of the case as that spot seems ideal. I don't own a Multi but perhaps shaving down the LCD PCB would make it fit, or maybe it could be replaced by a smaller LCD module if it exists.I originally wanted to mount the LCD in the front of a spare case I bought where the three plugs are but there isn't enough clearance unless I wanted a gap in the case which I didn't want to have. I decided instead to mount the LCD in the top of the case.
Cheers dudes. It came out pretty well but it wasn't without a few hiccups and challenges along the way.
I went through three screen in total. The first one I desoldered from the button selection board so I could try and mount it in the front of the case. It was a close fit but it didn't quite go fit but there was only a few mm's in it. Looking at the PCB, as @samplehunters suggested, I thought I might be able to trim it down a bit so I did so with my router but the screen didn't work afterwards It looks like there were some hidden traces that I didn't see. I bought another LCD to mount in the way I did above but this turned out to be faulty and the characters wouldn't always display correctly depending on how the board flexed. The board was flexing due to clearance issues between the bridge board and the multi and the back of the screen. I eventually changed the LCD again and changed the orientation of the header pins, they're actually pointing upwards now, not downwards like in the photo above, which gave me a couple of extra mm in vertical clearance. I managed to break the LCD mount doing this though and had to remake that. I think I've had the shell apart/together/apart/together more times times than i would like to admit
  Still, all's well that ends well.
The real sucker punch was right at the end after I had got everything sorted and just needed to apply the new sticker. I peeled the old one off and it pulled off a big chunk oi the casing! I've never seen anything like it. I had to go out and buy some flexible plastic filler and fill it before I could fit the sticker.

I went through three screen in total. The first one I desoldered from the button selection board so I could try and mount it in the front of the case. It was a close fit but it didn't quite go fit but there was only a few mm's in it. Looking at the PCB, as @samplehunters suggested, I thought I might be able to trim it down a bit so I did so with my router but the screen didn't work afterwards
 It looks like there were some hidden traces that I didn't see. I bought another LCD to mount in the way I did above but this turned out to be faulty and the characters wouldn't always display correctly depending on how the board flexed. The board was flexing due to clearance issues between the bridge board and the multi and the back of the screen. I eventually changed the LCD again and changed the orientation of the header pins, they're actually pointing upwards now, not downwards like in the photo above, which gave me a couple of extra mm in vertical clearance. I managed to break the LCD mount doing this though and had to remake that. I think I've had the shell apart/together/apart/together more times times than i would like to admit
  Still, all's well that ends well.
The real sucker punch was right at the end after I had got everything sorted and just needed to apply the new sticker. I peeled the old one off and it pulled off a big chunk oi the casing!
 I've never seen anything like it. I had to go out and buy some flexible plastic filler and fill it before I could fit the sticker.
samplehunters
Student
Just thought I'd share this CPS2 Multi sticker I made for myself a while back in case someone else wanted to use it. It's inspired by the SSF2X label.
I haven't printed it out for myself yet but it should be OK. I included 2 versions, one darker than the other.

https://gofile.io/d/tNemd8

I haven't printed it out for myself yet but it should be OK. I included 2 versions, one darker than the other.


https://gofile.io/d/tNemd8


