What's new

jermz1

Grand Master
Joined
Dec 2, 2017
Messages
465
Reaction score
622
Location
South Korea
Just swapped my monitor with a LG 32GN650-B.
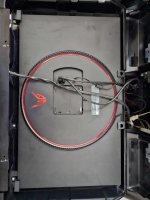
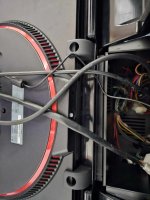
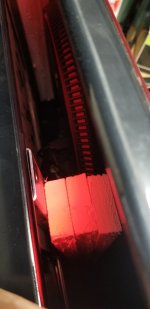
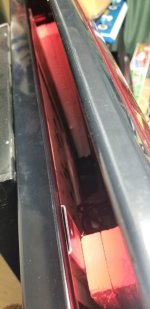
1in wide foam on the sides and 2in wide x3 stacked in the middle. I added some 3m heavy duty double stick tape to the foam to stick to the monitor.
Just need to screw in the main 4 bolts and slide the monitor a bit to the left.

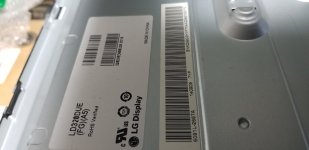
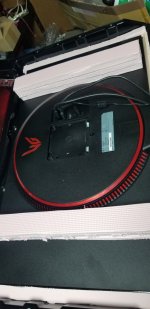
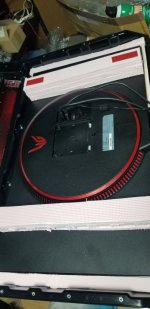
I have a korean noir. Not sure what comes stock.
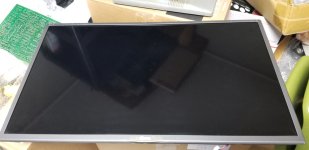
It came with an LG monitor.
 

Attachments

  • 20221109_205029.jpg
    20221109_205029.jpg
    151.6 KB · Views: 136
  • 20221109_205955.jpg
    20221109_205955.jpg
    81 KB · Views: 120
  • 20221109_205656.jpg
    20221109_205656.jpg
    76.7 KB · Views: 124
  • 20221105_004326.jpg
    20221105_004326.jpg
    73 KB · Views: 124
  • 20221105_011125.jpg
    20221105_011125.jpg
    86.3 KB · Views: 126
  • 20221105_004321.jpg
    20221105_004321.jpg
    95.6 KB · Views: 130
  • 20221105_001443.jpg
    20221105_001443.jpg
    121.9 KB · Views: 142
  • 20221105_001245.jpg
    20221105_001245.jpg
    115.4 KB · Views: 135
Just improved my previous mounts to 3d printed mounts.
 

Attachments

  • received_878625083956212.jpeg
    received_878625083956212.jpeg
    162.7 KB · Views: 117
  • received_349306380947261.jpeg
    received_349306380947261.jpeg
    156.7 KB · Views: 116
  • received_863506291734096.jpeg
    received_863506291734096.jpeg
    127.6 KB · Views: 104
  • received_1313261886045852.jpeg
    received_1313261886045852.jpeg
    130.8 KB · Views: 122
  • received_1053524049110935.jpeg
    received_1053524049110935.jpeg
    158.6 KB · Views: 122
The day after you posted this my original monitor started flickering. Would you mind sharing the STLs?
 
My LG monitors just came in for my Swap post Free Play FL. Really hoping @jermz1 will post these up soon for us!
 
I just swapped my two monitors today with these mounts and it went pretty well. I printed them in PETG. I used 2 LG 32GP750-Bs.

PXL_20231124_224616893.jpg

The more or less step by step:
Disconnect any video cables, power, the remote board, and the marquee light.
Remove the 4 big bolts and top 2 security screws and lift off the whole monitor assembly.

PXL_20231124_210358067.jpg

Take out the 8 little screws on the perimeter and remove the front glass/surround.
Unplug the light fixture at the top and remove the 2 screws holding it to the frame and remove it.
Remove the 4 big security screws in the corners to take the rear housing off the frame.
Remove the 6 large bolts to remove the stock monitor from the frame.
Put the rear housing back on the frame.
Put the light back on the frame.
Put it back on the cabinet.
PXL_20231124_210829392.jpg

Attach the new monitor to the glass using the mounts. I needed to use longer screws for the bottom mounts. They're M4.
Put the front housing/glass/monitor combo back onto the rear housing with the 8 little screws.
PXL_20231124_214810845.jpg
 
Last edited:
Great job once again !

Future project for me although there is something nostalgic about the old tech screen & for Megadrive/Snes it doesn't really matter.
 
If anyone was curious of the process, these are all the versions I went through.
I wanted to make a universal monitor mount but $$ was quickly adding up. Alignment is great but depth was an issue, as the monitor stuck out a quarter inch too far.
Aluminum brackets were great but couldnt do tight bends needed. The monitor bezel would get in the way of the screw.
Red prints were basic, they fit but too weak.
The rest were just fine tuning.
Still has work remaining but good enough to pop the monitor in.
20231126_122229.jpg

20230509_121431.jpg
20230509_121928.jpg
20230509_121941.jpg
20230509_122651.jpg
 
Last edited:
I'm looking at adding a LG monitor to my Noir in the near future so would love to get a source for some of these brackets.
 
I would be quite happy to purchase the from him as I don't have a 3d printer.

I'm guessing these fit most LG monitors? I've not bought one yet though.
 
Back
Top