What's new

Chandy Cab Restoration

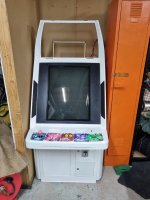
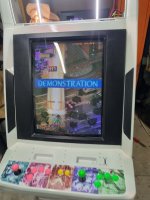
It ends up looking like this...
The big power cap goes from a cheap chinese 470uf 200v to a 560uf 250v Nishicon long life.
Looking at the rectifier diodes I am not interested in playing the game of what blows first, your 2A fuse or your 2A diodes. Out they come, holes ever so slightly drilled out, if you are careful you shouldn't have to scratch back too much mask to get a good solder.
The 140ohm white wire wound is a key point of failure in these chassis (along with almost every cap). These have been specked at 140ohm 25W to assist in heat dissipation of the transistor mounted on the back wall. If we cool this transistor a little better we can get this specked right 180ohm 25W, an ali clad mounted to the back wall does nicely.
While we are here we will replace the cap after the transistor with another Nishicon long life taking it from 100uf @ 160v to 150uf @ 250v
The trimpot in this area adjusts the DC Voltage which should read 110v over the 2w grey resistor to the bottom left (which the ali wall up) of the old white 140ohm wire wound. If you are using a 240v to 120v step down transformer to power this thing you likely have 117v comming in adjust it back to read 110v DC over the resistor.
This thing should be a little more reliable now. Still a few more things to change out (all the caps) but that can wait a bit.
 

Attachments

  • 20250418_101624.jpg
    20250418_101624.jpg
    142.8 KB · Views: 48
  • 20250419_200032.jpg
    20250419_200032.jpg
    169.5 KB · Views: 46
  • 20250419_200041.jpg
    20250419_200041.jpg
    168.2 KB · Views: 45
Last edited:
Nice work. I dunno how you know what to do here but I’m impressed and it’s going to help other people I’m sure. Are these chassis fairly versatile in their application?
 
Nice work. I dunno how you know what to do here but I’m impressed and it’s going to help other people I’m sure. Are these chassis fairly versatile in their application?
There seems to be 2 on the market. One 25-27" and 1 29". They are fairly versatile but some of that flexibility can only be achieved by component changes. Pretty easy to work on and a pretty straightforward circuit for someone who comes from building tube amps.
 
3.1 STICK IT 2 EM

Only one type if stick to put in a shmups cab. Sanwa LX with the original spring changed out for a 2lbs and a 1mm oversized stainless steel actuator.

Similar with the buttons Seimitsu screw ins as they are more robust and not as touchy. Nothing worse than dropping an unintentional bomb.

The marquee buttons are the same Seimitsu but the 24mm start buttons are just cheap chinese copies for now.
 

Attachments

  • 20250423_172332.jpg
    20250423_172332.jpg
    137.6 KB · Views: 28
  • 20250423_172409.jpg
    20250423_172409.jpg
    133.3 KB · Views: 24
X.XX ON THE DOWN LOW
Cab is in for paint this weekend. Despite the fact we are good mates, I can't tell you anything about the guy painting it, except for he is Italian, has a business just across the road from work, and his business seems to be closed lots. You work it out. He is also one of the best painters I have ever seen. I dropped off a can of plastic primer and a can of base coat white but he tells me he has something special in mind. Can't wait to see the results.
 
3.1 STICK IT 2 EM

Only one type if stick to put in a shmups cab. Sanwa LX with the original spring changed out for a 2lbs and a 1mm oversized stainless steel actuator.

Similar with the buttons Seimitsu screw ins as they are more robust and not as touchy. Nothing worse than dropping an unintentional bomb.

The marquee buttons are the same Seimitsu but the 24mm start buttons are just cheap chinese copies for now.
Nice option. I haven’t seen those actuators before. Do they feel different to play - being metal I mean - not the oversize?
 
Yeah, I think it makes the throw feel more solid or harder to knock and the return quicker, but this could all be in my head, who knows, a lot of these things are really subtle but definitely do contribute to an overall feel.
 
3.2 JUST LIKE US CHINA RELATIONS AT THE MOMENT "MY WIRE IS THICKER THAN YOURS"

There are a few issues on the power supply of the chandy. Most need to be totally rewired if you don't want your MF roof on fire. This one had a roughly wired meanwell supplying 5v @1A with no 12v and no -5v. That won't work.
Not wanting to spend too much on this MF, I am using a Meanwell RT-125b that was free because I ordered an A and they sent the wrong one from China. They corrected their mistake and sent the A which I used on another project but let me keep the B. The only problem with the B is that it supplies +5v, +12v and -12v not -5v.
I also have a CHAMMA harness straight from China and these also have issues one of which is that they are not wired for -5v. So I am taking the originality angle and not wiring for -5v (for the time being). The other issue with the Chinese CHAMMA harness is the stupidly thin power wires masquerading as 18awg (see photo for comparison with a proper 16awg). While from the outside they look like 18awg, just like Trump, they are all plastic and lack any substance. To make these work we will add a voltmeter, a strain reliever, do some organising and add thicker wires (make sure you do the GND too, if dont there is little point but i dont have photos of that).
.
 

Attachments

  • 20250425_112230.jpg
    20250425_112230.jpg
    146.5 KB · Views: 27
  • 20250425_102224.jpg
    20250425_102224.jpg
    189.8 KB · Views: 28
  • 20250425_110033.jpg
    20250425_110033.jpg
    86.7 KB · Views: 29
3.3 GETTING POWERED

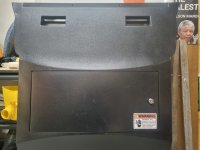
Not much to see here just replaced the old IEC with a 10A all in one including EMI filter. Also added a warning to make sure I cover myself for liability. The problem with the old one was not so much the front but what was behind it.
 

Attachments

  • 20250425_224327.jpg
    20250425_224327.jpg
    201.8 KB · Views: 27
  • 20250425_224449.jpg
    20250425_224449.jpg
    170.3 KB · Views: 26
  • 20250425_224511.jpg
    20250425_224511.jpg
    240.9 KB · Views: 27
3.4 GHOST IN THE SHELL

I am not in at the factory but I just got some photos sent to me. It's a base white with a really subtle pick pearl top coat to match the Seimitsu pink button and stick.

HOT TIP: if you are restoring a cab dont close your eyses and hit it with cans do it properly.
 

Attachments

  • 20250430_111954.jpg
    20250430_111954.jpg
    181.1 KB · Views: 40
  • 20250430_112006.jpg
    20250430_112006.jpg
    154.5 KB · Views: 38
  • 20250430_112213.jpg
    20250430_112213.jpg
    137.4 KB · Views: 30
  • 20250430_112049.jpg
    20250430_112049.jpg
    183.3 KB · Views: 33
  • 20250430_112229.jpg
    20250430_112229.jpg
    116.8 KB · Views: 35
4.1 LIGHTS CAMERA ACTION

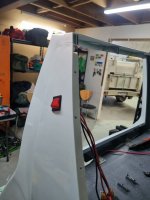
Marquee lights are a bit of a problem in this cab. Again these MFs went to Uganda to find their marquee light and its a tiny neon tube that needs high voltage (maybe 240v maybe 120v who the F knows as there is no information on these anywhere). Well that needed to go. The other problem up here is some MF has cut out a switch hole (at least it's the right size for something sensible). Oh and that MF hole for a lock in the marquee (right in the f'ing centre of the lower bit). What to do with that....

The plan... a 3d printed COB led square for light running off 12v. A separate 12v PSU to drive it (more on that in a min) a secondary power switch in that dumb hole on the side, so you don't have to pull the cab out to turn it on and a tube key lock as a marquee light switch to fill that stupid hole in the middle of the marquee.
A little on why a transformer. I will be running a meanwell rt-125a which has 12v but only 2A or 3A. The calculations on a cob strip are between 9 and 14 watts per meter. The square has just under 1m of cob, so let's say about 12watrs 12w/12v=1A. That's half of your PSU running your marquee leaving you only the other half to run everything else. Add a coin mech and light running off 12v you have stuff all left for the 5v line. So an additional 12v 2A psu for $20 is a good idea. Plus since we now need to run 240v to the marquee we may as well make that hole a power switch.

Now that god awful hole is a god awful switch...Oh well and the CPO while close to a blast city is a bit off, can you tell? You can see the pink pearl top coat well in the marquee picture.
 

Attachments

  • 20250506_131752.jpg
    20250506_131752.jpg
    152.6 KB · Views: 21
  • 20250504_155201.jpg
    20250504_155201.jpg
    126.2 KB · Views: 23
  • 20250506_131738.jpg
    20250506_131738.jpg
    181.2 KB · Views: 23
  • 20250512_234235.jpg
    20250512_234235.jpg
    238.6 KB · Views: 24
Last edited:
4.2 SCREEN TIME
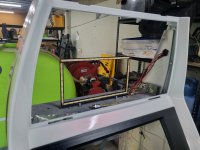
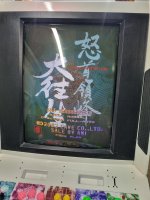
Ok dropped the screen in and the transformation is huge but... there is always a but with these cabs, some donkey has replaced the (most likely Ugandan) CRT with a chinese tube from a 29" chinese consumer TV and the bezel sticks out. I have seen this before with replacement tubes in a blast city. In that situation you back mount the monitor instead of front mounting it to buy youself the 1cm (~0.5" for those who still use their fingers for measuring). But (yes another one) I'll be dammed if I am rear mounting this on the 4 "screws" (you could hardly call them bolts) provided, (its hard enough in a blast with a proper mount and frame) This will take some thinking time. In the mean time I'll move on to wiring this thing.
 

Attachments

  • 20250513_160615.jpg
    20250513_160615.jpg
    165.7 KB · Views: 21
  • 20250405_145041.jpg
    20250405_145041.jpg
    139.7 KB · Views: 22
Last edited:
4.3 TOTALLY WIRED

Spent a day wiring this cab and... it's not pretty yet, and while it looks a little dangerous it's absolutely better than the death trap I started with.

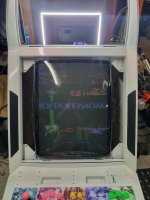
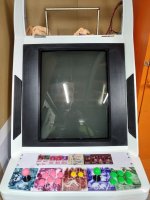
First job was getting the 240v in an making sure we had a safe mains earth to all metal parts (CRT mount, chassis shelf, psu 1 and 2 and isolation/step down transformer). I used wago,s all round and this was the first time ever. To tell the truth I really like the but they make your wiring a mess and it will take some time to work out how to wire cleanly with them. Once everything was done I only had time to turn it on (no CRT adjustment) before I had to head back home. The picture is mirrored because some Muppet soldered the red where the blue goes on the CRT yoke and THID Muppet only checked Horizontal was Horizontal and vertical was vertical not that they were the right way around. The rest is the result of no adjustment. On a positive note the marquee lights look... well bright and the chassis works after some significant mods, but as someone has already pointed out the current picture is big pee pee poo poo.
 

Attachments

  • 20250518_154541.jpg
    20250518_154541.jpg
    152 KB · Views: 13
A bit more time to play before and after work today and the picture is looking much better. Still needs degaussing (the rebuilt aliexpress chassis lacks a degauss circuit) and there is a slight vertical issue but I have run out of adjustment on the chassis. I will need to think about making a really small value change to one or both of the vertical width caps.
 

Attachments

  • 20250519_192104.jpg
    20250519_192104.jpg
    162.2 KB · Views: 18
  • 20250519_192047.jpg
    20250519_192047.jpg
    212.9 KB · Views: 19
4.4 INSTRUCTIONS PLEASE
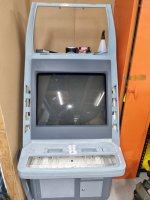
I am not sure I really know what happened when these cabs were designed. Originally there is a butt ugly steel plate above the CPO, with two... ashtrays?... coin trays? The best conclusion I can draw is that this cab was designed by one of those MF that puts cigarette burns all over the Exceleena and Egret control panel and use their cup holders as an ashtray. Like most stupid MFs they can't imagine that they got shit wrong and wondered why Japanese made their ashtrays out of plastic. Of course there was only one solution to this... make the ashtrays out of steel... and put a huge butt ugly steel plate around them incase you miss or need to butt out on the control panel. Problem solved.... Problem is I am a smoker and thoese things are cup holders and shouldn't have a cigarette go anywhere near them, and if you are so lazy that you can't find a better place to butt out than the CP, you deserve to have that thing butted out on your forehead.

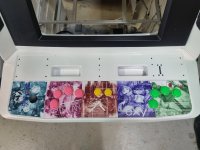
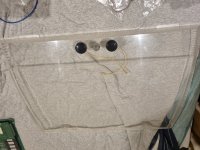
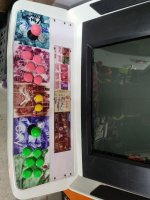
That butt ugly bit of metal just had to go. The original idea was to reinstate the Candy style coin drop on the CP, but while the cab can accommodate this none of the hardware was present and the coin door had a giant hole in it for a coin mech. Fixing the hole in the coin door and recreating all the drop coin hardware would have taken too long so that idea quickly died. What remained was the need to get rid of that ugly plate. The first idea was a second printed CPO. I ordered one with the CPO I put on earlier from Game on Graphix and while the quality was good, the one I ordered to replace the metal slab was tiny. When I looked into the images I had sent the background was transparent not white. So what came back was just the instruction insert. Thankfully this idea was crap anyway as the two giant voids would have sagged. After a few weeks of thinking today I took an 0.8mm white polypropylene sheet, an 0.8mm clear lexan sheet and the CPO printed instructions and removed the ugly steel ashtrays and surrounds. Here are the results. Shout out to Close Quarters Battle Arcade for the original Sanwa CP bolts and the two seimitsu buttons I was missing on each side (again I was originally planning on only having 4 and using the CPO to cover the 2 extra holes but it felt crap so I added 2 unused buttons to fill the voids)
 

Attachments

  • 20250522_175451.jpg
    20250522_175451.jpg
    173.1 KB · Views: 14
  • 20250522_175456.jpg
    20250522_175456.jpg
    169.9 KB · Views: 14
Last edited:
Back
Top