Ziggy Cheetos Dust
Grand Master
A while back I modified a Noir clone panel on one of my Lindberghs to make use of the Brook UFB.


A couple of years later I was going to do something similar to use an RGH Xbox360 in my Blast City. Along came the Mistercade and then the add on Mistercade Admin Board. Even better. So I got myself an old Versus City panel and got to work.
A couple of years later I was going to do something similar to use an RGH Xbox360 in my Blast City. Along came the Mistercade and then the add on Mistercade Admin Board. Even better. So I got myself an old Versus City panel and got to work.
 ). I also added a headphone jack that goes into the Mistercade and have the other two buttons/switches should I later use a Brook UFB and want to select between D-Pad and stick and/or isolate the extra buttons like on a fight stick.
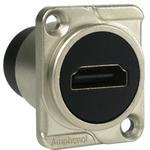

 I have pinched your idea for a sub panel but I need to do something slightly different due to clearance issues.
 . Wow, you were doing this 10+ years ago. The method holds up well though - even with CAD and laser cutting available. I bet I can sharpen my punches too with the right bit and a dremel.