What's new

Offsider

Student
Joined
May 6, 2021
Messages
22
Reaction score
56
Location
Australia
Hi there AP community! Got this NAC towards the beginning of the year, already have the restore over on Aussie Arcade. Wanted to share the adventure here too.

There are some talented people here on AP , I hope these restore posts are worthy.

Pre-Paint

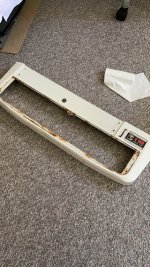
This poor thing had a hard life here were the problems


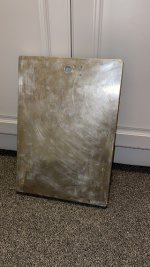
-Monitor anti-glare/static coating very patchy all over

-Rust in and around each door

-Surface rust on the monitor frame

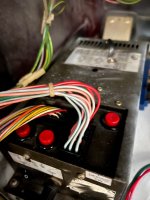
-Surface rust on the power supply

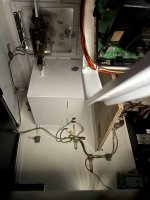
-Very filthy inside with nuts/bolts/wire off cuts/random junk like a cigarette packet lolly wrappers and broken quick disconnects all kicking around in the corners and wedged behind the transformer.

-Drink stains down both sides of the front and rear inside shell

-AC wiring looked messy and unsafe and no inline fuse

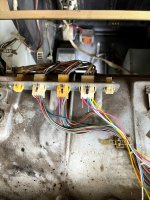
-Jamma loom and rest of the wiring just filthy everything caked in grime

-One of the mounts where the inlay bolts to the CP was broken off

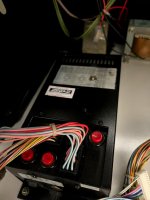
-Wiring coming off the underside of the Jamma connector worn to bare wire from rubbing on the rough edge of the PCB mounting frame (about 8-9 various wires needed to be spliced here and soldered and heatshrinked)

-Missing screws all over the machine

-Back AC panel was badly bent in one corner in order to access the back AC panel from the rear of the machine it looks like someone had just forcefully bent the panel back because they couldn't be bothered getting a tamperproof tool to get it off correctly.

-The only things that were earthed/grounded were the coin door and coin box, all others non existent & under the CP non populated grounding 2 pin AMP connector

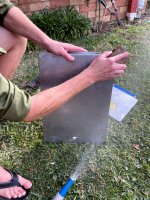
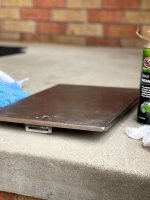
First job was the monitor, the anti-glare/anti static coating had been rubbed off in places all over it looked very unsightly. Went and bought a cheap car buffer from supercheap auto, it came with a terry towel sock pad/microfiber socks and a buffing sock. Got some Auto Glym windscreen/glass polish while i was there and got into it. Dampened the terry towel sock and liberally applied the Auto glym. With quite firm pressure i went over the face of the monitor multiple times until i could see all the purple/pink residue starting to come off. Kept rinsing the sock and repeating until it was all off and then with the buffing sock gave it a final once over, took about 20mins below is the result.

1.jpg
2.jpg


The monitor face looked very clear and flawless now I was happy, the Auto glym even took the swirls and light scratches out of it.

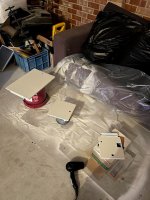
Next wife and I put the cabinet on its back and pulled the CRT and chassis, brushed the entire thing down to remove all the soot/black build up and using a lot of damp paper towels deep cleaned the back of the CRT.
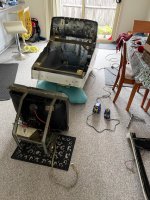
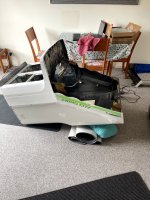
4.jpg5.jpg9.jpg8.jpg3.jpg
With the monitor and chassis cleaned I was itching to get it cranked up , re-assembled and did and initial power up. It looked quite vibrant and colours were good pre-colour calibration was happy the monitor didn't look to tired at all.

12.jpg
11.jpg


The cabinet stayed like this for a few months now in the living room in this state, I got irritated and decided it wasn't near good enough.

7.jpg
 
Last edited:
Painting

Sent the power supply and chassis off to the legends at Jomac and gutted the wiring and everything in the bottom cavity of the cabinet, took off the CP and bezel and all doors/hatches marquee light, coin chute etc etc, we pulled the monitor out again and got it into the garage.

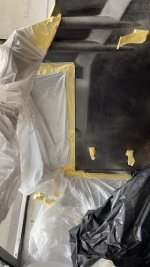
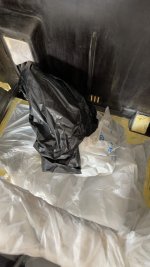
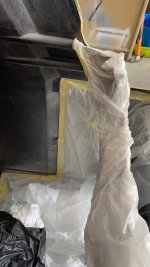
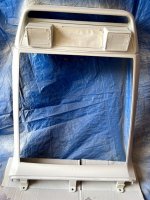
Whole cabinet inside and out was wet sanded with 600grit and then washed down and dried. Next was all the plastics/fiberglass material shell with plastic primer quite a few coats (3 or 4) inside and out which was then lightly wet sanded with 600 grit and washed down and dried thoroughly. I masked the front half inside of the shell and re-did the black rear half in gloss black. Let that sit for a few days and then masked the rear inside half and re-did the front inside half of the cabinet in gloss white.

13.jpg15.jpg14.jpg

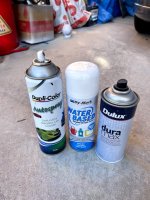
Paints used-

-Dymark acrylic gloss white spray cans from Bunnings (in the end used about 13 cans for the whole operation). Good paint in my opinion this stuff very hard to make it run and you can go heavy with it.
-Duplicolor autospray Gloss black spray cans from supercheap for inside back half of the shell and the power supply (would of been better to get a Dymark equivalent for this one)
-Dulux duramax plastic primer
-Supercheap primer/surfacer for the metal bits

0.jpg

Let this all cure for a few days and then the next mission. The metal doors, bezel, monitor frame, coin box, coin chute, CP and entire outside of the cabinet. Doors were a mess sanded these with 340 grit and primed the bare metal spots, rubbed down the monitor frame and primed that too (forgot to get pics of this) in my haste with the monitor frame i forgot to mask the metal on metal areas and where the frame bolts into the machine fixed this later on as i was putting it back together and sanded all those spots back for ground continuity messed the new paint job up a little in those spots but at this point i'd had enough. CP and bezel were easy same process as the rest of the plastics/fiberglass materials re-did all in again Dymark gloss white.

22.jpg21.jpg19.jpg

Entire outside of machine re sprayed quite alot of coats (6-7 cans worth)

18.jpg
20.jpg


Assembled all parts back on and did around 3 more final coats to blend everything in. Few days later wet sanded entire outside and parts with 1200 grit as the finish had quite a rough texture on the plastic/fiberglass ready for polishing in a few weeks.
 
Last edited:
Re-Assembly and finish up

AC wiring redone and cleaned up a bit with proper screw down connectors (used the heavy duty double screw types to be safe) new noise filter (originals terminals snapped clean off inside their quick disconnects (were white with corrosion). Added an in-line 3A fuse on 240v hot line coming in to the step down transformer. Just a note with the fuse, i ordered a cheap one from eBay and the gauge of the wire wasn't great, went to supercheap and bought one of the inline fuses there with the clear casing, from there i used the thicker gauge wire & its terminals from the supercheap one (pretty much matched the 240v line gauge) and put them in the original smaller screw casing connector and used the original's spring). So pretty much just used the smaller casing to suit smaller fuses and its spring with the super cheap larger gauge wires put in it.

30.jpg


At this point i worked on all the earthing/grounding and made it all reticulated (coin chute/monitor frame/all doors and hinges etc etc) and double checked the existing ground wiring.

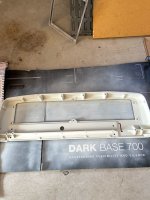
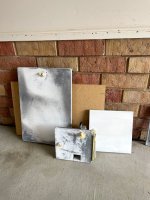
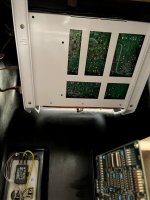
Went to Bunnings and got a big sheet of nice 13mm Plywood took my templates with me and got the staff there to cut the plywood sheet up, new PCB mounting boards made.

Everything got re-assembled over a few more days and we got the cabinet back inside. Was pretty excited at this point as this was the first power up with the serviced chassis and power supply from Joe & Sonya, the team at Jomac does a fantastic job and they are really nice people. I thought the monitor was decent before now its very vibrant I was beside myself.

33.jpg
34.jpg
37.jpg
46.jpg44.jpg43.jpg

New side art and pretty much the end of the journey here as in the following days I took some more pictures.

39.jpg
36.jpg


The feeling when the entire project was over and sense of relief that washed over me really was amazing I'm really happy I did this and urge anyone who wants to jump in and freshen up a cabinet like this to go for it, this was the first time I've done something on this level and I'm no pro painter but I'm really happy with the result.
54.jpg
 
Last edited:
Doors Revisited (For the third time) :D

The day I received the cabinet hurriedly I primed and resprayed these with crappy cheap white export brand spray paint. Amateur stuff I didn't even sand and prepare the surfaces on them, went straight over old paint etc. No idea.


On the initial restore above I learnt a little more, sanded these back to the original paint, primed and tried to get the surface as uniformed as possible, then sprayed with a lot of coats of Dymark Gloss white. I never took the locks off and really should have taken my time here but with the pressure of the whole project I just wanted them 'good enough'. While probably ok at this point for most people I kept procrastinating that I never devoted the time to them like the rest of the cabinet.


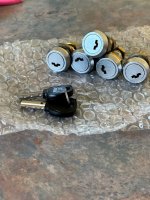
I noticed the bare metal parts of the cabinet that I did paint (the coin box & PCB frame) came out really nice and glossy, but the doors weren't great at all, looking at the cheap old locks and how the paint job turned out on the doors, decided to get a set of 5380 locks from Yaton, and while waiting- do these damn doors properly and for the last time.


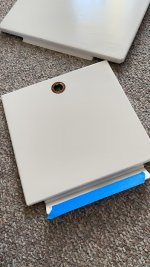
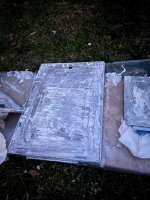
Under the locks was hiding rust, was glad I did this and discovered the problem. Went and got some paint stripper and back to bare metal. One slather and of this stuff and 10 minutes later did and inital scrape, there were so many coats of paint on these but the first pass got pretty much all of them off, one more slather and pretty much the remaining paint was gone, including the original factory paint. The really tough bits I then took the doors to the laundry sink and with some heavy grit got every scerrik of paint off.

1.jpg4.jpg5.jpg

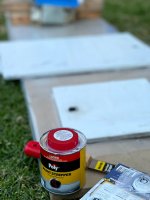
Went up in grits here to 600 and they looked quite uniformed. Just the process now of wax and grease remover, wipe off and prime (hair dryer help at this time weather wasn't great in these few days.)

6.jpg8.jpg81.jpg10.jpg

Got the good old Dymark gloss white out again (I swear I've kept the Dymark factory in business these past months I've bought about 30 cans of the stuff over the whole period.) Few cans worth on the doors this time , I've found with this dymark the more you layer the glossier you'll get, so went pretty heavy on em.

11.jpg


I let all the doors now sit for a good 3 weeks to cure , one thing with polishing the Dymark Gloss white paint, I wouldn't bother, the two smaller doors took the polish well (Nu Finish regular polish not cut and polish) the larger door however, the polish seemed to smear the gloss coat. I was disappointed because I had to (for the 4th time) spray this door. Sanded it back with 600 to get uniformed again, then 5-6 coats more to get that gloss layer back.

I suppose you could call this a single stage paint job, no clear coating/colour sanding I think they turned out as best as I could get, for protection lots of layers over the weeks of 'Bowdens Lazy Wax'.

12.jpg
13.jpg


Cabinet keeps evolving I'm still really happy with what's been achieved, for the future looking into a marquee, get the cabinet running on tokens and some fresh CP wiring.
Thanks for looking and joining me on the experience I had.

-Tom
 
Hi @Offsider ,
I was looking for anti-glare coating removing and I found your project here.
Great homemade restoration! Well done!

I am considering to buy a NAC with the anti-glare coating scuffed in several places.
From your description your method seems pretty straight forward. I wonder if there is any chance to damage the glass of the screen during this process. You know, when the pad operate in those areas of the screen where the coating is gone...

In this picture seems to see some blury areas left on the screen. Is it like that in the reality or it's just a picture effect.
12.jpg


I wonder if it is possible to unstuck the whole anti-glare layer starting from the corner of the monitor, like I watched in some videos on YouTube, instead of sanding it ?
Hey legend!

Thanks for your comment I’m glad it gave you some direction.
The picture mentioned above is just a blooming photo effect. As you can see here after using the polish mentioned, the monitor will be pristine.

IMG_7006.jpeg

There is no fear of scratching the monitor face , the polish is designed to remove hard water deposits from car windows. As long as you use that exact Auto Glym product, or one designed to remove water deposits from automotive glass you can’t damage anything.
Remember to use a terry towell “sock” for your polisher of choice (it has some texture to it) and just follow as I said and keep going over and over.
Keep the sock slightly moist, and rinse it occasionally. You will see the pink glare coating coming off.
As a final polish swap to a very soft polishing sock.
If you take your time and keep going over the face of the monitor with the method I mentioned you will have success.
I don’t believe Toshiba monitors like this have a film you can peel off mate, like say a consumer set or a PVm.
Don’t hesitate to let me know if you need any more help.

Cheers mate

Tom
 
Thank you very much for your help! You are very good!
If will get that NAC with this kind of issue, sure I will do your method.

I wonder if might be a good idea to use the polish with the car buffer on the original shell too (?) the original paint shouldn’t go off (?)
 
Thank you very much for your help! You are very good!
If will get that NAC with this kind of issue, sure I will do your method.

I wonder if might be a good idea to use the polish with the car buffer on the original shell too (?) the original paint shouldn’t go off (?)
Honestly mate, if you get a cabinet and you can avoid respraying the entire thing that is your best outcome.

With some polish (I’d avoid “cut & polish just in case but still would be fine) and a car buffer, you will get it looking really nice.
A lot of these Sega cabinets just need some love and attention to be somewhat bought back to their former glory

She is a beauty!
Thanks man,
This restore feels like a lifetime ago, I still dust and wipe the inside of the cabinet, keep it covered etc etc to this day.
It really was a special project
IMG_7506.jpeg
 
Honestly mate, if you get a cabinet and you can avoid respraying the entire thing that is your best outcome.

With some polish (I’d avoid “cut & polish just in case but still would be fine) and a car buffer, you will get it looking really nice.
A lot of these Sega cabinets just need some love and attention to be somewhat bought back to their former glory


Thanks man,
This restore feels like a lifetime ago, I still dust and wipe the inside of the cabinet, keep it covered etc etc to this day.
It really was a special project
IMG_7506.jpeg
I agree! I have a pre-repainted NNC from JCL and its beautiful but I got that because of the plastic and yellowing that I did not want.

My other cabs without yellowing - simple green - and some love got them nice and clean - Meyers Rust Remover for the black scuffs.

I would only get re-painted I think if it was a really bad case. There is something special about both repainted and non repainted cabs depending on the situation.
 
I have some of the Anti-glare coating scuffs on my NAC. Might need to review this thread \ hit you up with some questions in the future.
 
Back
Top