jermz1
Grand Master
Just received my order, I'll be messaging those who pmd soon.

Still avaliable?I have 2 sets left.


Yes i am !Recevied my Metal parts today. Thanks Jermz! I'll document the swap from 3D parts to Metal for anyone interested.

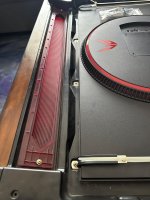
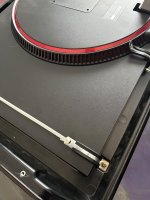
You read my mind I have the mounts and have been wondering if anyone had a successful monitor swap yet.I upgraded my Noir with the LG 32GP750-B using the aluminum mounts. Huge shoutout to @jermz1 for the original design plus improvements. Also thank you to @notsonic for the removal steps and @PASTBLASTER for the video. It looks great but I struggled with it the first night when trying to have all 4 mounts loosely in place before dropping the monitor in. This is what I did in case it helps anyone else:
- Screwed the bottom mounts in loosely using longer M4's as seen in the video.
- Used 10mm thick spacers as recommended for the bottom mounts. jermz1 sent images and confirmed that the thickness is the most important. His width was 17.85mm and the inner hole was 8.43mm. The ones I found at the hardware store were slightly larger than that.
- Laid the screen down and centered it.
- Screwed the top mounts on loosely.
- Stood the monitor up slowly to let it slide down fully into the bottom brackets, centered it again, then tightened them all.

Que dotos y vídeos has podido ver para instalarlo? Yo tengo que hacer algunas modificaciones para mi pantalla y me gustaría verlo si es posible. GraciasActualicé mi Noir con el LG 32GP750-B usando los soportes de aluminio. Un agradecimiento especial a @jermz1 por el diseño original y las mejoras. También gracias a @notsonic por los pasos para desmontarlo y a @PASTBLASTER por el video. Se ve genial, pero me costó la primera noche al intentar colocar los cuatro soportes sin apretarlos antes de colocar el monitor. Esto es lo que hice por si a alguien le sirve:
- Atornillé los soportes inferiores sin apretarlos demasiado usando M4 más largos como se ve en el video.
- Usé espaciadores de 10 mm de grosor, como se recomienda para los soportes inferiores. jermz1 envió imágenes y confirmó que el grosor es lo más importante. Su ancho era de 17,85 mm y el agujero interior de 8,43 mm. Los que encontré en la ferretería eran un poco más grandes.
- Coloqué la pantalla hacia abajo y la centré.
- Atornillé los soportes superiores sin apretarlos demasiado.
- Levanté el monitor lentamente para dejar que se deslizara completamente dentro de los soportes inferiores, lo centré nuevamente y luego los ajusté todos.
It will help to watch the video posted earlier in the thread and read notsonic's steps to disassemble. I don't believe there is a video of actually installing it though, which is why I wrote out the steps that helped me.Que dotos y vídeos has podido ver para instalarlo? Yo tengo que hacer algunas modificaciones para mi pantalla y me gustaría verlo si es posible. Gracias
Te será útil ver el video publicado anteriormente en el hilo y leer los pasos de Notsonic para desmontarlo. Sin embargo, no creo que haya un video de la instalación, por eso escribí los pasos que me ayudaron.
En cuanto a herramientas, creo que solo tenía un destornillador (JIS), una llave inglesa y una llave Allen (llave hexagonal) para las M4 que tenía en el garaje, pero cualquier cosa que necesites es fácil de encontrar. Lo más divertido es cuando te encuentras con problemas, como me pasó a mí, donde algunas ya estaban desgastadas o dañadas y tuve que comprar un juego de brocas para zurdos para taladrarlas y encontrar un repuesto. Pero eso es parte del hobby. =)


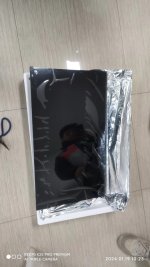
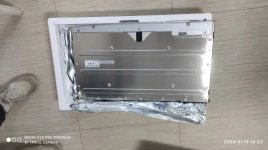
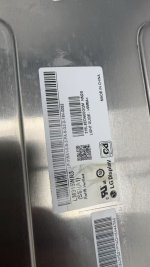
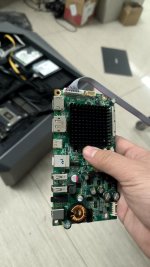
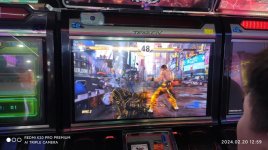
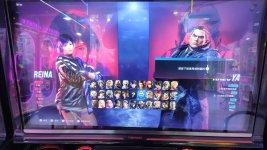
Hell yeah! Very cool thanks for the details.This personal upgrade to a NOIR monitor uses a bare screen approach. It features LG LED panel, specifically the LM315WR5-SSA1, a 4K 60Hz IPS panel.
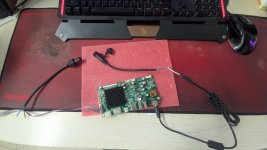
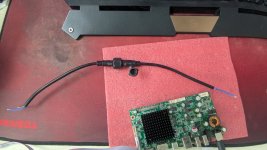
It's no casing, only the power supply and driver board.
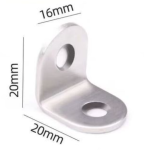
Because there's no casing and the panel is very light, it's secured using a compression method (backplate springs) and metal pads.
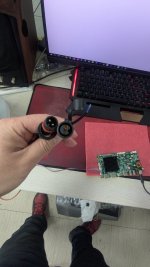
The panel uses a default 24V DC power connector, and the NOIR frame has a built-in 24V power supply, so a custom power connector for the driver board is sufficient without an external power source.
That's so cool.
Price: Screen + Driver Board + Other item = $230.