MiSTer JAMMA options?

Yeah nothing works when I press p2start it resets mister.

Also I'm using a mister Pi instead of a regular mister but the seller on eBay said it still works with it.
 
Last edited:
Yeh I have a mister de10 in one of these mister to jamma/jvs and a mister pi in my other ..


Can you get to your settings.ini page ?

I have to use a hdmi lead to a monitor to see my settings
 
Appolagies …
The switches need to be
This way
IMG_5664.jpeg

For kicks ..

I am not getting my .ini settings through hdmi …
Só I will need a bit more time to get a vga long enough or set up a small vga monitor near my cabs to get access to my .ini settings

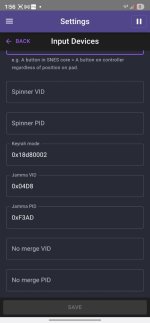
To see my jamma vid and pid

Although ..,
I am pretty sure you can get it sorted in update all.script

I will just check but I think it automatically configures it ..
 
Input Issues (VID/PID): If using JAMMA/SNAC, you may need to configure no_merge_vid and no_merge_pid in your mister.ini to ensure proper controller mapping.
 
To configure JAMMA controls on a MiSTer FPGA, you must set the Vendor ID (VID) and Product ID (PID) in your
MiSTer.ini file to match your specific arcade interface device (such as J-PAC, I-PAC, or a USB JAMMA adapter). This ensures the MiSTer correctly recognizes the input as a game controller rather than a standard keyboard.

Common VID/PID Settings (MiSTer.ini)
Add or edit these lines in your mister.ini file located on your SD card:
  • Legacy J-PAC (Mini-USB/PS2):
    jamma_vid=0xD209
    jamma_pid=0x0301
  • USB Capable J-PAC (Only PS/2 connectors):
    jamma_vid=0x04B4
    jamma_pid=0x0101
  • Generic Chinese USB Jamma/JVS (AliExpress):
    Often recognized automatically, but if not, user reports suggest using the VID/PID found via the "Define joystick buttons" menu.

Essential Setup Steps
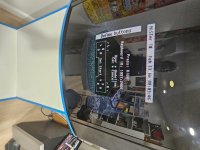
  1. Define Joystick Buttons: Go to the MiSTer Main Menu -> Define joystick buttons. Map your JAMMA controls (Joystick, Button 1, Button 2, etc.).
  2. Configure J-PAC Mode: For J-PAC users, ensure it is in dual-controller mode (not keyboard mode) so the Neo Geo core recognizes both players separately. This is usually done by holding Player 1 + Button 3 during boot.
  3. Disable Input Merge: If only Player 1 works, or buttons are mixed up, disable input merging in MiSTer.ini:
    ;no_merge_pid=0 (remove the semicolon).

Troubleshooting
  • No Controls: Ensure your J-PAC/I-PAC is not being seen as a keyboard. If it is, the inputs will not work in many cores. Use WinPAC software to force it into gamepad mode.
  • Test Input: Use the "InputTest" core in the Utilities section to verify that buttons are mapped correctly.
 
Basically you don’t want Your sticks and buttons defined as keyboard !

Try configuring your sticks and buttons as a controller ..

Test in input test
 
Also getting the remote app
Of you don’t already have it?
Will help you a lot..

Let’s you get to your settings on your mobile phone


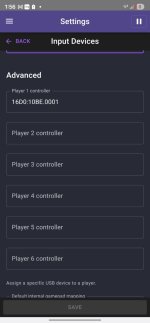
Here is my vid and pid
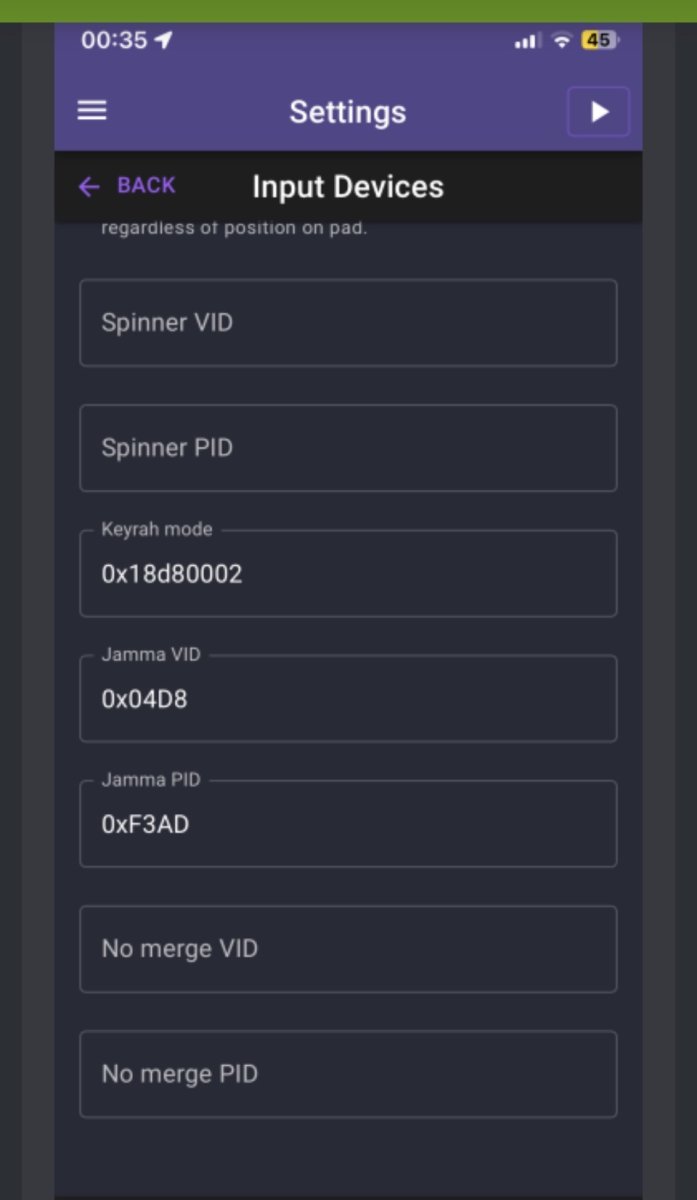
IMG_5668.jpeg
 
Also getting the remote app
Of you don’t already have it?
Will help you a lot..

Let’s you get to your settings on your mobile phone


Here is my vid and pid

IMG_5668.jpeg
This is what I got ? U see anything
 

Attachments

  • Screenshot_20260209_135624_Remote.jpg
    Screenshot_20260209_135624_Remote.jpg
    46.4 KB · Views: 27
  • Screenshot_20260209_135643_Remote.jpg
    Screenshot_20260209_135643_Remote.jpg
    44.8 KB · Views: 22
Try this now

This is the way to set Controll’s
For A controller ..


1. Global (Main Menu) Mapping
This step defines your controller's physical layout so MiSTer recognizes it across the entire system.
  • Access Menu: Connect your controller and a keyboard. Use the official MiSTer Main OSD by pressing F12 on your keyboard.
  • Define Buttons: Select Define Joystick Buttons from the menu.
  • Follow Prompts:The system will ask you to press specific buttons (Up, Down, Left, Right, A, B, etc.).
    • Skip Buttons: If your controller doesn't have a specific button (e.g., an analog stick), press F12on your keyboard or a pre-assigned Menu button on your controller to skip it.
  • Save: Once finished, the configuration is stored based on the controller's unique hardware ID.

2. Core-Specific Mapping
Once the global mapping is done, you must assign those buttons to the actual controls of the game system you are running (e.g., mapping your "B" button to "Fire" in an arcade game).
  • Launch Core: Open the specific core (e.g., NES, Genesis, SNES).
  • Open OSD: Press F12 (or your defined Menu button) while inside the core.
 
Try this now

This is the way to set Controll’s
For A controller ..


1. Global (Main Menu) Mapping
This step defines your controller's physical layout so MiSTer recognizes it across the entire system.
  • Access Menu: Connect your controller and a keyboard. Use the official MiSTer Main OSD by pressing F12 on your keyboard.
  • Define Buttons: Select Define Joystick Buttons from the menu.
  • Follow Prompts:The system will ask you to press specific buttons (Up, Down, Left, Right, A, B, etc.).
    • Skip Buttons: If your controller doesn't have a specific button (e.g., an analog stick), press F12on your keyboard or a pre-assigned Menu button on your controller to skip it.
  • Save: Once finished, the configuration is stored based on the controller's unique hardware ID.

2. Core-Specific Mapping
Once the global mapping is done, you must assign those buttons to the actual controls of the game system you are running (e.g., mapping your "B" button to "Fire" in an arcade game).
  • Launch Core: Open the specific core (e.g., NES, Genesis, SNES).
  • Open OSD: Press F12 (or your defined Menu button) while inside the core.
Tried it all I might have a faulty board
 
Try this now

This is the way to set Controll’s
For A controller ..


1. Global (Main Menu) Mapping
This step defines your controller's physical layout so MiSTer recognizes it across the entire system.
  • Access Menu: Connect your controller and a keyboard. Use the official MiSTer Main OSD by pressing F12 on your keyboard.
  • Define Buttons: Select Define Joystick Buttons from the menu.
  • Follow Prompts:The system will ask you to press specific buttons (Up, Down, Left, Right, A, B, etc.).
    • Skip Buttons: If your controller doesn't have a specific button (e.g., an analog stick), press F12on your keyboard or a pre-assigned Menu button on your controller to skip it.
  • Save: Once finished, the configuration is stored based on the controller's unique hardware ID.

2. Core-Specific Mapping
Once the global mapping is done, you must assign those buttons to the actual controls of the game system you are running (e.g., mapping your "B" button to "Fire" in an arcade game).
  • Launch Core: Open the specific core (e.g., NES, Genesis, SNES).
  • Open OSD: Press F12 (or your defined Menu button) while inside the core.
Shouldn't my control be all good for jamma or should I plug a conr
 
Back
Top