Thank you all for your kind comments
") @Aurich
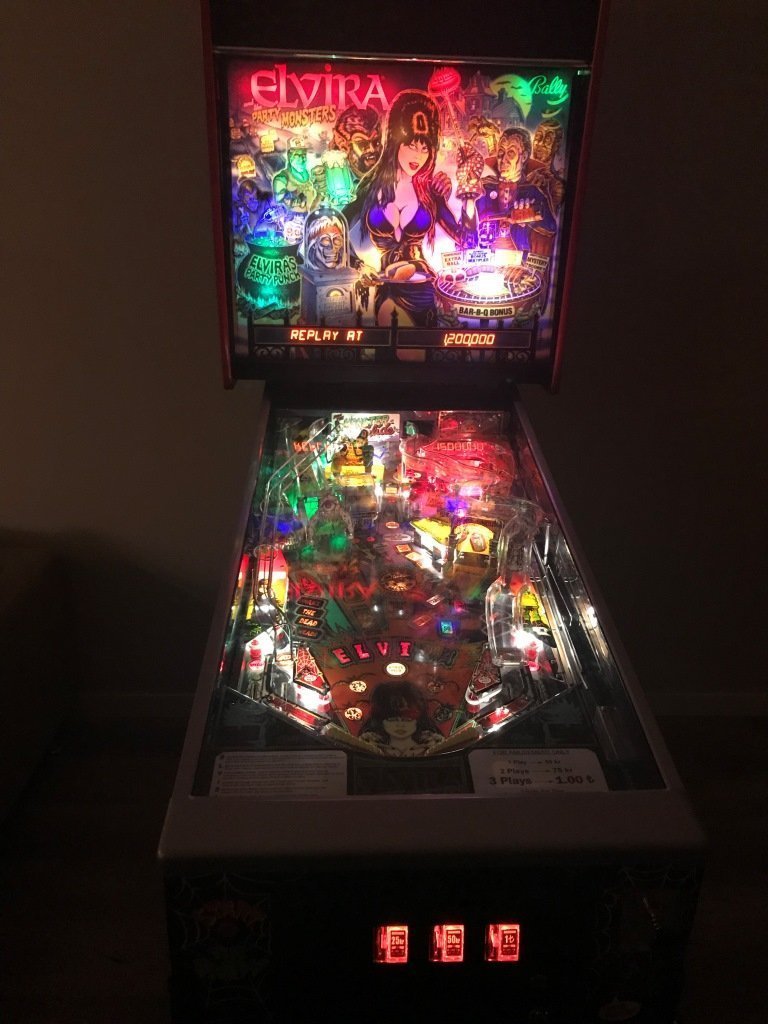
@Aurich I guess I've seen your restoration photos before since I remember the f**ed up face of Elvira
 @mastercello
 I've documented all my work on a local website but unfortunately its in Turkish. However, I'll try to provide quick answers to your questions with photos
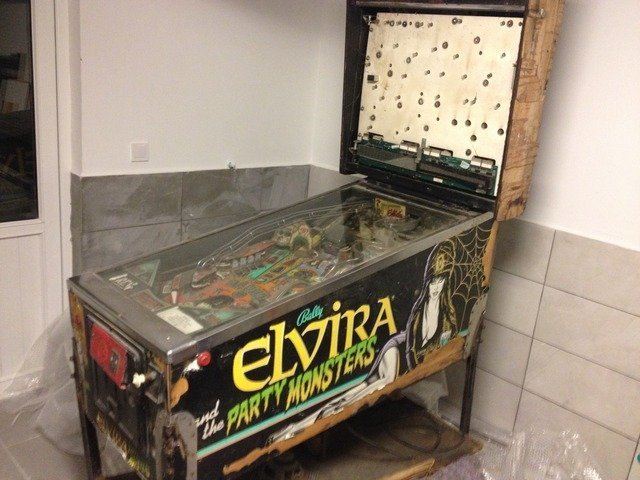
First of all... If your playfield is in OK condition, do NOT touch it!!! Its a HUGE pain in the butt to disassemble everything, remove mylar, touch up/paint, clear coat, reassemble everything back...
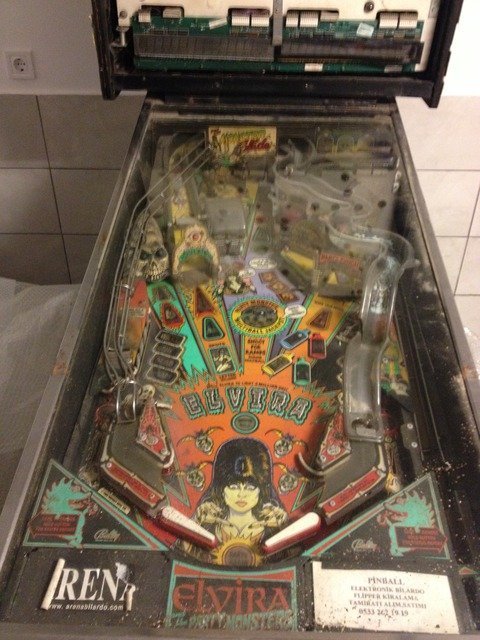
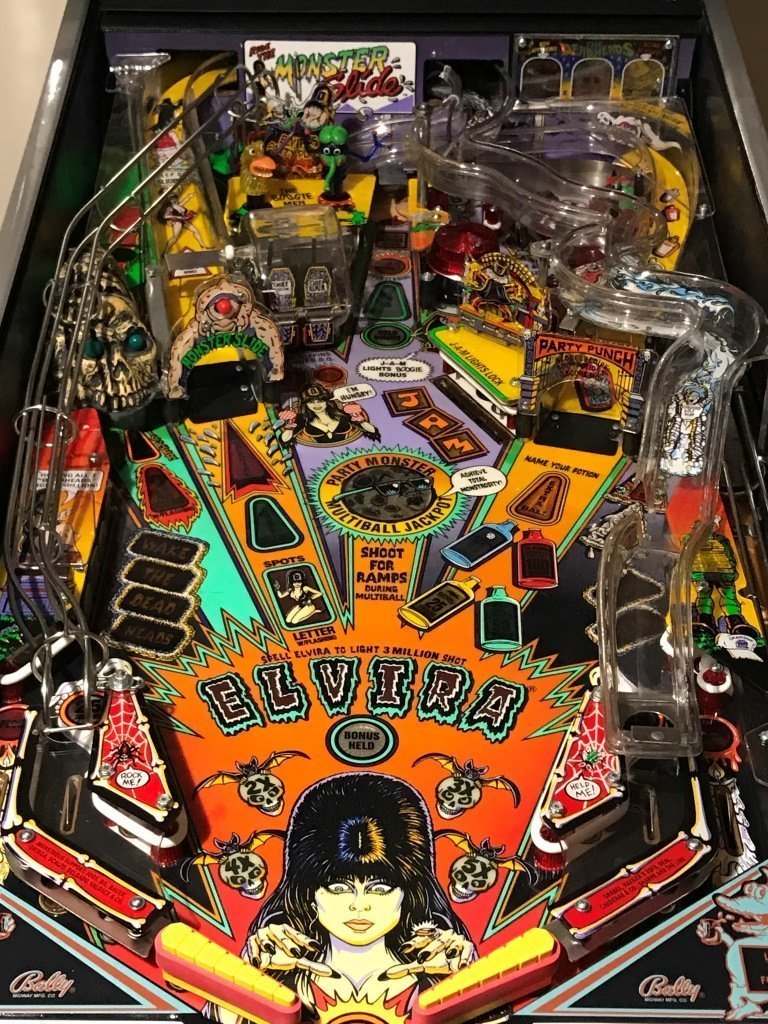
Compare your playfield with mine (or like @'Aurich''s PF) then judge yourself and proceed...
OK, here are my methods;
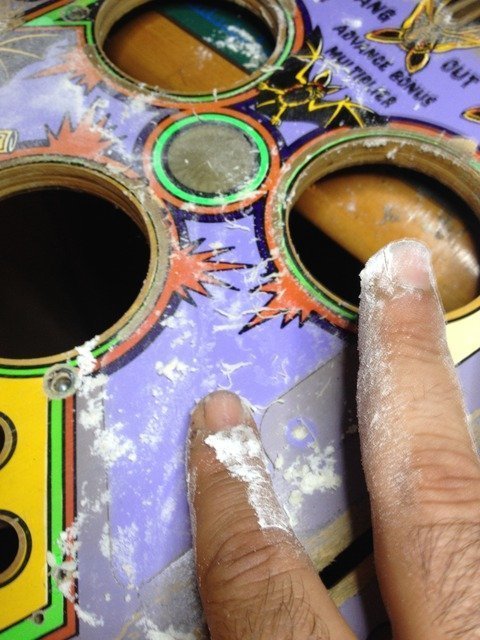
Removing Mylar: I used a heat gun (actually the heat gun of my solder station) in medium setting (100 celcius) and used alcohol (IPA) and flour to remove the adhesive residue. Peel the mylar slowly but you will loose some of the insert decals no matter what you do. However, no paint was lifted during the procedure.
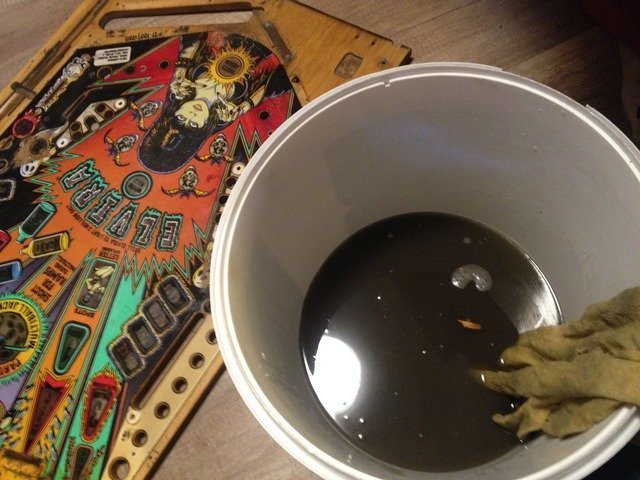
Cleaning the PF: Well, people say "do not use water" to clean the PF and "apply a light clear coat before airbrush to lock down the original paint". Well, sure... Unfortunately, I had to use water to clean this play field. This junk was left under rain, locked up in a junk warehouse where rats have peed and shit, inside out. Sorry, cotton swaps and Naphta was not enough. And yes, unfortunately this procedure takes away some of the flaked paint... Just clean the play field BEFORE you remove the mylar.
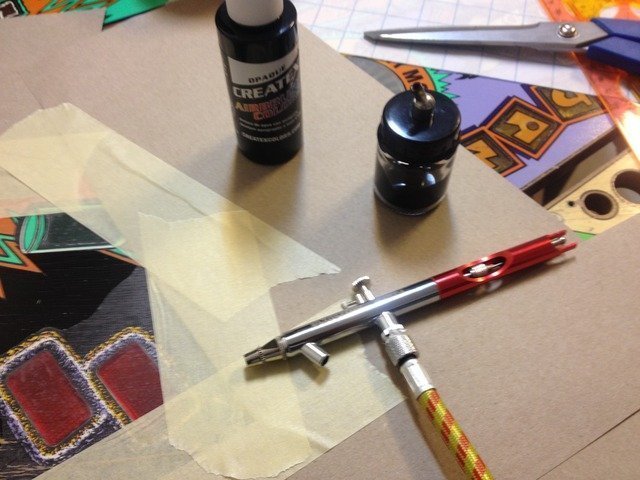
Airbrush material: I've used an ordinary bottom fed airbrush. I used Createx paint (excellent quality, easy to work with, exact color remained after clear coart, highly recommend it). Use quality frisket paper to mask (not a cheap painters mask tape). And before airbrushing, don't forget to repair the highly worn areas.
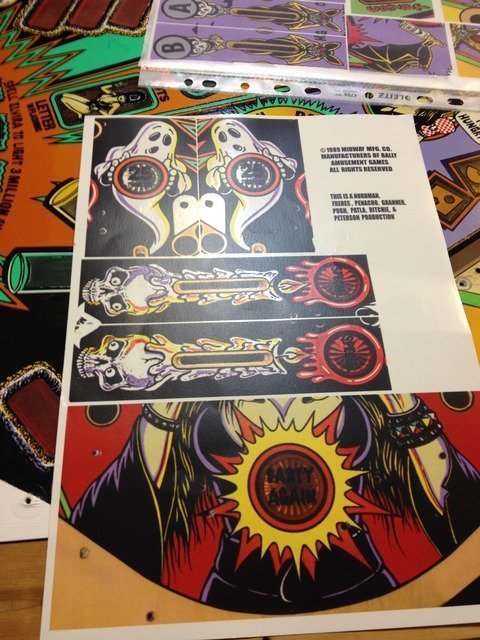
I also produced water slide decals to patch the worn artwork. Just don't forget to paint the areas white before applying the decals.
Clear coating: I used an ordinary local brand 2K acrylic (2 parts, resin + hardener) clear coat. Really nothing special about it. Just use the HS version (High solid).
The first coat will look like nightmare

don't get panicked. There will be small areas where clear will not stick. Don't worry. Just don't forget to apply a very light "dry" run. Wait 10-15 minutes. Apply the "wet" coat. Wait a day. Wet sand with 600 grit paper. Clean with naphta, start over to apply a next coat of clear. With this method you'll end up glass looking clear eventually.
I used a cheap HVLP gun a 50 Liter air compressor. Again, people would say 50L capacity wouldn't be enough that compressor would kick in while you are spraying. Yes, that happens. But I didn't see any negative effect of it since you are applying a really wet coat and your mistakes is always been corrected by the next sanding and coating anyway.
I applied 8 coats of clear. I know people say "apply 2 or 3 coats MAX". But my PF was so f**ed up I ended up that much of clear coat. Eventually I sanded alot between coats so it was like I removed most of the clear material from the previous coat anyway.
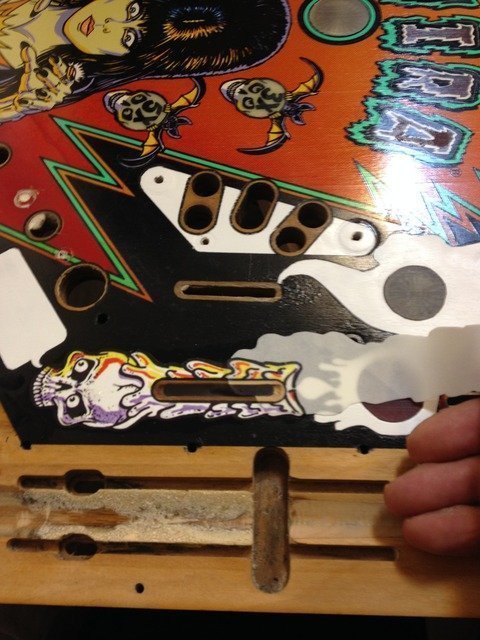
Just don't forget to deal with the cupped and raised inserts before you clear

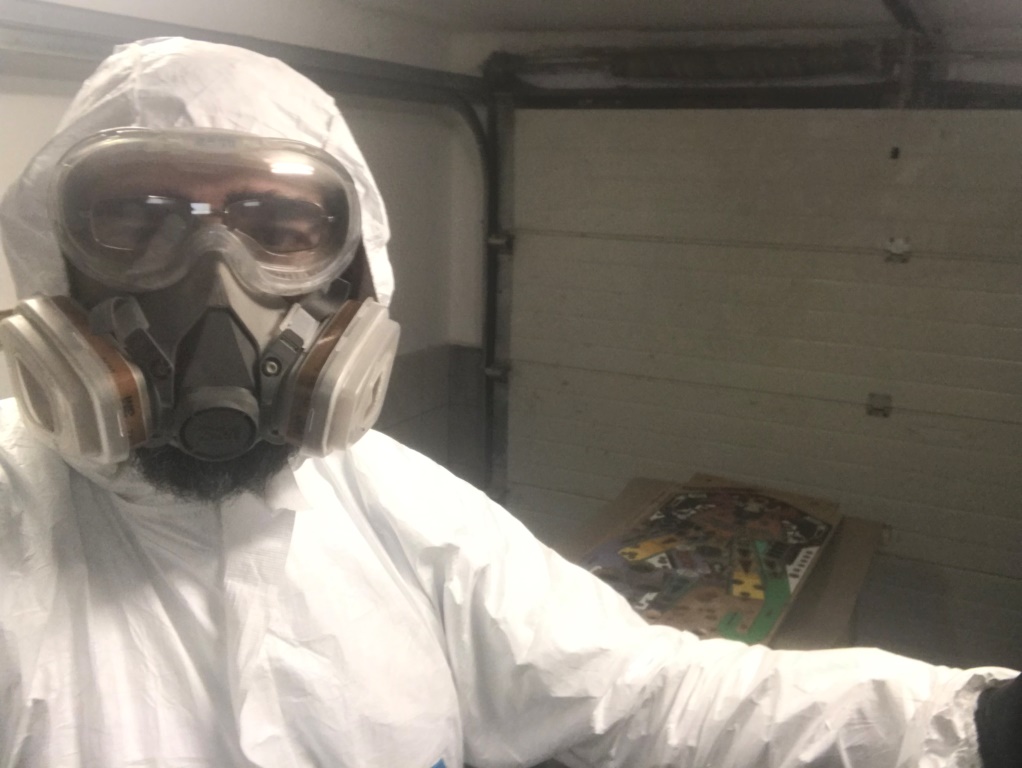
And wear disposable Tywek suit and a decent mask and glasses. This clear coat stuff is really nasty...
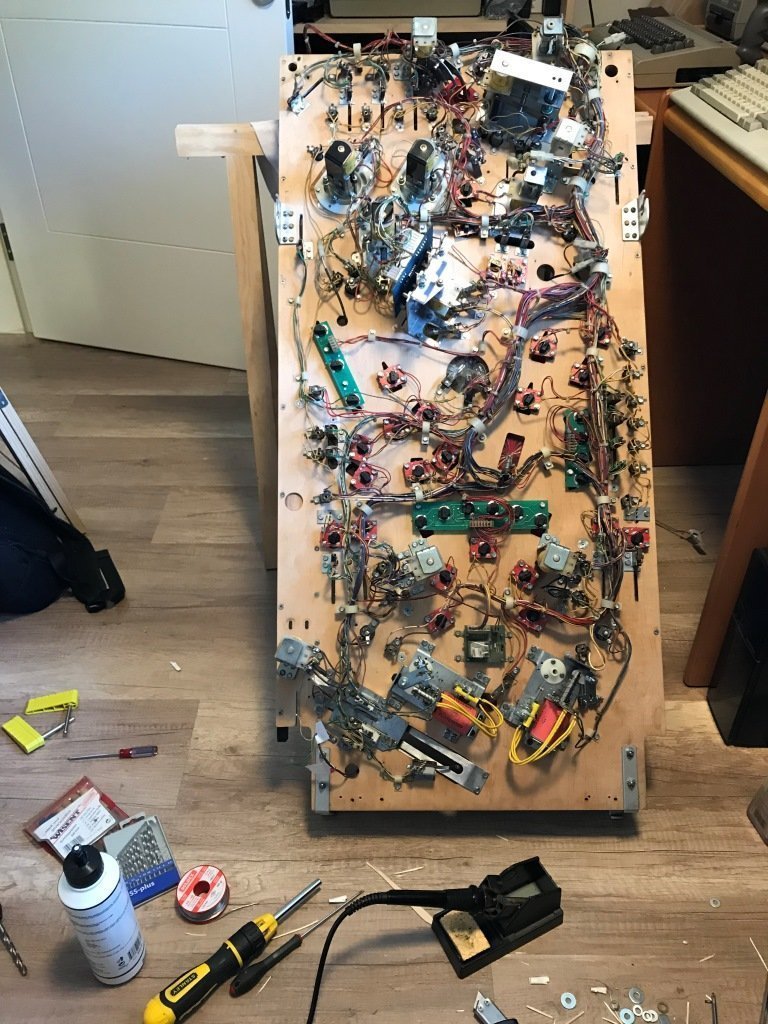
I've let the PF cure for 6 weeks before applying the last wet sanding, polish and wax. During this time I dealth with restoring all the rusted mechanical parts, bulb sockets, ramps etc...
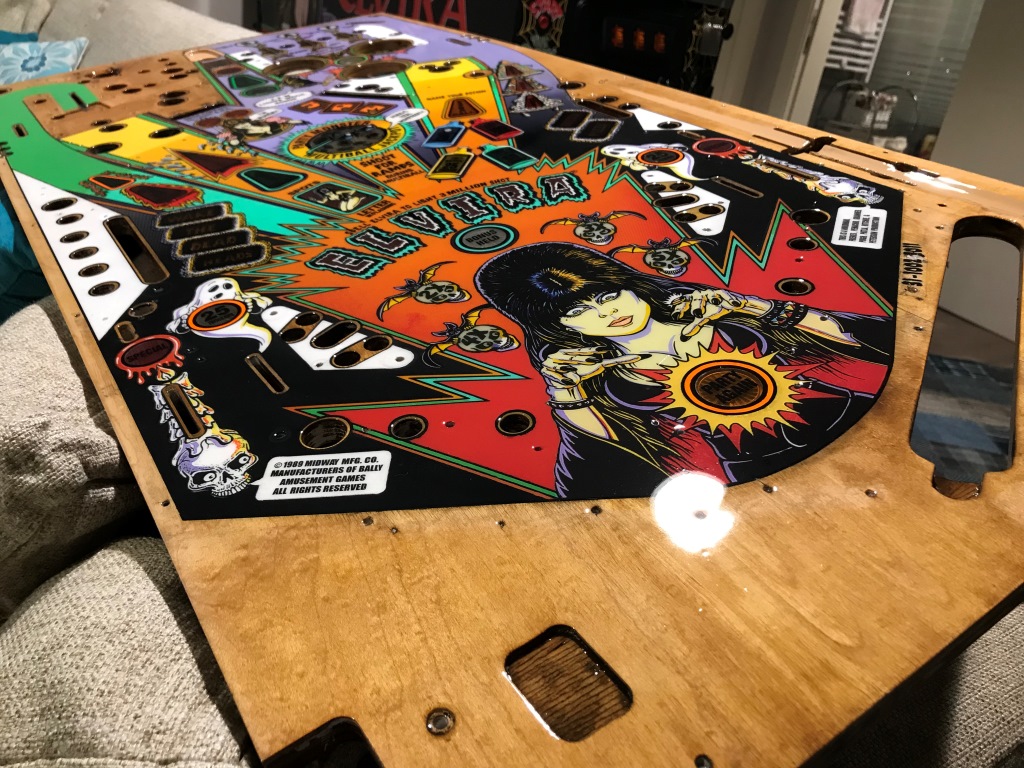
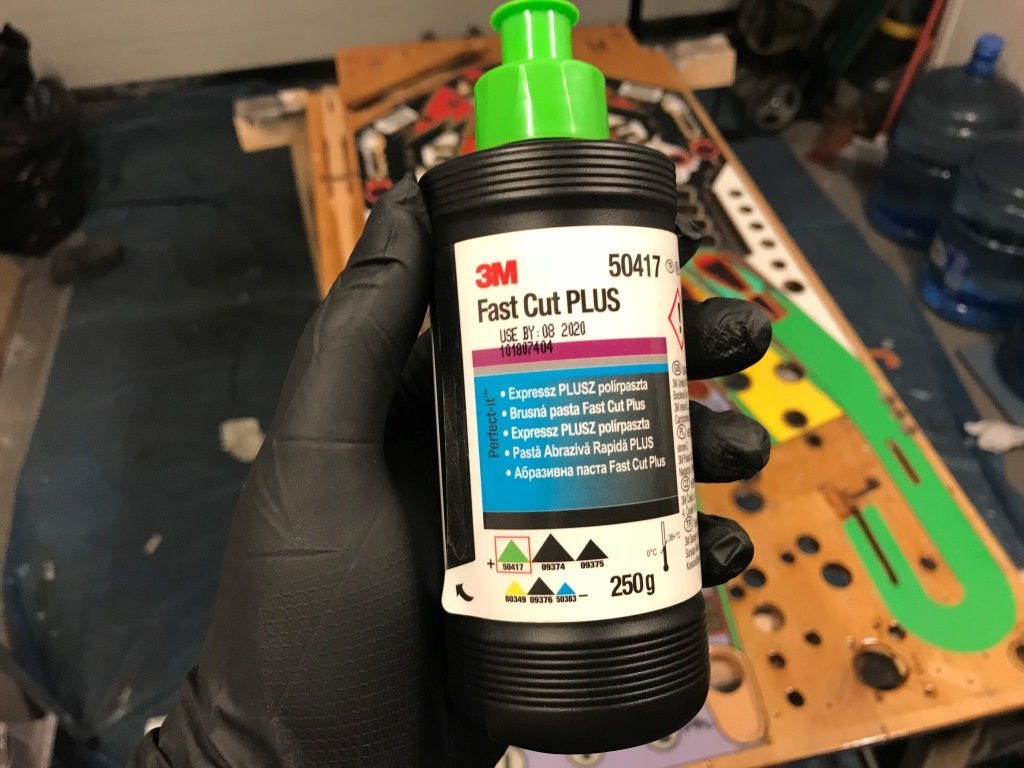
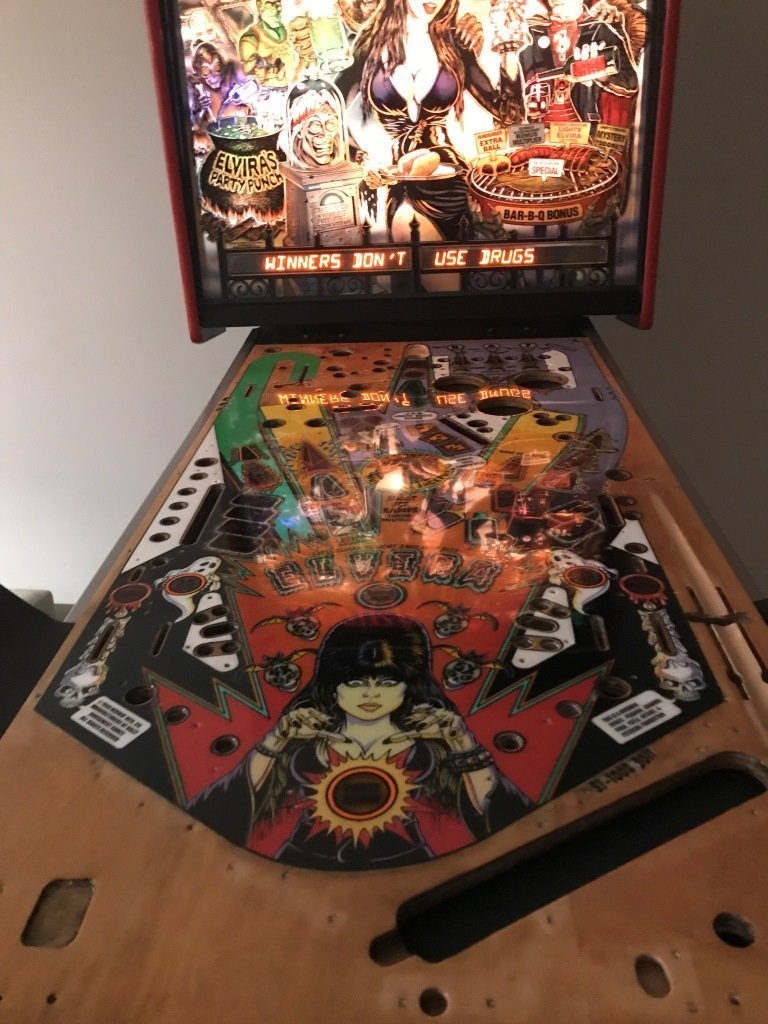
Polishing and Waxing: Although the last clear (above pic) may look like glass, it had imperfections. Dust particals, tiny popped out air bubles, most importantly, the clear "shrinks" by time and you notice that around the inserts. To correct these minor issues, I wet sand, 600, 800, 1000, 1200, 2000. Then I used 3M Fast Cut Plus for polishing.
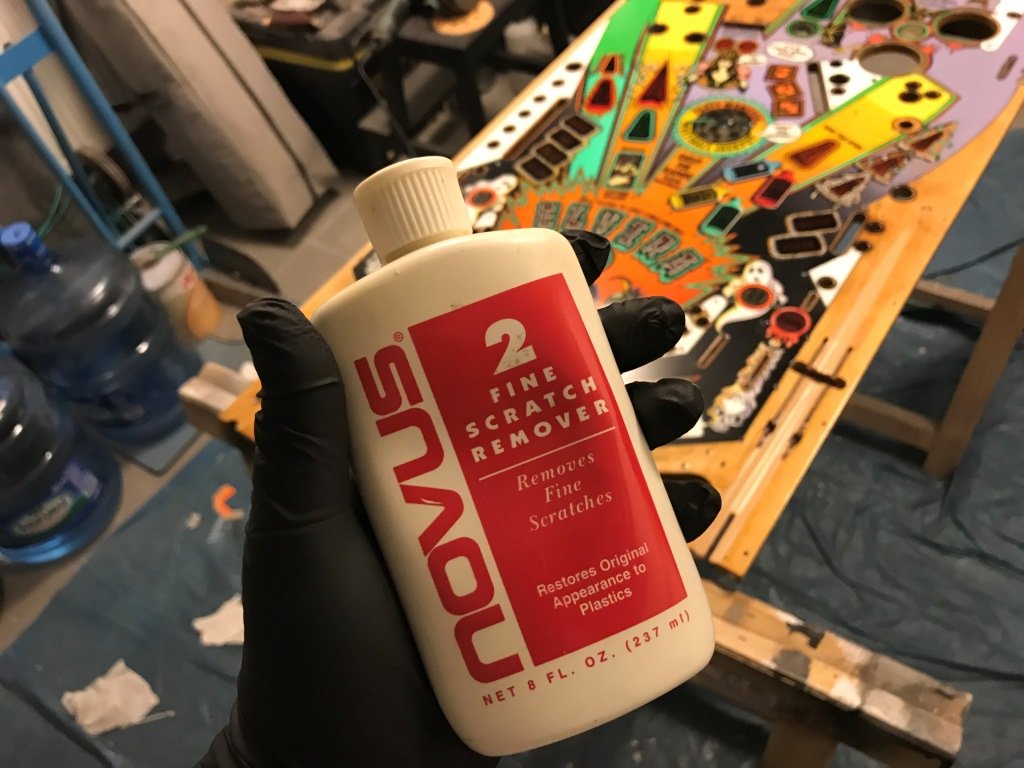
.. and Novus 2 for final polish.
I would have used a finer polish instead of Novus 2 because I didn't get expected "shine" with it. Nevertheless, it was OK before the wax.
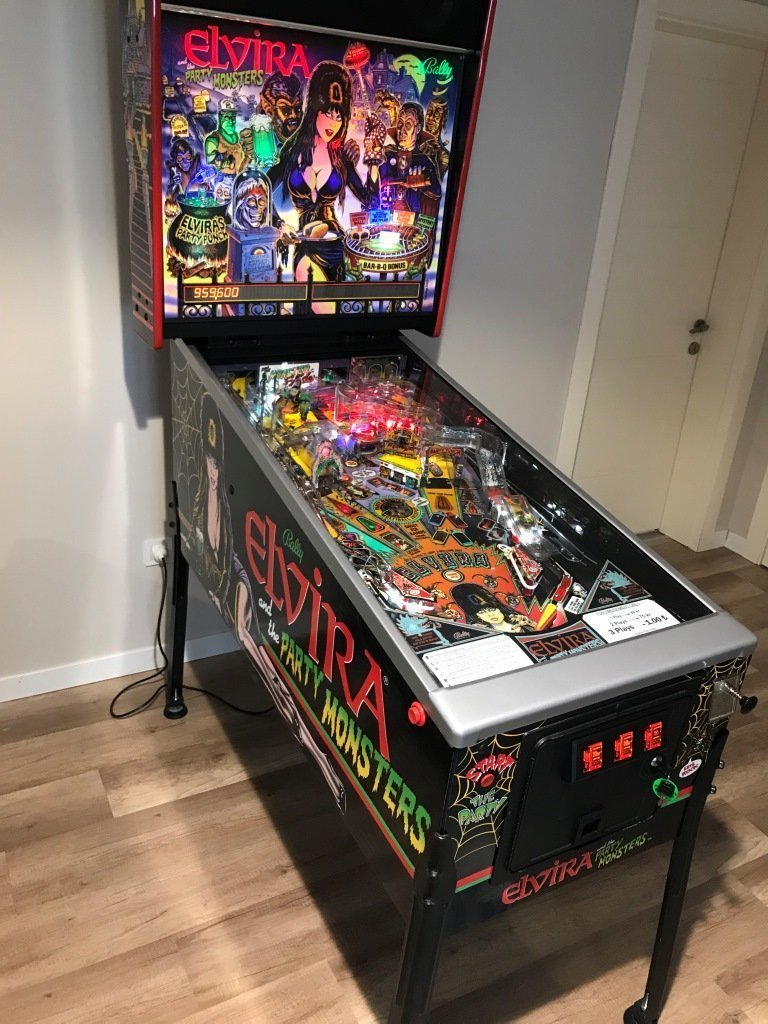
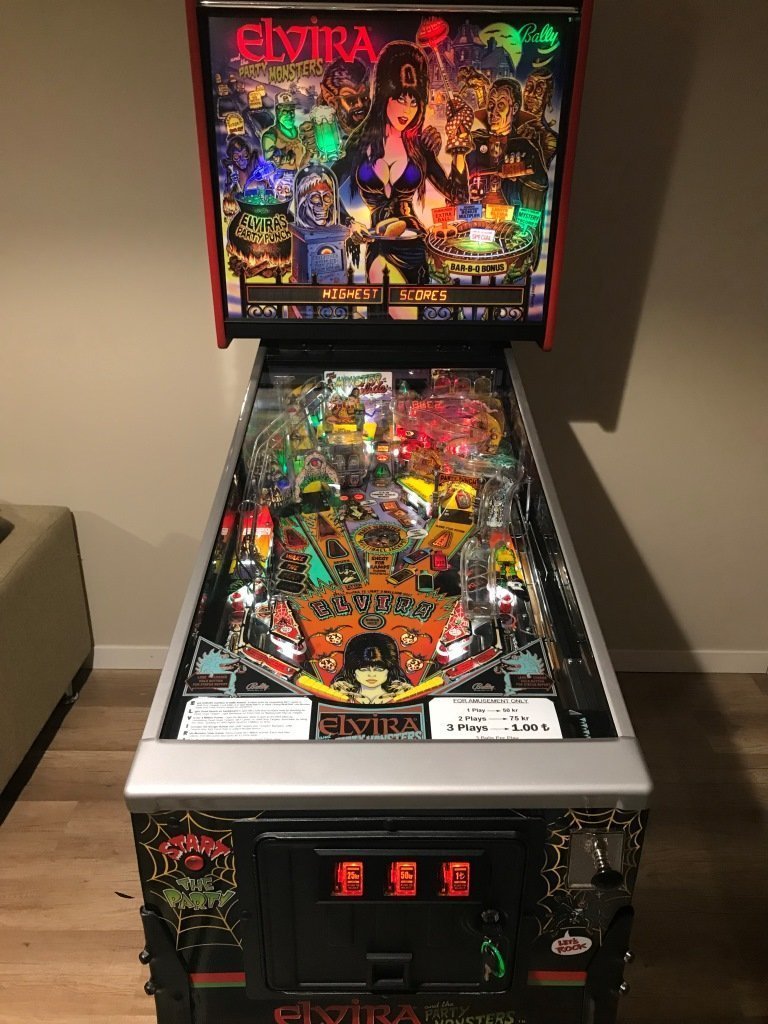
... and the final result. Not bad at all, after all my inexperience and f**k ups


") Didn't see/read too many people re-applying a mylar after a modern clear coated PF anyway...
Didn't see/read too many people re-applying a mylar after a modern clear coated PF anyway...