LWK
Student
I need to buy me one of those mounts soon.
did you ever heard back from them @rewrite about the speakers??2 per box, 4 per cab, yeah.Hey Rewrite....if I'm right that there are two speakers inside each box, I'm in for probably 12, depending on cost. If you make a group buy, give me a shout, as hopefully that amount would help clear the hump.
I absolutely will, just waiting to hear back on minimum order quantity and pricing.
You need to adjust your keystone on your projector to correct that, it's caused by the angle at which your projector is aiming at the screen nothing you can do about it in this setup apart from using the adjustment. Well nothing short of buying an ultra short throw which is mounted perpendicular to the screen.currently my main issues are filling the screen which I almost did and having a sqaure picture. the top of the image is less wide that the bottom I dont know why.
this the best I got,You need to adjust your keystone on your projector to correct that, it's caused by the angle at which your projector is aiming at the screen nothing you can do about it in this setup apart from using the adjustment. Well nothing short of buying an ultra short throw which is mounted perpendicular to the screen.currently my main issues are filling the screen which I almost did and having a sqaure picture. the top of the image is less wide that the bottom I dont know why.
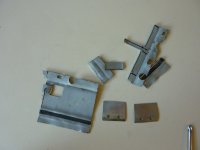
I screwed up and left the plastic side one piece and applied pressure with it and it snapped.
Film installed. The glass is tinted, and the film was black. Had to bump the brightness. I'll be honest. I sort of wanna swap out my benq for a better condition one anyways, but I could always go grey, but ugh, it's just a endless pit of work. Might be time to settle for the time being.