What's new

TodoRojo

Grand Master
Joined
Sep 12, 2021
Messages
358
Reaction score
835
Location
UT
Hello Everybody,

I got a couple more projects knocked out over the winter and thought I'd share my journey. First, a big thank you to @Cereth and @Lemony Vengeance for the great deal and delivery!

Some of you may remember there was a deal Cereth did as a "Black Friday" special in order to clear out some old stock. These Diamond Blues were a couple of them. They required a bit of repair and a little elbow-grease; but they were easier than my Astros! Here's how they came:

IMG_6443.jpeg
IMG_6525.jpeg


All in all, not bad! They had the usual signs of use but no abuse or anything. Just lots of soda spills and tar. As far as repairs went, the two biggest things were a non-functioning LCD (turned out to be a fan connected to the wrong connector) and some broken traces from mechanical failure on the Wei Ya PSU. Removing a bit of solder-mask and soldering a big glob fixed that.

As I usually do, I'll try to keep a table organized and up-to-date as I remember what I bought. Hopefully I can track everything down.
Here's a video of the reassembly process:
View: https://www.youtube.com/watch?v=BAVFxOGzRhg


Control Panels:
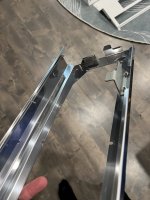
Lots of buildup on these guys. I used a lot of simple green; but the real hero was this all-purpose cleaner from target:
https://www.target.com/p/method-fre...pray-bottle-28-fl-oz/-/A-13531143#lnk=sametab.
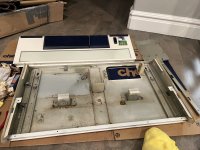
IMG_7237.jpeg

I was shocked how well that stuff worked. I sprayed it on, let it sit for a minute or two, and the tar would slide right off.
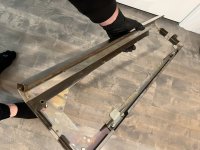
IMG_6567.jpeg IMG_6577.jpeg

For scratches in the CP I started around 400 grit, then 600, then 1000 grit. Once I had a nice shine with few to no visible scratches, I re-applied the brushed look with a scotch pad. To get them as straight as I could I leaned it up against a cardboard box.
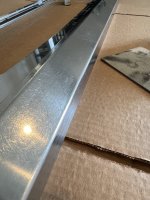
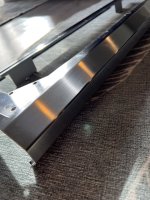
IMG_6583.jpeg IMG_6589.jpeg

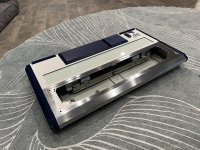
Came out pretty nice.

IMG_6596.jpeg IMG_7327.jpeg


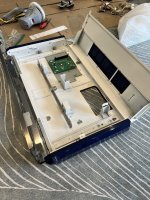
I'll spare some of the details for the control panels. They're pretty straightforward though. Disassemble, clean, put back together.

Onto the main course:

IMG_6656.jpeg


I'll take you through most of what I did in the next few posts but I won't cover both. The processes were mainly copy/paste anyway.


Here's the purchase sheet. I'll keep filling it in as I find purchase history.

ItemCostLinkNotes
USB A to B$3https://www.amazon.com/dp/B000067SMW?psc=1&ref=ppx_yo2ov_dt_b_product_detailsI wanted beige to match the originals
Ground Loop Noise Isolator$12https://www.amazon.com/dp/B06XQYN77L?psc=1&ref=ppx_yo2ov_dt_b_product_detailsThanks to @dmg01 for the tip here. Helped reduce buzzing. Results may vary, though.
Vessel Screwdriver$9https://www.amazon.com/dp/B000TG8OTY?psc=1&ref=ppx_yo2ov_dt_b_product_detailsI bought another one. You can never have enough of these :)
Rivet Nut Setter Kit$79 (returned)https://www.amazon.com/dp/B003TODXQW?psc=1&ref=ppx_yo2ov_dt_b_product_detailsFIxing the broken rivet nut. I returned this (sorry Amazon).
Right-angle 3.5mm$8https://www.amazon.com/dp/B01DCBJ51I?psc=1&ref=ppx_yo2ov_dt_b_product_detailsUsed these for the new monitors. Made it a little easier under the mount.
Wing Bolt (Speakers)$9https://www.amazon.com/dp/B092SN4NQR?psc=1&ref=ppx_yo2ov_dt_b_product_detailsWing bolt for broken one in the speaker.
ARCTIC F12 120mm Fan$9https://www.amazon.com/dp/B08THM7V8T?psc=1&ref=ppx_yo2ov_dt_b_product_detailsTwo of these. Really quiet!
120mm Grill$9https://www.amazon.com/dp/B07NYDWPX6?psc=1&ref=ppx_yo2ov_dt_b_product_detailsThese match the original grills really well.
Adhesive Cable Ties Medium$14https://www.amazon.com/dp/B0881FBKNW?psc=1&ref=ppx_yo2ov_dt_b_product_details
Zip Ties Assorted$7https://www.amazon.com/dp/B097M825XG?psc=1&ref=ppx_yo2ov_dt_b_product_details
Adhesive Cable Ties - Small$10https://www.amazon.com/dp/B0881GHDGK?psc=1&ref=ppx_yo2ov_dt_b_product_details
2-Pin Fan Adapter$9https://www.amazon.com/dp/B083CRN5L6?psc=1&ref=ppx_yo2ov_dt_b_product_details
120v → 100v Step-down$140https://www.amazon.com/dp/B07L57MTF6?psc=1&ref=ppx_yo2ov_dt_b_product_detailsGot a big boy so I can plug multiple cabs into it.
LG 32GN600-B$180
 
IMG_6638.jpeg

The first thing I noticed was how cloudy the displays were. I used to do repairs at an Apple Store and it reminded me of the old iMacs that didn't have the lcd adhered to the glass. Those used to get so gnarly! Here are a few more "before" photos:

IMG_6658.jpeg
IMG_6649.jpeg


Curiously, both of these had their fans just kinda hanging around out the back. I have no idea why they did this. Any thoughts on that?


IMG_6691.jpeg
IMG_6700.jpeg


IMG_6701.jpeg
IMG_6913.jpeg


IMG_6900.jpeg


IMG_6747.jpeg
IMG_6767.jpeg


Once I got the cabs stripped down I carried them into our "dog run" (former owner of the home built it. Now I just use it for arcade stuff) and soaked the thing in more of that Method all-purpose cleaner. I let it sit for a bit, then hosed it down. Then I did another round of it and rubbed it down with a microfiber cloth. The after felt like a completely different cab! The casters on these make them really easy to move around. That was a huge plus.
 
Once I had everything apart I began cleaning. The hardest things to clean were these plastics. They are so incredibly fragile that just unscrewing them caused a couple of the posts to break. Unfortunate, but they did go back together ok. I just had to be very careful. Piece by piece I would take things apart and take them to wash.

IMG_6777.jpeg
IMG_6785.jpeg


IMG_6782.jpeg


This was the second-most frustrating issue I ran into. The casters on bottom have 5.5mm hex bolts The bolts are pretty dang soft and the threads either had paint or loc-tite on them. I learned early you should slow down, make sure you're absolutely square with the bolt, and if your hex key is at all stripped to get a new one. One of the bolts didn't want to come out and I tried multiple extractors to try and drill it out, vice-grip it out, etc. Finally I ran to Home Depot and got this extractor kit. The 12 mm fit right over the head of the bolt and I was able to hammer it on and get the teeth to bite. Sweet victory.

IMG_7052.jpeg
IMG_7051.jpeg
IMG_7050.jpeg


The most frustrating thing I ran into was a busted nutsert. This super sucked. If you've never taken apart a vewlix the front right bolt holding in this leg has very little space to get to the bolt. As I was putting this back onto the cab I was tightening with a socket wrench and everything was going fine. Taking my time because the space is so small. All of a sudden the bolt gets very easy to turn... I wanted to puke. I knew what happened. Fortunately the bolt was only about a quarter the way screwed in when this happened. After another quick trip to Home Depot, I returned with some really thing needle-nose pliers and I was able to grab the nutsert and I backed out the bolt. I ordered a nutsert gun thing from Amazon and got a new one in. Good as new.

IMG_7507.jpeg
IMG_7521.jpeg


After scrubbing the larger things down moved on to reassembly and other random jobs. I ordered two different sets of fans and although I like the aesthetic of the Be Quiet! fans the most, both these and the ARCTIC fans are really quiet. You can't hear them over the console or whatever you have in the cab so that's good enough for me.

IMG_6768.jpeg


Lastly for this post, I thought I'd show off a photo of the glass being cleaned. That alone made the whole cab look like new.

IMG_6831.jpeg
 
The casters (once I got the damn things off) were a lil crusty. I didn't really want those rolling around on our carpet. I didn't find any info on how to take these apart and I didn't want to replace them with the wrong thing (couldn't find any matches locally) so instead I decided to clean them. I grabbed my random orbital sander and simply ran it against the wheels. Once that was done, I cleaned them with all-purpose cleaner. It was pretty easy. Not everything came off but it's due to the gashes in the wheels. Good enough!

IMG_7053.jpeg
IMG_7056.jpeg


One of the Wei Ya PSUs had an A/C input that was wiggling around. This cab had a "needs repair" sticky on it so my guess is it was this. I did a quick repair on it; maybe I'll go back and make it prettier, but it is strong and these PSUs aren't too hard to come by. I used a fiberglass pen to reveal more copper and flooded the area with solder.

IMG_6940.jpeg
IMG_6953.jpeg


Decided to have one cab Tate, one Yoko. This photo shows I clearly placed the speaker wire in the wrong spot, lol. I went back and fixed it later. The monitor here is the original.

IMG_6800.jpeg
IMG_6807.jpeg


The plan from the beginning was to put new monitors in here. Well I did this around Christmas so there were some good deals going on. I grabbed two new 1440p monitors from Walmart for $180 a piece. These fit perfectly using @FrancoB 's mounts! I got those in and they've been such an awesome upgrade.

IMG_7199.jpeg
IMG_7201.jpeg


That's mostly it! These really aren't too bad to get going. Thanks to the @Arthrimus board I have some Reflex and Brooks boards in there and using the original harness. Also big thanks to Lemony again for hooking me up with a P2 harness and getting a spare sound board for me! One of these came without. He came in super clutch.

I got a couple Xbox 360s for them and plan to build a steam PC as well. They're a real blast; and as much as I love my Astros, it is kinda nice to not have to worry about the maintenance of a CRT, haha.

IMG_7850.jpeg


Since I have one Tate and one Yoko, I'm working on an Aurora skin for modded Xboxes that is Tate: https://github.com/ElRojo/xbox360
Feel free to check it out! I am just doing it in my free/downtime so work on it is a bit slower right now, but I plan to reskin as much as I can so that it's fully usable in Tate mode. I also replaced all the buttons to correspond to the arcade buttons so that the UI is a little more user-friendly.

That's a wrap on these two!
 
i have 2 orange diamonds that i took completely apart to clean. i wish i would have done a deep log as you did. either way, i will share once they're done. good job!
 
Looks fantastic man! Two dia blues in Hori and Tate look great although I may be a little biased :D I seem to have seen a lot more dia Blues recently, I assume as a lot of them have reached the end of their working life and have been put out to pasture in the home market. Looks like you've got a great space to use them in too.

Great work on the CP polishing, that's something I still need to do too, I'f I can get mine anywhere near yours I'll be happy :thumbup:

Glad you're enjoying the monitor upgrades too! ^^
 
i had yellow tint on my monitor bezels as well. i had them re-anodized for around $120 each and it turned out great. don't know if that bothers you. don't know any other way of restoring them.
 
Wow, thank you for a great details write-up. I can definitely use these in the future if I need to do anything for my Vewlix Diamond Orange or Vewlix FC.
 
i had yellow tint on my monitor bezels as well. i had them re-anodized for around $120 each and it turned out great. don't know if that bothers you. don't know any other way of restoring them.
I'll definitely be doing that at some point. I have 4 more cabs on the way, though. 2 astro cities and 2 more diamond blues.

On my first Astros I re-plated everything and it turned out great. When I do it again I want to make sure I make it worth it and hand them a big bag of items, haha.
 
Back
Top