What's new

opt2not

Multi Boyz Pixeler
Legendary
Multi Boyz
Joined
Nov 10, 2015
Messages
2,925
Reaction score
5,983
Location
California
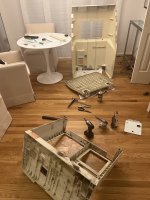
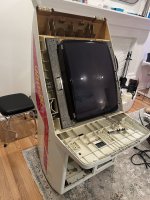
Picked up this beat-up Konami Windy locally for cheap. As you can see, she needs some work.
I love these cabs, been wanting one for a while, but they rarely pop-up. They're made of all thick ABS Plastic, barely any metal, has an awesome shape that's close to the dimensions of an Astro City, but thinner in the profile dimensions. Time to give it a new lease on life! Shhhh, it's ok, Windy. You're in a safe place now. The bad men can't hurt you anymore.
IMG_2857.jpg


She's been used and abused. Scratches from vandals tagging her up. Scuffs, crust, gooey and rusty, security bars. Let's assess the damage and figure out a plan of action.
First, here is the more egregious damage to the plastic shell, the rest are minor scuffs or leftover adhesives but these are the deeper scratch issues:

IMG_2903.jpg

Lots of tagging, and I removed one side of the security bars so there are holes to fill. All this damage is fixable with a little JB Weld products and a repainting.

Speaking of tagging, there's more on the monitor glass. Now this will be harder to fix. Assholes. I'm going to see if I can buff them out. They don't seem too deep, but I might not be able to remove them completely. Maybe lessen their depth:
IMG_2904.jpg


The monitor is the original Toshiba tube, PB6640 chassis. Great scanlines and brightness when this monitor is working. This one unfortunately doesn't power up. I'll dig into this and see if I can get it working again. If not, I could always put my spare Nanao-MS9 into it. But I'd prefer the original monitor setup.
IMG_2899.jpg


The marquee area is probably the best part of this cab right now, the acrylics look good:
IMG_2871.jpg


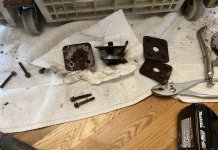
Of course the cab is missing the plexi marquee art holder, those things are pretty hard to come by for a good price. But it's also missing the 2 legs in the front, and both back wheels. Luckily it has the mounting plates for the back wheels, and I've already ordered replacements based on @Asobu 's great write-up on his restoration.
IMG_2893.jpg


I took apart the control panel. I had to drill out the standard cam-locks that were on there, which wasn't a big deal with my carbide metal bits. You can see from the top, some dingus spilled soda or something all over the CP. It's all gooey and sticky under there. The panel itself looks to be a 2L12B that has been bastardized with a Happs IL 4-way joystick and buttons, probably to run a cheap x-in-1 multi board.
IMG_2905.jpg


Also another security prevention feature, no plastic coin entry, just this metal plate with a slot. Well at least they didn't mangle the slot, just gotta fix those new screw holes.
IMG_2868.jpg


Aside from the awful kitchen counter vinyl overlay someone put on this, it also has plexi over the CPO which isn't flush and extrudes out. After removing it and peeling back the gross sticky patterned vinyl, the original panel's CPO is revealed! It's too bad whoever converted this removed the second player's joystick mount. I might see if a metal worker friend can help me weld a mount back on it, because the metal of the panel itself is in pretty good shape. Just gotta fix the new holes, and get an overlay. Though, it might just be better to get an Alberto repro and save the hassle.
IMG_2923.jpg


She's already looking like a Windy again!
IMG_2931.jpg


First step to all of this is to take the cab apart completely, give it a good cleaning and disinfecting before I start tackling the physical fixes. I'd also like to gut it and start looking at the monitor in the near future.
Not going to rush through this restoration like one of my Aero City's (took 13 days!) , but I always like staying organized and planning these resto's out fully. I'll do some of this over the holiday break of course.

But my plan is to get this to a nice "house-ready good condition" within the next few months. I don't need a pristine fresh-from-the-factory looking cab. I've never been down with those types of restores, I respect those who do them, but they're not for me. I like my cabs to look good with a little patina to show their usage.

I'll keep this log up-to-date as I progress.
 
Congrats! Same story with mine down to the same issue with the cp. I ended up getting a repro from Alberto. I figured welding the 2p mount could be tricky. But for now an Alberto panel sounds good.
I'm eager to see your restore. I just cleaned mine up really good. Would eventually like to paint both of mine to bring back that beautiful pearl-white finish back to life!
 
That's great it has the wheel mounting plates. That took me awhile to find for one of my Astros that was treated similar to this Windy.

I'm excited to see this restored.
 
Congrats! Same story with mine down to the same issue with the cp. I ended up getting a repro from Alberto. I figured welding the 2p mount could be tricky. But for now an Alberto panel sounds good.
I'm eager to see your restore. I just cleaned mine up really good. Would eventually like to paint both of mine to bring back that beautiful pearl-white finish back to life!
Yeah I’m thinking I’ll go with an @alberto1225 panel and save the hassle

For the painting I’ll go with my regular method of rattle can and wet sanding automotive enamel. All my restores have been done this way and after the paint dries and I polish and buff it, it comes out looking pretty good. It’s a bit more work, but it saves me money and looks decent. Not body shop pro level, but id say a notch under that.

Welcome to the WindyBois. These cabs are absolutely fantastic!
We are Windy Lindy Bios! Ok I’ll stop now. 😂

That's great it has the wheel mounting plates. That took me awhile to find for one of my Astros that was treated similar to this Windy.

I'm excited to see this restored.
Thanks again for helping me pick it up!

Well, my poor reading skills really let me down today, but his looks like a fun restore, can't wait to follow along!
The other word that came to mind was gnarly. But I thought haggard best describes a rundown lady, which is what this cab is!
 
Ordered the wheels from this seller that was recommended by others. Also picked up a couple legs to see if they fit as well.
IMG_3027 copy.jpg

As reported in Asobu's thread, the wheel plate holes just need to be filed a bit to line up properly to the mounting plates. But they're a good fit and looks to be a nice reproduction of what these cabs had before.
IMG_3031 copy.jpg


The legs also seem to be very close. I could file the holes as well and it should fit.
IMG_3028 copy 2.jpg


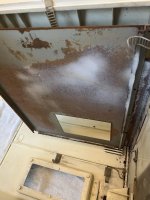
Opening the monitor shroud/bezel shows off how the monitor is mounted.
IMG_3040 copy.jpg


I can see what people were talking about with this monitor being easy to neck, the monitor is mounted directly to the cab! And there’s no frame for the tube, it’s just a couple metal plates with handles that are bolted to thick plastic mounts of the cab itself. I'm going to have to take it really easy when I remove the monitor to work on it.
IMG_3043 copy.jpg


This Remote board has seen better days. looks like a coupe of resistors fried from soda or whatever was spilled over the CP. Corossion everywhere. I'll try to clean it up and fix it, but might have to find a replacement instead.
IMG_3038 copy.jpg
 
Last edited:
Now that the monitor section is open, time for a cleaning. I took the shroud/bezel off and disassembled it.
IMG_3211 copy.jpg


After a good cleaning with Simple Green, it cleaned up really well. If I didn't have to repaint this after fixing the scratches and damage, i would have left it as is! turned out a lot whiter after the wash than I expected.

IMG_3214 copy.jpg


IMG_3215 copy.jpg


The marquee is in great shape! Looks really new:
IMG_3213 copy.jpg


I also took apart the CP top and cleaned it as well as repaired the scratches.
IMG_3181 copy.jpg


IMG_3183 copy.jpg


IMG_3182 copy.jpg


Luckily these scratches were shallow, so I decided to just sand them down starting with 120 grit sandpaper, then going up to 800 to get it smooth. The Windy is all about thicc ABS, so I’m not worried about thinning it too much.
IMG_3178 copy.jpg


When I pulled the coin cover off, I needed to remove the coin decal since it's trashed and has additional holes. these additional holes will be filled, and I'll get a new repro label for the coin decal.
IMG_3176 copy.jpg


You can also see the original paint under the coin decal. This is a White pearlescent paint, which has a slight sparkle to it. I'll have to look into reproducing this.

Next up will be removing the tube and further disassembly of the cab for cleaning and scratch/hole repair. Stay tuned!
 
Last edited:
Toshiba tube is manufactured in March 1997 witch is great . Anyway , beside that scratch marks , the screen looking great imo :happy: Its great cabinet for your collection !
 
Thanks guys.

More progress on disassembly and cleaning today. I carefully pulled the monitor, as I mentioned above there is no frame on this tube, which is probably why people warn about damaging the neck. I decided to put the tube down on it's face for now, while I figure out a safer way to have this sitting on my workbench for servicing.
IMG_3222 copy 2.jpg


I really like how easy it is to take this cabinet apart. There is not much to it. it comes apart in 5 sections: the CP top and bottom, the monitor shroud/bezel, the front and back shell, and the base.

Pulled the front shell off, which gives me easier access to the wiring, which is very simply laid out.
IMG_3224 copy.jpg


Ready for more cleaning.
IMG_3225 copy.jpg


Hosed it down, sprayed with Simple Green, then got to scrubbing.
IMG_3228 copy.jpg


So fresh and so clean clean.
IMG_3231 copy.jpg


For the CP bottom section I still need to get into some of tight spots with a toothbrush to get out some of the residual dirt and dried soda sludge. But overall it's a huge improvement from the nastiness that it was.
IMG_3230 copy.jpg


Gonna let it sit and dry overnight.
IMG_3234 copy.jpg


Next up is to remove the remaining art, and the residual adhesive before I do the scratch and hole repair.
IMG_3233 copy.jpg
 
Last edited:
On my strip down I had a few of the brass threaded inserts come loose, do you have a good method to refit these? Great work on your restore.
 
I have one brass insert that came out. I’m thinking I’ll put a dab of epoxy glue in there to keep it stuck inside the hole. 🤷🏻‍♂️
I'm sure you've done this before, but if not, put a bolt in first so it prevents epoxy from getting in the threads. And also use a spare bolt because it might glue in there and you'll have to wreck the head to get it out, potentially. Best to pull the bolt out before full set, depending on your epoxy. I've been down both roads and it sort of sucks.
 
Last edited:
I'm sure you've done this before, but if not, put a bolt in first so it prevents epoxy from getting in the threads. And also use a spare bolt because it might glue in there and you'll have to wreck the head to get it out, potentially. Best to pull the bolt out before full set, depending on your epoxy. I've been down both roads and it sort of sucks.
Actually all you need to do is grease the inside of the insert (WD-40 works), then wipe it away after you've set it into the hole. The grease won't allow the epoxy's hardening process to take place on the threads.


I know I said I wasn't going to rush through this restore, but I still have another 1.5 weeks off work so I figured I'd just keep chipping away at it each day.

Next I removed the remaining artwork and leftover adhesive residue. This took a bit of patience and a hot air gun to help get the old artwork off. For the adhesive residue I used Goo Gone, let it sit for 20 mins soaked in that stuff, then used a plastic scraper to get it off.
IMG_3253 copy.jpg


After another round of cleaning, I started fixing the scratches and sanding down the rest of the shell parts. Smooth as silk. This part is ready for new paint.
IMG_3281 copy.jpg


IMG_3282 copy.jpg


Most of these scratches were shallow, so I just needed to sand them down with 120 grit , then smooth it over with 800 grit
IMG_3283 copy.jpg


This part is also ready for new paint.
IMG_3288 copy.jpg

I've got 3 more shell parts that I need to do the same treatment to, this will be tomorrow's task.
Moving onto the monitor momentarily, I decided to at least test, clean and if necessary rejuv the tube. After a few cleaning passes and removing shorts, I'm happy to report that the monitor is in healthy shape! All guns are in the green!
IMG_3262 copy.jpg


Good neck glow:
IMG_3257 copy.jpg


Cleaned up the remote board too. I was able to get the gunk off, which was luckily only spilled beverage. I replaced the corroded resistor and jumper wire from before, and didn't notice any trace or pad damage. when I service the chassis I'll check if this remote board works.
IMG_3291 copy.jpg


I did a cleaning pass on the chassis with my tried and true method of soapy warm water, air drying, then oven drying.
IMG_3298 copy.jpg


Currently sitting in front of fan for overnight, then tomorrow into the oven for 40 mins at 175 degrees fahrenheit to dry up any remaining moisture.
IMG_3299 copy.jpg
 
Last edited:
Well this weekend that passed was pretty busy, had a weekend getaway up a mountain, then beginning this week was a visit to Disneyland for the kiddos, then I caught a cold... so not much more progress happened until today.

Today's task was to fix holes.
I usually go with bondo, but this time around I wanted to try something a bit different.
For filling I'm using plastic weld putty, then reinforcing it with epoxy.
IMG_3401 copy.jpg


Just fill it up, and overflow it onto the sides so it has the full coverage and sealing. This may have been a bit more than I needed since you got to sand it away after.
IMG_3500 copy.jpg


Behind the holes I put temporary tape to stop the putty from passing through the hole when applying it.
IMG_3501 copy.jpg


After sanding it smooth, no more holes! This putty kinda feels like bondo when I sanded it. Easy to shape or smooth down.
IMG_3516 copy.jpg

IMG_3517 copy.jpg


removing the tape on the back shows this:
IMG_3512 copy.jpg


But as I mentioned, a bit of epoxy to seal the back and reinforce it so it doesn't get punched through or slip out. these holes are small enough that i don't need to use any kind of mesh or wire to back it. putty and epoxy seem to be good enough.
IMG_3519 copy.jpg


Now that the this is done, the cabinet is ready for paint! Windy's had a pearlescent white paint job, similar to a lot of white cars you see on the road these days. they have that sparkle to it. I have to decide on a course of action, either I do it myself, which will require I pick up a new skill of using a paint gun and compressor (also gotta buy those things), rather than my comfort zone of rattle cans and wet sanding. Or get a body shop to do it.
I'm leaning toward the latter.

Two things I lied about starting this restore. I said I wasn't going to rush through this and just take my time, that got thrown out the window. The other was that I didn't care about prestine factory looking restorations, that patina was fine. But in this case doing a pearl paintjob kinda forced my hand to make this cabinet shine like it's coming off the factory line!
Anyway, I'll put more thought into it.

While I figure that out, next up is monitor repair work. Gonna throw some fresh caps, new HOT, and reflow this chassis. Hoping I can get some life back into it.
 
Man this is great to see. I have windy 1 in about the same shape as yours, a yaton special that spent alot of its life outside. Abused, then rusted to hell, then a really shitty yaton rattle can paint to "fix it up" before sending it over to the US. Tube is scratched to hell.


I had to back burner the project and its still in a million pieces on the bench but its next on the list. I got a small start on a few things. Paint is gonna be handled at a pro shop, the pearl adds another layer of expertise that i dont have.

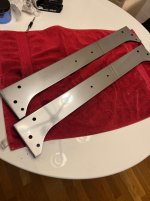
I did get the tube frame/handles rust free and polished :)
 

Attachments

  • IMG_3082.JPG
    IMG_3082.JPG
    217.3 KB · Views: 81
  • IMG_3081.JPG
    IMG_3081.JPG
    179.8 KB · Views: 77
  • IMG_3079.JPG
    IMG_3079.JPG
    302.8 KB · Views: 78
  • IMG_3059.JPG
    IMG_3059.JPG
    244.6 KB · Views: 78
  • 320287804_1193477281574556_3827596972317054957_n.jpg
    320287804_1193477281574556_3827596972317054957_n.jpg
    169.3 KB · Views: 82
  • 320022802_1579516965812188_7689125185911598859_n.jpg
    320022802_1579516965812188_7689125185911598859_n.jpg
    234.5 KB · Views: 86
  • IMG_3610.JPG
    IMG_3610.JPG
    39.5 KB · Views: 78
Back
Top