You are using an out of date browser. It may not display this or other websites correctly.
You should upgrade or use an alternative browser.
You should upgrade or use an alternative browser.
DARKSOFT New Namco System 2 Multi
- Thread starter Darksoft
- Start date

Shin
Enthusiast
soo can I ask about the small changes we'll all like?A small update for everyone who preordered this multi. We still have a few units left. I've made some small changes that I'm sure that you will all like.
We are still good to ship at the end of September but it's going to be rather at the end of the month. I'm sure you are going to like it!!

also, I searched the usual place on archive org, but didn't find it yet

(I still didn't get the shipping notice email from SyG though, so no rush here)
Last edited:

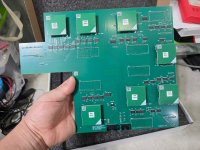
main changes is that now is more compact and a bit shorter and allows for proper ventilation of the audio section. Also it uses now the same rotary switch pinout as they one that @twistedsymphony created, so it's also compatible with his OLED solution.
You will all get your shipping notice very soon and if you didn't get yours yet, go for it! There are just 3-4 left!
You will all get your shipping notice very soon and if you didn't get yours yet, go for it! There are just 3-4 left!

AlxUnderBase
Enlightened
What temperature and airflow percentage did you use on your HAKKO @AlxUnderBase ?
Thanks for asking . The temperature range of this gun use 350°C to 500°C (660°F to 930°F) and im using the first scale of the setting temperature operating (it have 4 options to set the temperature and first is 350°C with the noozle that the gun came set from factory -
N61-08 nozzle, which has an inner diameter of Ø1.0 mm)
Last edited:

ShootTheCore
Legendary


playero
Enthusiast
playero
Enthusiast
Where can I get Namco system 2 multi files?

Mrhide
Legendary
Hello Guys we've started yesterday to ship Namco System2, we will whip all the orders by the end of the week
We have a last one piece available if someone miss it
Best regards
Aldo
Just got my shipping confirmation email

thank you Aldo

Shin
Enthusiast
also got mine 

Orakelschaf
Professional
Got my shipping confirmation email, from SaveYourGames, today
AlxUnderBase
Enlightened
SYG sent out the parcels very fast . Also received the DHL notification . Thanks @CPZ - SAVEYOURGAMES 
If you have downloaded the instructions, notice that we will make a small addition to it
* 128Mbit modules may not be recognized by the TL86_PLUS when you press "Detect" button. In order to program it, you need to change to "User Defined" and choose the corresponding size of the module. It only happens with 128Mbit modules.
But you need to be careful. The sticker on the module indicates the size in Mbits and the "User Defined" section shows it in Mbytes so for the 128Mbit module, we need to choose 16MB.
* The second modification not in the current instructions is the following. You need to either leave a keycus inserted in the Video PCB or put the diode as explained here: https://arcarc.xmission.com/Web Archives/ionpool.net (Dec-31-2020)/arcade/namco/cosmo_gang_conversion.html
Hopefully someone will make some rompacks available for you.
* 128Mbit modules may not be recognized by the TL86_PLUS when you press "Detect" button. In order to program it, you need to change to "User Defined" and choose the corresponding size of the module. It only happens with 128Mbit modules.
But you need to be careful. The sticker on the module indicates the size in Mbits and the "User Defined" section shows it in Mbytes so for the 128Mbit module, we need to choose 16MB.
* The second modification not in the current instructions is the following. You need to either leave a keycus inserted in the Video PCB or put the diode as explained here: https://arcarc.xmission.com/Web Archives/ionpool.net (Dec-31-2020)/arcade/namco/cosmo_gang_conversion.html
Hopefully someone will make some rompacks available for you.
Last edited:
RepairGuy95
Champion
A script to make your own files is mentioned?
Mrhide
Legendary
I will upload the script on the 1st post soon.
dirtyfoxj has some stuff in the folder...
...and the scripts appears to only be looking for these files? is there a part of the script missing from roms to the above?
10/3 edit: READS THE INSTRUCTIONS AGAIN
oh! ...There is one example folder filled the rest need to be filled using MAME dumps for example.
re edit and I still don't get it. We need to merge all the chr, name, obj1 and all of these in each of the folders before running the script?!
Also the read me from the valkyrie japan to english is in the folder but not the script! find it here
Last edited:

nnap
Grand Master
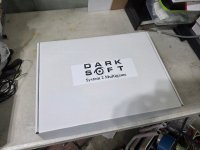
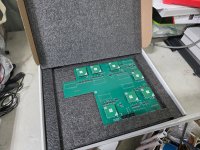
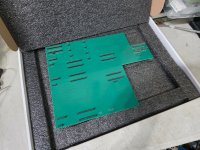
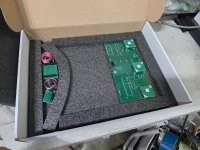
Very nice packaging!
Removed all the GND headers
When programming the modules, make sure that you are using the 62 version of the Proman software. Mine was on 59 and that version has a bug where it does not use the correct size when verifying the 128MBit modules after programming.
One module would not verify correctly. After having a closer look I found this
Pins 1+2 were bridged. After removing the bridge, I was able to programm/verify the module.
After installing the multi, I had GFX issues. I removed the multi and cleaned all the sockets with isopropyl alcohol which I should have done before. When installing the big multi PCB on the CPU board, make sure that the middle part of the board is fully seated.
There was also a mismatch in the manual for JP15. The text said to put it in the left and the image had it on the right. I went for what the picture said.
I only had a short time to try it but it is looking good so far. You will most probably have a flipped screen initially. Remember that you have to hold the TEST button pressed to navigate the menu. There is a screen flip option in there. The test menu also has additional pages that you can cycle through by pressing the SERVICE button.
Good info @nnap. Let us know how ir works for you when you test it further.
Please notice that Marvelland English version is a prototype and has a different audio. More info here:
https://tcrf.net/Marvel_Land_(Arcade)
Please notice that Marvelland English version is a prototype and has a different audio. More info here:
https://tcrf.net/Marvel_Land_(Arcade)
the manual shows the JP15 on the left as well as the manual. Where did you see that?There was also a mismatch in the manual for JP15. The text said to put it in the left and the image had it on the right. I went for what the picture said.